Do you want an easy DIY Spring wreath idea? The tutorial below will show you how to make a wreath in just a few steps. This spring grapevine wreath can be made in about 15 minutes. It will add a nice welcoming touch to your front door this spring!

Today’s post is an easy DIY Spring Wreath idea for you! And it is part of a series called Thrifty Thursday. Where the last Thursday of the month I team up with other DIY Bloggers to bring you home decor ideas on a budget! So please check out all their ideas at the end of this post!
If you joined me for the 12 days of Christmas this winter you remember I posted a DIY grapevine wreath that could be made for only $5 by using foraged greens. This spring that wreath was looking pretty sad. But instead of throwing it out I re-purposed it into an easy DIY Spring wreath!

Here’s what you need to make an easy DIY Spring wreath:
- grapevine wreath
- 2-3 smaller floral green stems (choose some that are more whimsical)
- 2-3 larger flower stems
- floral wire
- Ribbon or bow
- scissors or wire cutter
Here’s how to make an easy DIY spring wreath:
Step 1: Remove any florals from wreath (if using a new wreath skip this step)
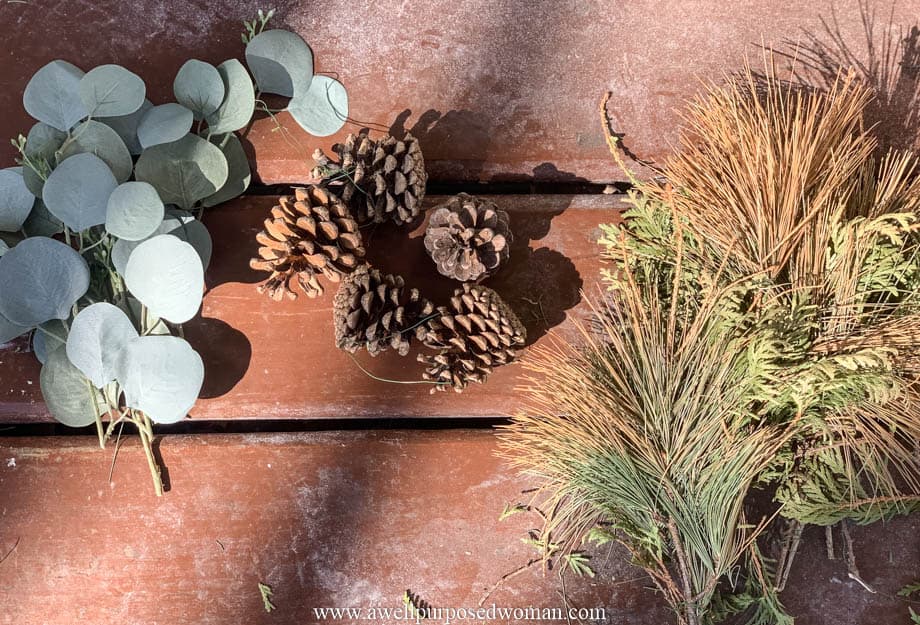
If you are re-purposing a grapevine wreath you already have on hand or purchased one second hand. Start by using your wire cutter and removing any floral or greens from your wreath. Here’s the items I removed from the grapevine wreath.
And now I had a blank grapevine wreath to start an easy diy spring wreath.
Step 2: Choose a focal point & place ribbon on spring wreath
I like to start making my wreaths by deciding where the focal point of my wreath will be. Usually I will place my ribbon or bow where the focal point of the wreath will be. With grapevine wreaths I like to decorate one side of the wreath and leave the other side open.
Use floral wire and attach the bow to the focal point of your wreath.

Step 3: Arrange your greens into bunches on your wreath
The next step is to decide how you will arrange your floral greens. I picked three different types of greens and played around with how I would place them on the wreath. These greens are going to be placed on the edges of your floral arrangement.
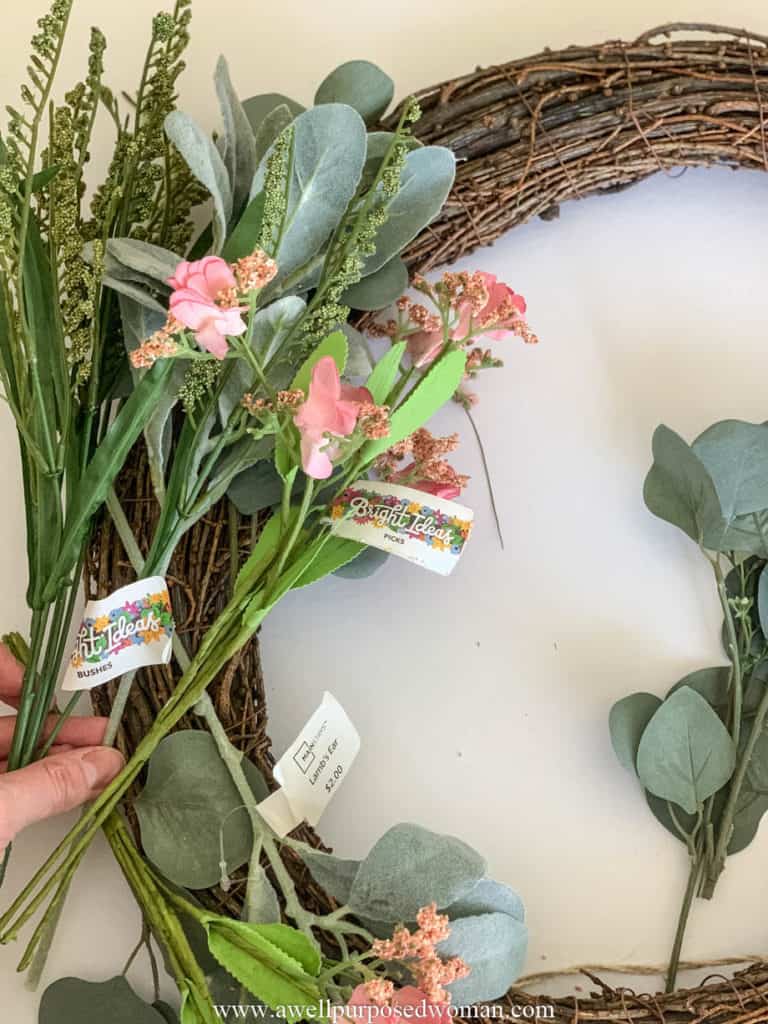
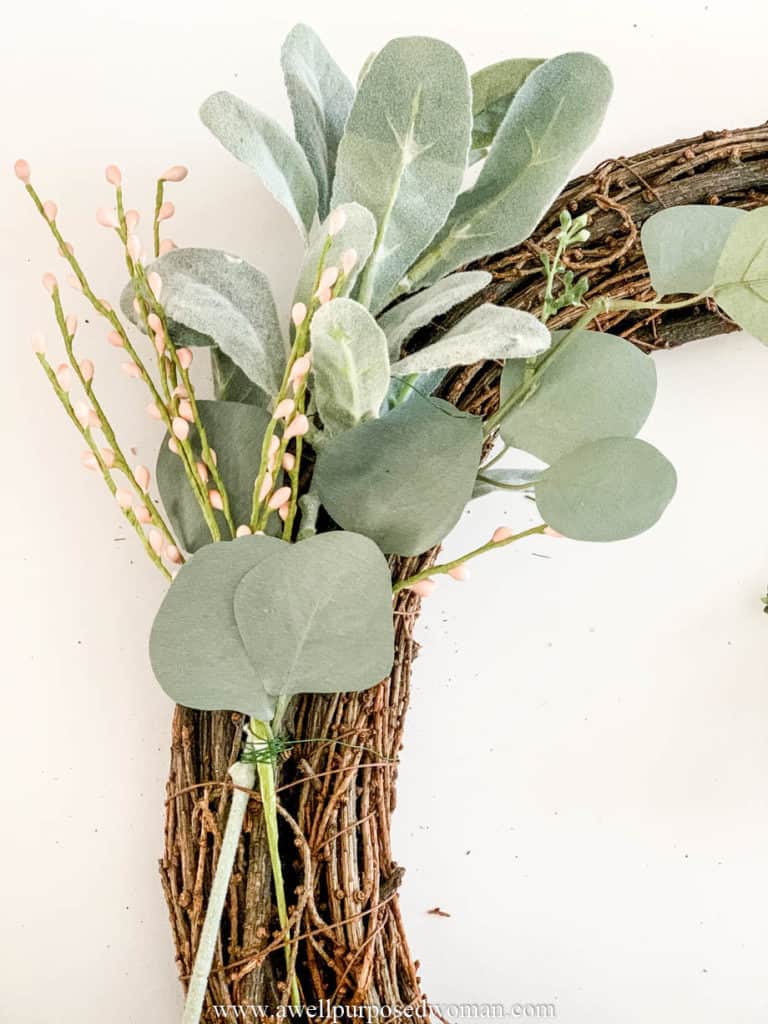
Make 3-4 floral bunches with the floral wire. These bunches can be more whimsy and can stick out from the wreath.

Attach the bunches to the grapevine wreath with the floral wire. I attached 4 bunches of greens to run up one side of the grapevine wreath.
Step 4: Attach the bigger flowers to the wreath
Next you will place the biggest flowers on your wreath closest to the ribbon (focal point of your wreath). Use the floral wire and attach the flowers where you think they look best. I mixed the bigger flowers in with the other greens.

And that’s it! A beautiful and easy spring DIY wreath!
Now wasn’t that easy? Making a beautiful wreath for spring can be super simple!

And here is the easy DIY Spring Wreath on our front door!
Remember to check out some other great DIY Projects from this month’s Thrifty Thursday special below.
One Thousand Oaks: DIY Candlesticks Thrift Store Up-cycled Project
Windmill & Protea: DIY Marble Looking Frames
The Inspired Decorator: DIY Nightlight Up-cycle


The Lived In Look: DIY Restoration Hardware Stone Vase
Practical Whimsy Designs: Simple Branch Dollar Tree Decor

Thanks so much for joining us today! I hope you are inspired and have some new ideas for up-cycling items around your house now!
Take Care,

This wreath is super cute! I love your DIY ideas! I also love that you have an Annabelle because I do too! ❤️ Thanks for sharing all these great ideas!
Hi Sarina, Thank you!! So glad you did too! That is so sweet! Sure, thanks for visiting! Elizabeth
What a beautiful wreath. I am definitely wanting to make a wreath for my spring or summer decor. Great inspiration!
I love everything about this wreath Elizabeth! You have a great touch when it comes to the grouping and focus points of a wreath!
Your wreath turned out so great! I love using grapevine wreaths as a base for when I make wreaths! They add such a pretty element to the wreath!
Thanks Jaclyn!! Elizabeth
It’s so pretty and perfect for spring!
Thanks Sara-Lynn! Elizabeth
This is such a beautiful spring wreath Elizabeth! Thanks for the inspiration I needed to go dig out my grapevine wreath for a little DIY.
Thanks Martina!! 🙂 Elizabeth