Learn how to bleach furniture the easy way. This tutorial will show you an easy way how to bleach furniture. Don’t you love more natural looking wood? This tutorial will show you how easy it is to bleach your furniture.
If you have been looking for an easy way to bleach furniture. This tutorial is for you. My oldest daughter is officially off to kindergarten this week. There have been many tears, but half of them have been due to how proud I am of her. She has really shown my husband and I how ready she is for school.
One of the sweet things about this week has been being able to spend more time with my younger daughter Emmie. We have had a lot of 1:1 time and it has been a huge blessing to both of us. And with a little extra time this week I have also been able to also focus on a few more projects.
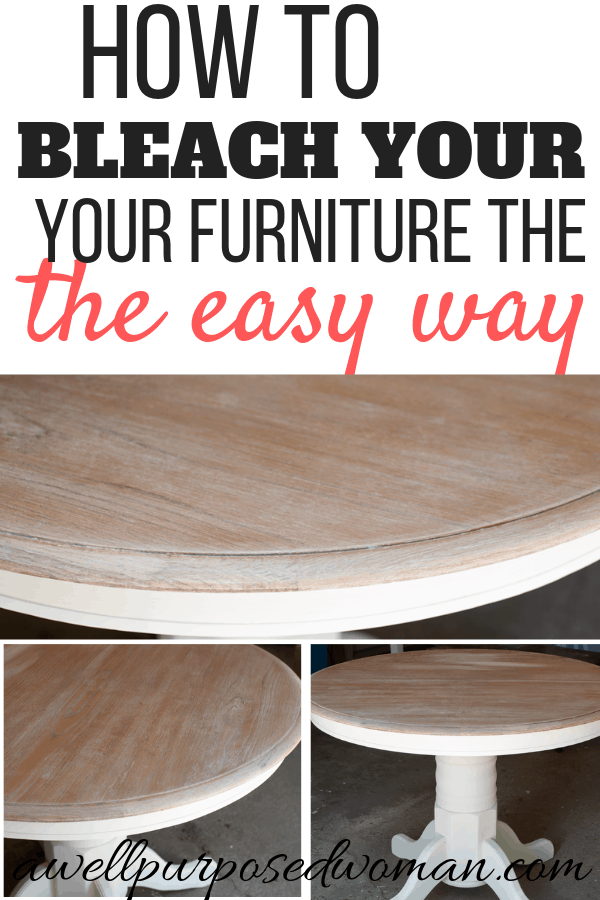
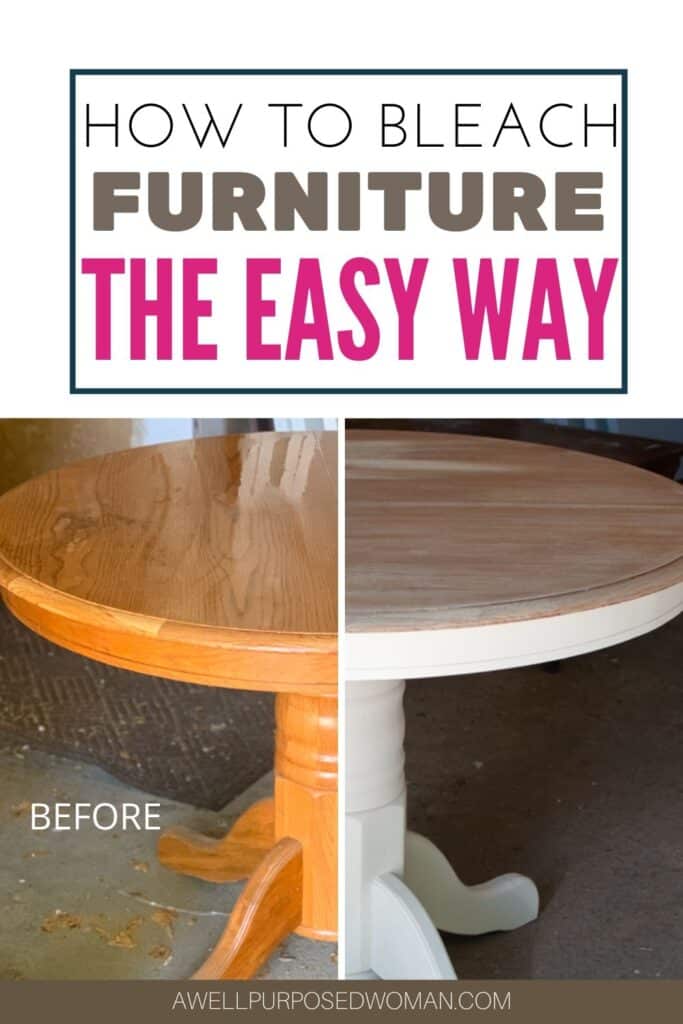
One of the projects I started a few weeks ago was bleaching the top of a small pedestal table. I re-did the top by bleaching the wood, and chalk painting the bottom, in a farmhouse style. It was really fun and I would say a fairly simple project. And I absolutely am so in love with the finished results!

If you have been curious about how to do a bleached or driftwood finish on a piece of furniture I highly recommend it! The results are absolutely fabulous and I got to say the process is rather easy. So in my book those are two huge reasons to try it!
How to prepare your furniture for bleaching:
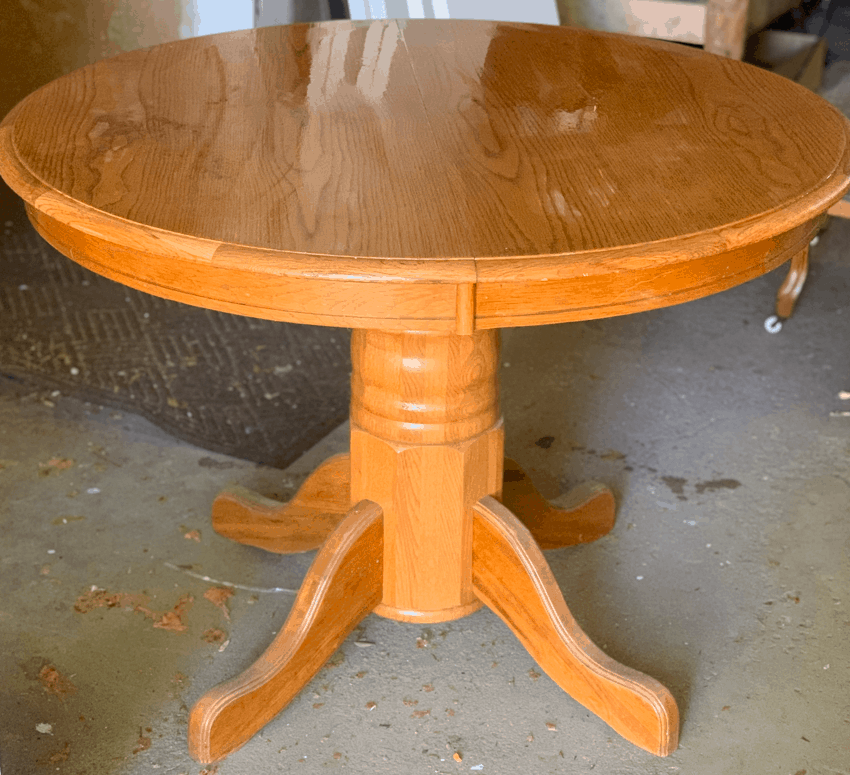
Damon and I had been looking for a round table for some time. He really wanted to try a small table in our kitchen as a breakfast nook. I have learned to listen to him when he has an idea for furniture or home projects because they usually turn out really nice! So finally we found this little table at a local thrift store for $6!
It sat in our garage for a few months, even though I had a plan for it. I think the thought of sanding the table was holding me back. But then I finally found the motivation I needed to get started.
My dad was visiting for my birthday, and since we share a love for all things thrifty, we stopped at a nearby garage sale. I am so glad we did because I happened to find a heat gun which was just what I needed to get started!
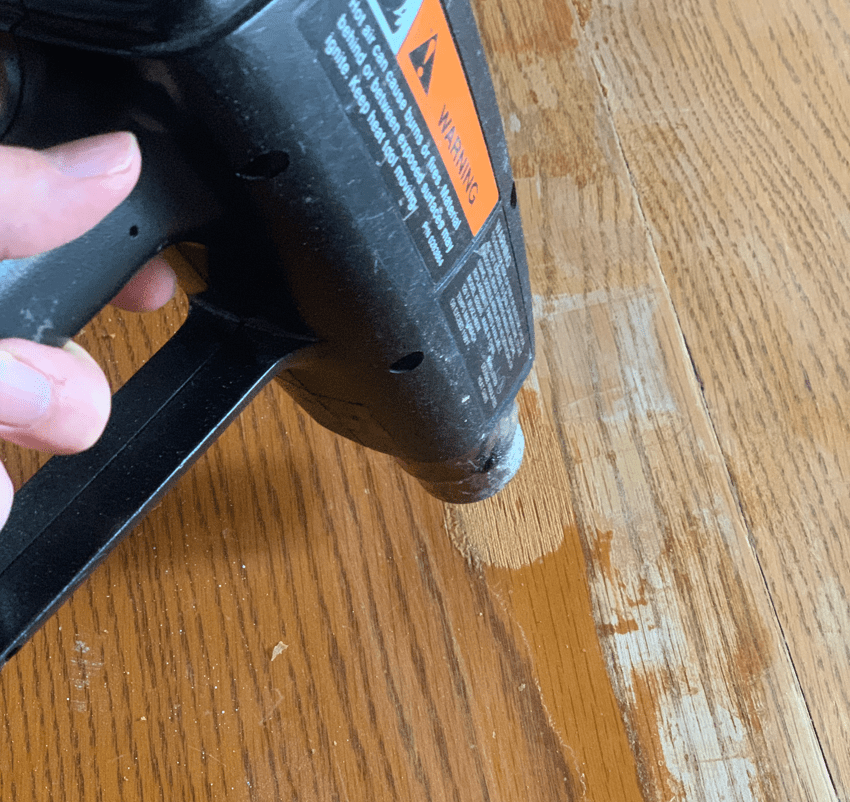
If you have never used one before they are pretty awesome. They remove paint or varnish with heat. I really wasn’t looking forward to sanding the top of the table so this tool helped me to finish the table quickly. This was my first time using one. It took me about 45 minutes to do the entire top of my table.
After using the heat gun to remove all the varnish. I did use a hand sander to ensure I had reached the bare wood of the table. Because once you reach the bare wood, then the fun of bleaching the wood begins!
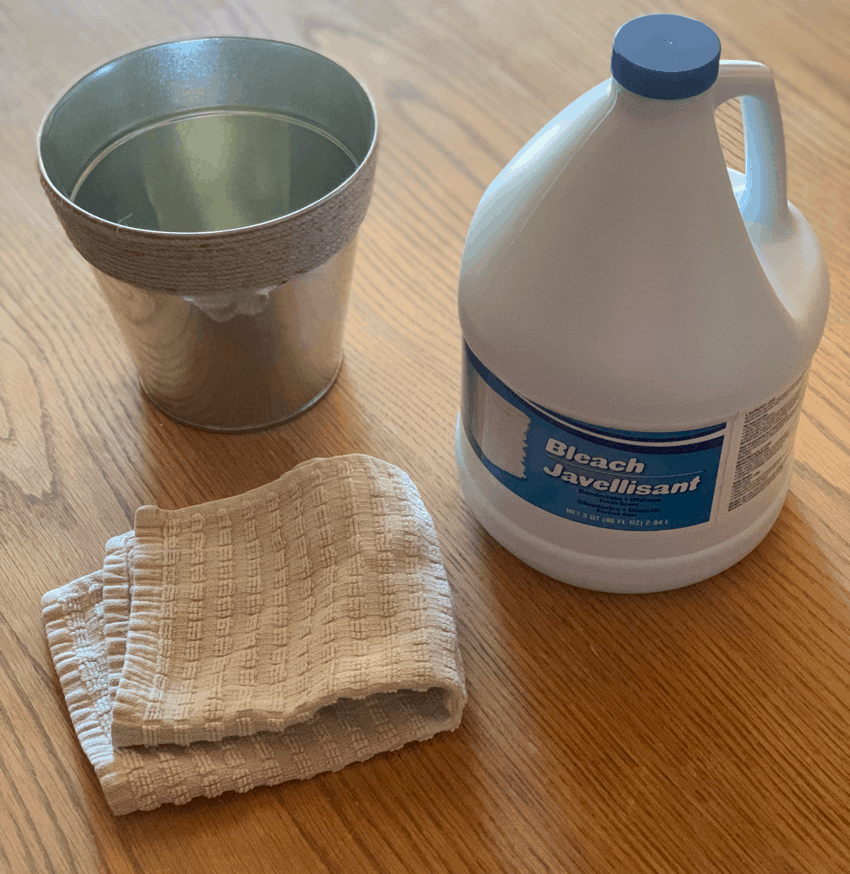
Here’s what you will need to bleach wood on furniture.
So here’s how to bleach wood on furniture:
Step 1: Sand or strip the furniture to the bare wood.
I just covered this above, but get down to the bare wood of your furniture. Sand, strip, whatever it takes. You will want to get down to the bare wood before you apply bleach.
Step 2: Apply bleach to your wood.
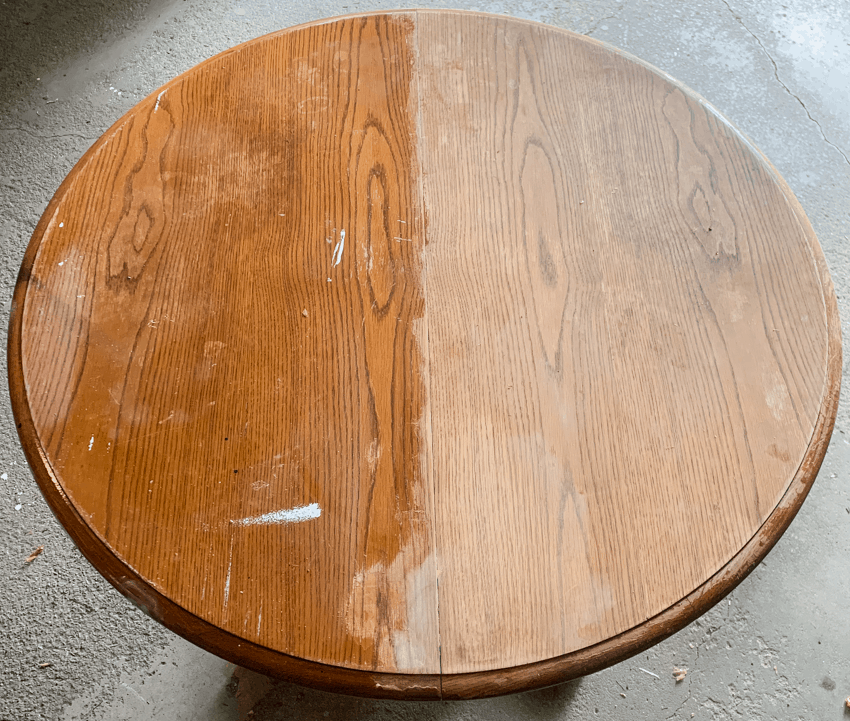
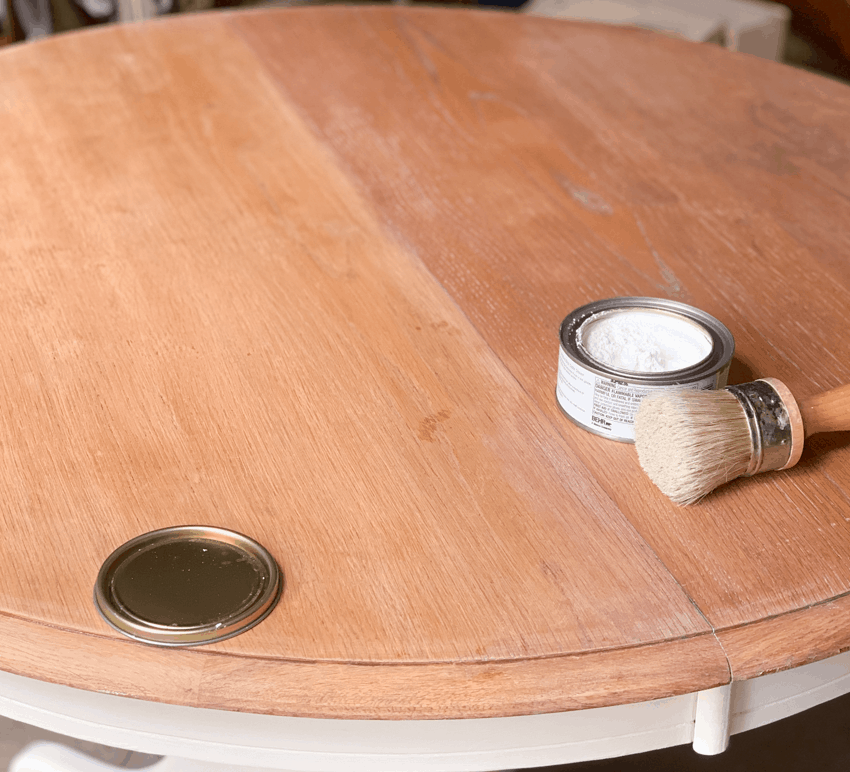
When applying bleach to your wood, I would use gloves, a mask, and safety googles. I poured my household bleach into a bucket and used a rag to wipe bleach over the table. You do not want your bleach to pool on top of the table but just do a nice even swipe of the bleach on your surface. Now you will wait of the bleach to dry. I waited about 30 minutes until all the bleach appeared dry before applying another coat of bleach.
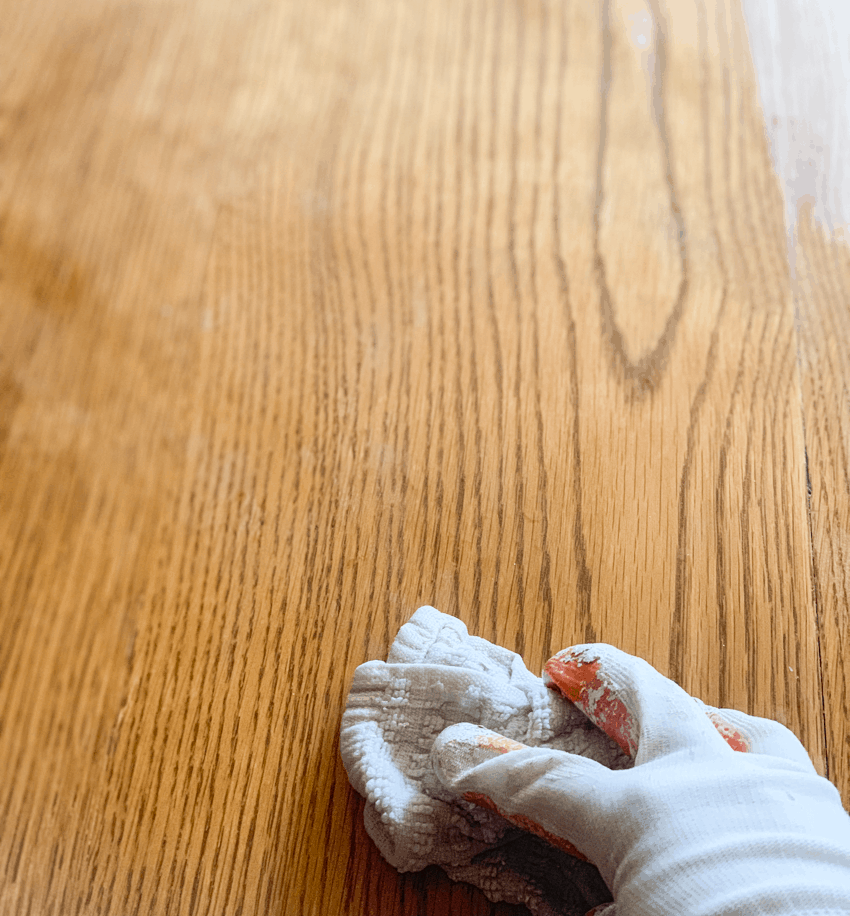
Then wipe the bleach on again. Remembering every coat will lighten the wood further. I did 4 coats of bleach until I was satisfied with the color. You can stop at any point you are satisfied with the color. This will probably depend a lot on the color of the wood you are starting with.
Step 3: Wash away extra bleach to stop the bleaching process.
When you find the color you like. Use soap and water to stop the bleaching process. I used a combination of water and vinegar 50/50 which can be used. But use extra caution with this because bleach and vinegar when mixed can form a toxic gas. But you do not want the bleach to continue to process the wood, so you need to interrupt that process.
Tip: Not all woods respond the same to the bleach. Oak responds well to bleach.
Step 4: Apply white wax to seal your bleached furniture.
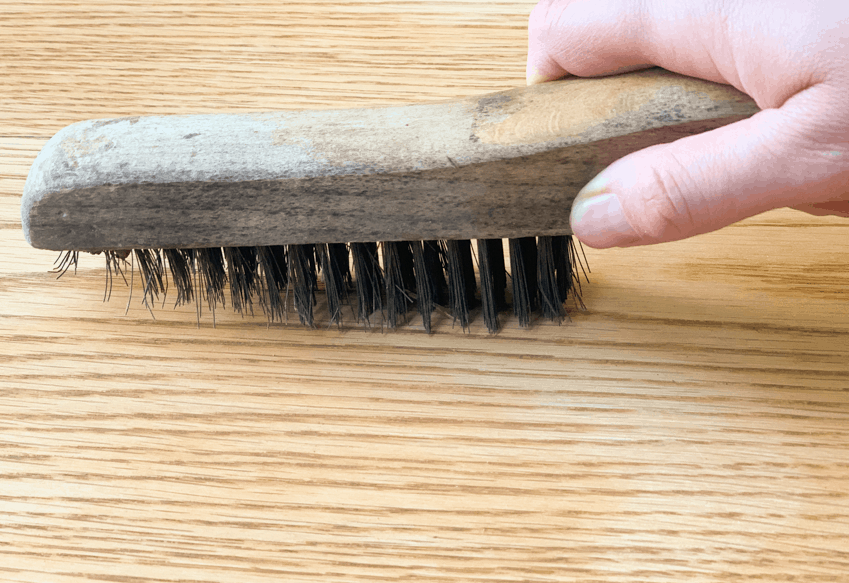
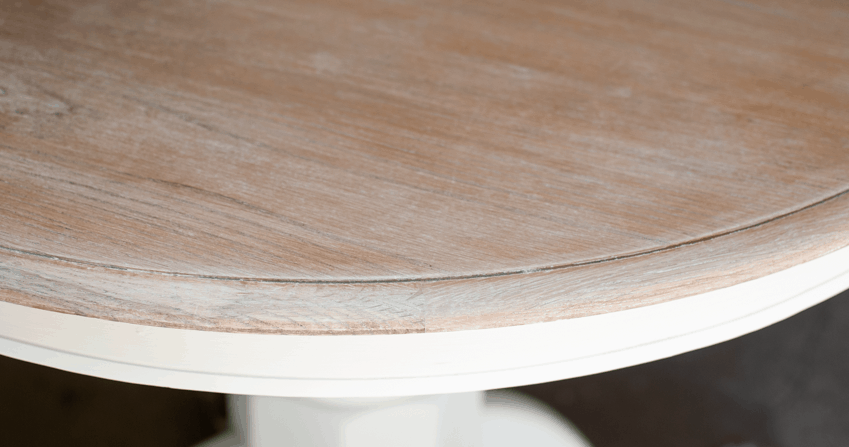
The final step is to seal your bleached furniture. I used a white wax on the top of this table. Before applying the wax I used a stiff wire brush and brushed along the grain of the wood to create some deeper groves for the wax to fill.
The white wax will add a beautiful touch to the wood and truly gives your wood that bleached driftwood look.
In the picture above I had waxed the right side of the table. As you can see it actually darkened a the table a little bit. I ended up going over the right side more with the wire brush and sandpaper to make it appear a little bit lighter.
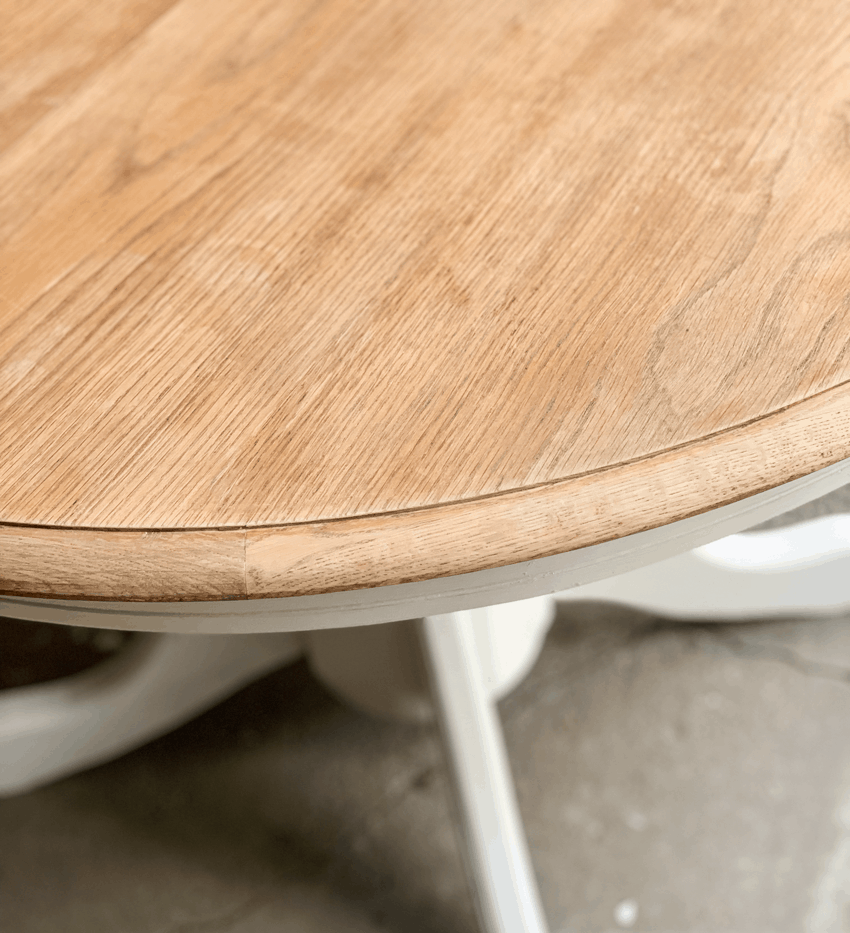
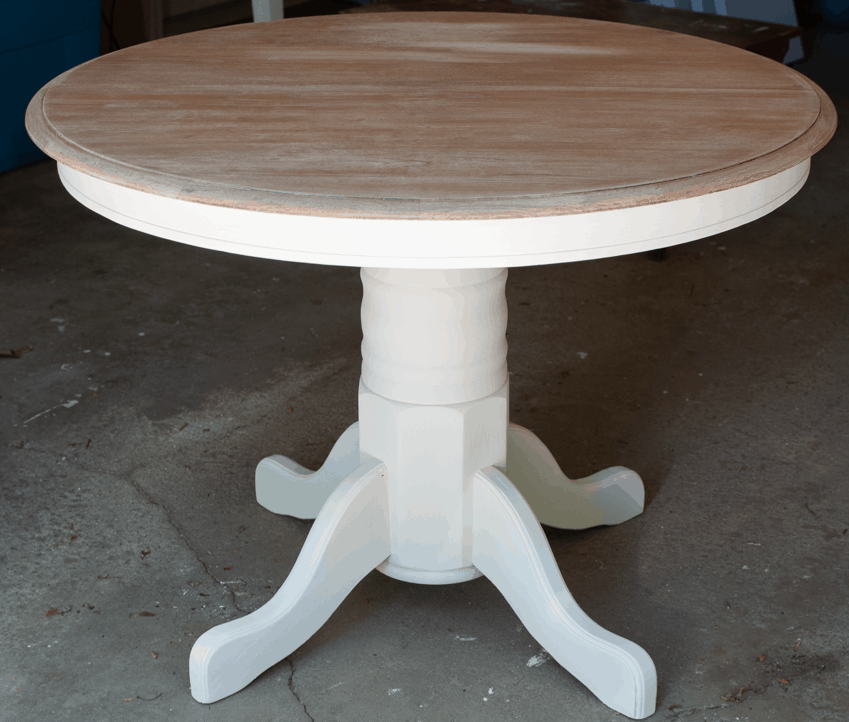
But then…pure beauty! I love the color and truly the process was so simple. Although I love chalk painting because it is so simple, bleaching wood has also become a new favorite.
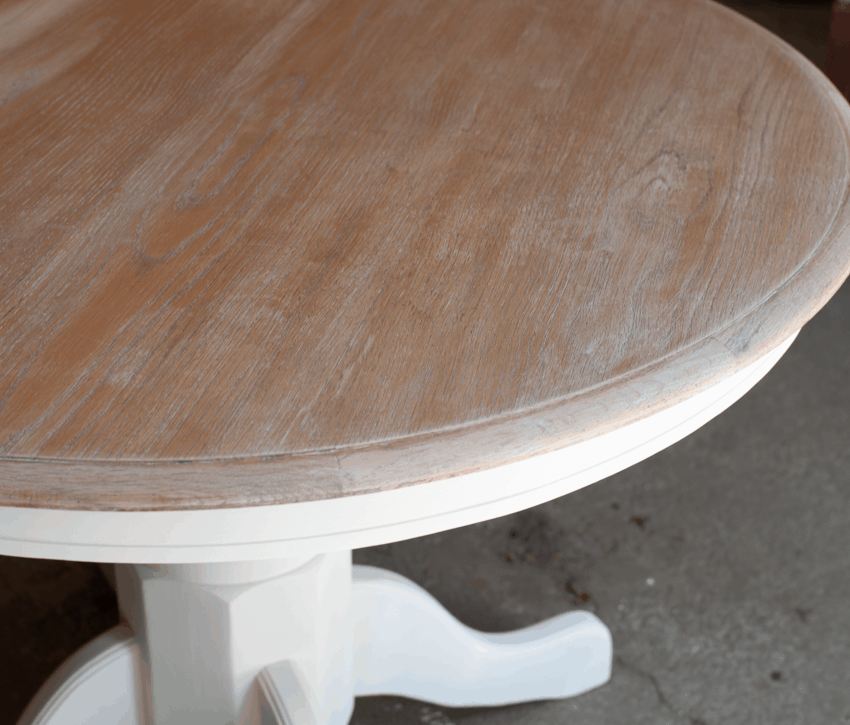
And here’s the after shot of the table! I love how it turned out! So light and clean looking.
Now I will bring it upstairs to get some more beauty shots but until next time! I hope you have a wonderful weekend!
Update: 7/20/20- I wanted to update this post because it has been almost a year since I first posted it. After using the table for almost a year I would recommend using something more heavy duty to seal the table than just the white wax. Poly-crylic or polyurethane would do a better just of sealing the table if you plan to use it as a kitchen table or table that gets a lot of use.

P.S. If you don’t have time to do it now. Just pin for later!


Neat! Wondering…was the bleach 100% or diluted when you bleached wood?
It’s definitely diluted. I usually use 1 cup of bleach for 4 gallons. Elizabeth
How would you do kitchen cabinets? I have golden oak kitchen cabinets that I am struggling with trying to find a color to paint when I saw your article on bleaching. I thought this might work. Also, I have arthritis in my hand, so I’m just struggling with the whole process I t
Hi Ruth, I think personally I would hesitate before doing this to kitchen cabinets. I think the process worked well on a piece of furniture or a table top but to do all of your kitchen cabinets, I think it would be difficult, especially if you are concerned about physical limitations. Myself I would consider chalk paint or other mediums which do not require a lot of prep work. Good luck! Let me know what you decide. Elizabeth
This is such a cool technique. I would love to do something like this on our kitchen table here in Draper, UT. We are doing a mini kitchen makeover this month with some professional cabinet refinishing, and fixing up our table like this would be the perfect finishing touch for the space. Thanks so much for sharing!!
Sure! Hope the kitchen reno goes well. Elizabeth
Hi!
I was wondering how this method would work on bedroom furniture. I’m sure some parts of it aren’t solid wood. Do you think this process would still work?
Thanks!
Hi Denise, yes! It would still work. I have seen others do it on real wood furniture of course and it turns out GORGEOUS! Happy DIYing! Elizabeth
This is exactly what I’ve been looking for! So beautiful! I wa a wondering if I stress of white wax, can I use a watered down white paint white wash? Have you ever tried that to achieve the same white wash look?
Yes definitely! I think that would look gorgeous! Elizabeth
Hi Elizabeth! Thanks for the tutorial to bleach furniture the easy way!!
I saw the white wax you linked and saw there was an option on amazon for black/brown wax. I was curious if you’ve ever used black/brown wax on bleached furniture…?
At this point I haven’t used black wax. I have used antiquing wax, which is a brown color. It works well if you like an antiquated look on furniture. Do you know what type of look you are going for? Elizabeth
I love the look of the table, but I panicked when you said to use vinegar to stop the bleaching process. Vinegar and bleach mixed together makes a toxic chlorine gas that can be deadly! I highly suggest you revise this method.
Whoop! Ok that’s scary and something I didn’t know. I revised it. Elizabeth
This is exactly the look I am trying to create for my kitchen table. It’s beautiful! Were you able to put polyurethane over the white wax for more durability?
Hi Michelle, my plan is to do a matte poly over the white wax. I will post it once I complete it. Thanks. Elizabeth
Polyurethane over wax?! Most likely you’ll have to sand the table top first to remove the wax. Then, use ASCP in pure white or old white color wash to achieve the look you want. Or another finish technique that’s been successful for you! Last, apply the poly! Annie Sloan has her own polyurethane.
Hi Essie, thanks for your ideas. Yes, the wash is a good idea! Elizabeth
Was this a kitchen table you eat on constantly? How does the top hold up with constant use?
Hi Ashley, it is used for high traffic. I am probably going to add a coat of matte polycrylic or spray with poly urethane in the near future because we use it so much. Let me know how yours turns out. Elizabeth
Hi! I love the look of the table and do a lot of refinishing myself. You sparked my interest about the power stripper that you used to remove the stain and varnish. Would you have more info on what brand, type . . . that you used?
Hi Lynn, I apologize for the delay in getting back to you. I have been on maternity leave. Here’s the info for the power stripper. Please let me know if you have any other questions. Elizabeth
Great job! Think i might have skipped a paragraph, but i’m guessing you bleached only the TOP of the table… what did you use to paint & seal the table BASE? It turned out beautifully!
Hi Jenny, I painted the bottom and sides with Rustoleum chalk paint and clear wax. Let me know if you have any questions! Elizabeth
Hi, do know the exact name of the tool you used to strip down the wood?
Thank you!
Hi Rana, it’s a Wagner power stripper Elizabeth
It looks wonderful! I might try the bleaching method on our toy chest that still needs a makeover.
Yes! I highly recommend it..I loved the finished result. And it is a pretty straightforward process. Let me know if you do.
Wow!!! That looks amazing!
Thanks Alesha! I really loved the finish result!
Love the table! Thinking of doing ours. You mentioned that on the right side of your table it was darker when the wax was applied. Did you wait to re-sand it & use the your wire brush when it was dry? Or, should you do it right away? Thanks! Kim
Hi Kim, I re-sanded it the next day. You probably could do it right away. Let me know how it turns out. Elizabeth