Learn how to sew a DIY Face mask to help! Help fight the current shortage of face masks and keep our communities safer. Here’s information on how you can sew a DIY Face Mask to help in your local or broader community.
There is a need for sewers to learn how to sew a DIY Face Masks!!!
My husband works in healthcare and there is plenty of discussion going on about the lack of PPE (personal protective equipment) for healthcare workers, especially masks. But this morning my friend Melanie at Love and Stand Together sent me a link of how to sew a diy face mask! I have been interested in how we can help out, even being limited by being at home.

So if you too have been looking for a way to help out and you can sew a basic stitch than you can too!! Being so directly involved with someone in health care, I am deeply passionate about getting the word out that there is a way to possibly help out!
Learning how to sew a DIY Face Mask
One of the ways I have found to help out is to learn how to sew a DIY face masks. It is super easy and it can offer protection in areas/ times when PPE is limited for healthcare workers or even to protect your own family and friends. These obviously are not the ideal PPE (personal protective equipment) for healthcare workers, or people infected. But according to the CDC they may possibly still be helpful during times of crisis.
Here’s CDC’s guidelines for when handmade DIY masks:
“HCP use of homemade masks:
In settings where facemasks are not available, HCP might use homemade masks (e.g., bandana, scarf) for care of patients with COVID-19 as a last resort. However, homemade masks are not considered PPE, since their capability to protect HCP is unknown. Caution should be exercised when considering this option. Homemade masks should ideally be used in combination with a face shield that covers the entire front (that extends to the chin or below) and sides of the face.”
Sewing DIY face masks might help in situations where nothing else is available. Also making DIY face masks for the general public to use, who are not infected, can reserve the actual PPE for healthcare workers and people infected.
Update: The CDC now recommends that all individuals wear face cloth masks while in public. Helping out by making DIY Face Masks is an incredible gift during this time. So if you have joined in to help out! Thank you for all you are doing!!
I have been asked for recommendations for what to use so I have included affiliate links for your convenience. I receive a small commission if items are purchased through the links with no additional charge to you.
Free DIY Face Mask Pattern
Signup to receive a free DIY Face Mask Pattern download and Tutorial directly to your inbox!
Total time to sew a DIY Face Mask:
- 15-20 minutes
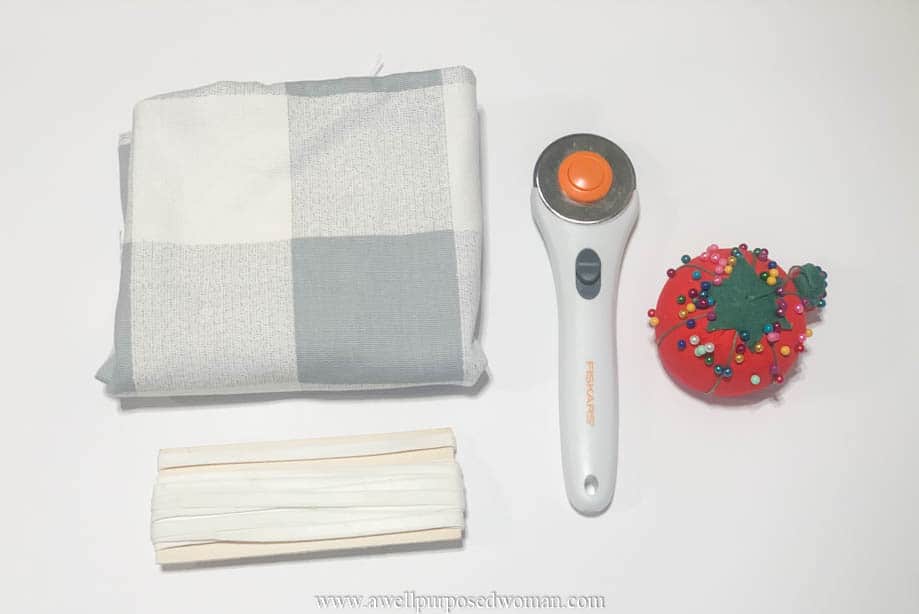
What you need to make a DIY Face Mask:
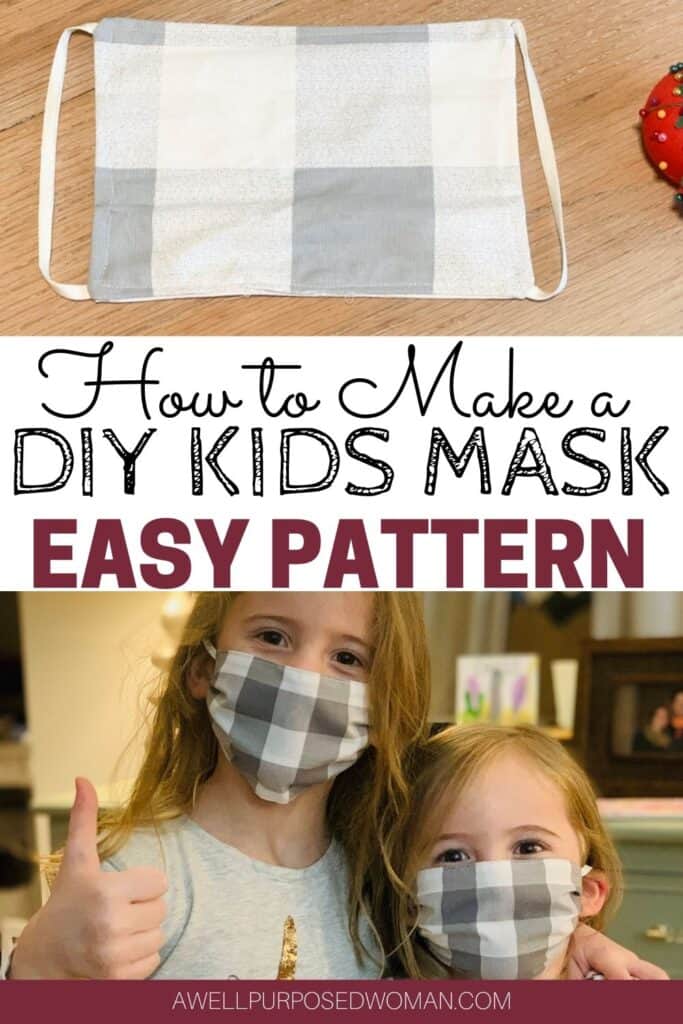
- 100% Cotton Fabric that is tightly woven (You will need 2- 9″x 6″ rectangles for medium adult mask, 2- 10″x 6″ rectangles for a large mask, 2- 7″x 5″ rectangles for small child’s)
- Flat Elastic (1/4″-1/8″) or hair ties/ rubber bands.
- Sewing Machine
- Sewing Pins
- Scissors or Rotary Cutter
- Download PDF Instructions & Pattern Above or Below

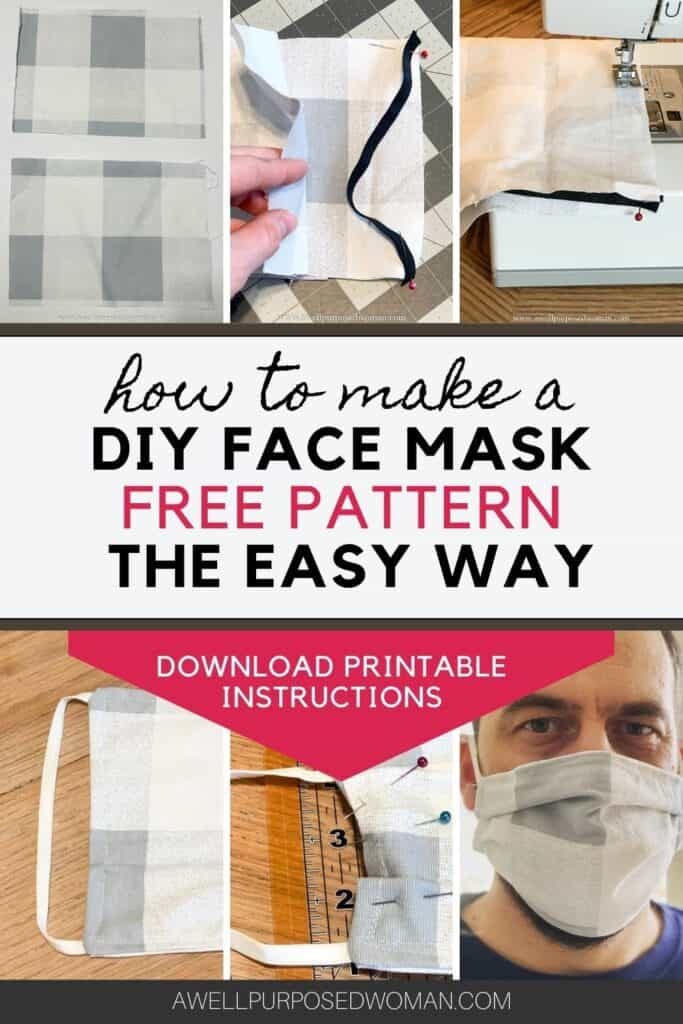
Here’s how to sew a DIY Face Mask:
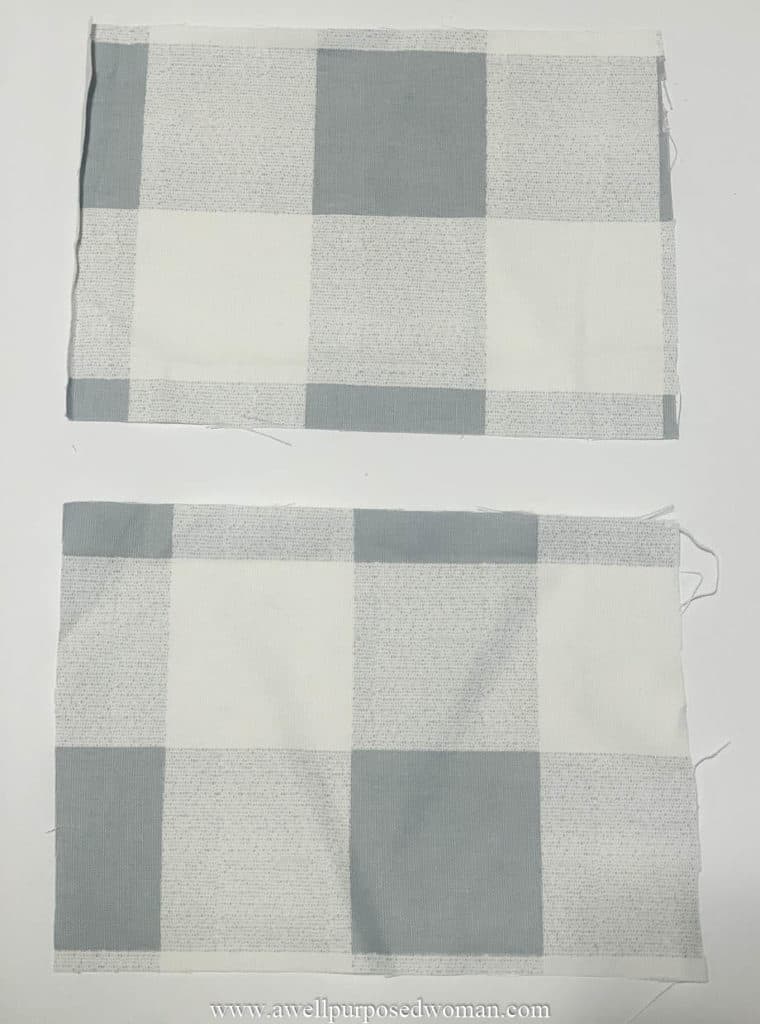
Step 1: Cut Your Fabric & Elastic
Cut out fabric into 2 rectangles (You will need 2 9″x 6″ rectangles for women’s adult mask, 2 10″x 6″ rectangles for men’s adult mask, 2 7″x 5″ rectangles for child’s). Cut 2 elastic strips 6-7″ long for adult masks, and 5.5″ long for children’s masks.
Tip: You will want to make sure to use fabric with a tight weave. Quilter’s quality cotton or duck cotton fabric with a tighter weave with at least 180 thread count works well. If you can see through the fabric it means there is a looser weave and should be avoided for face masks. I have also found doing the back side with flannel does help with the permeability.
Step 2: Sew Your DIY Face Mask
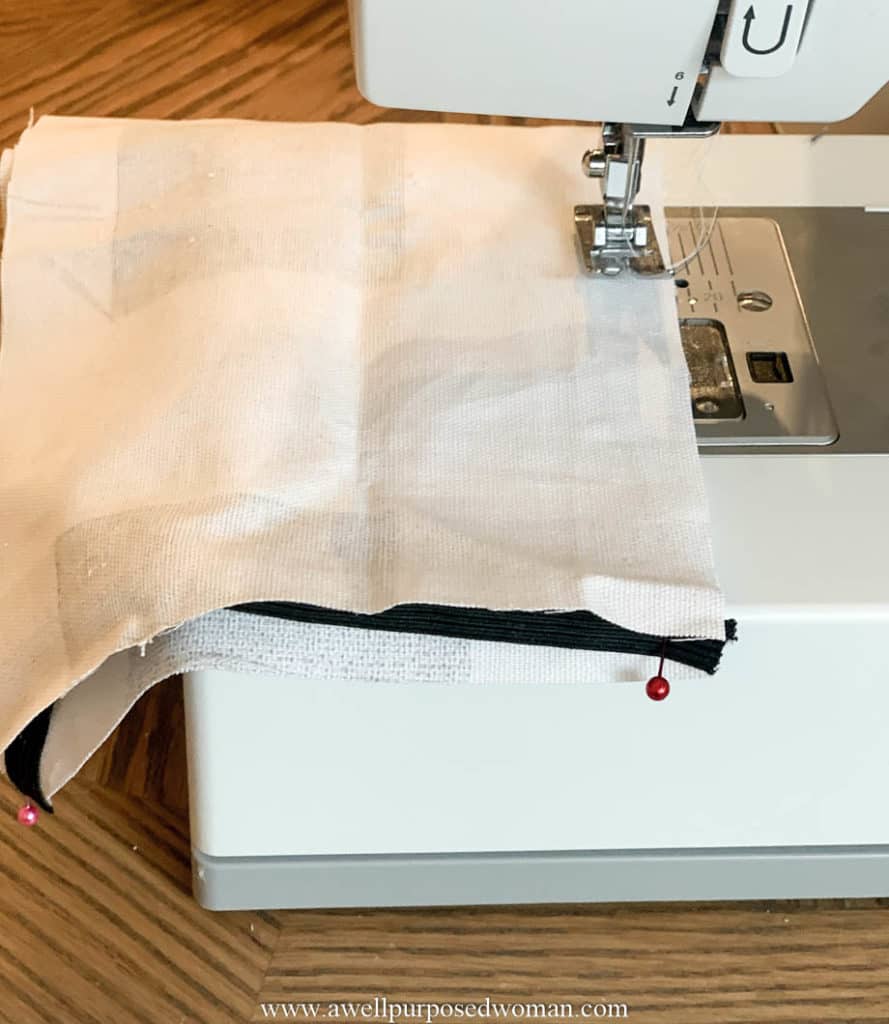
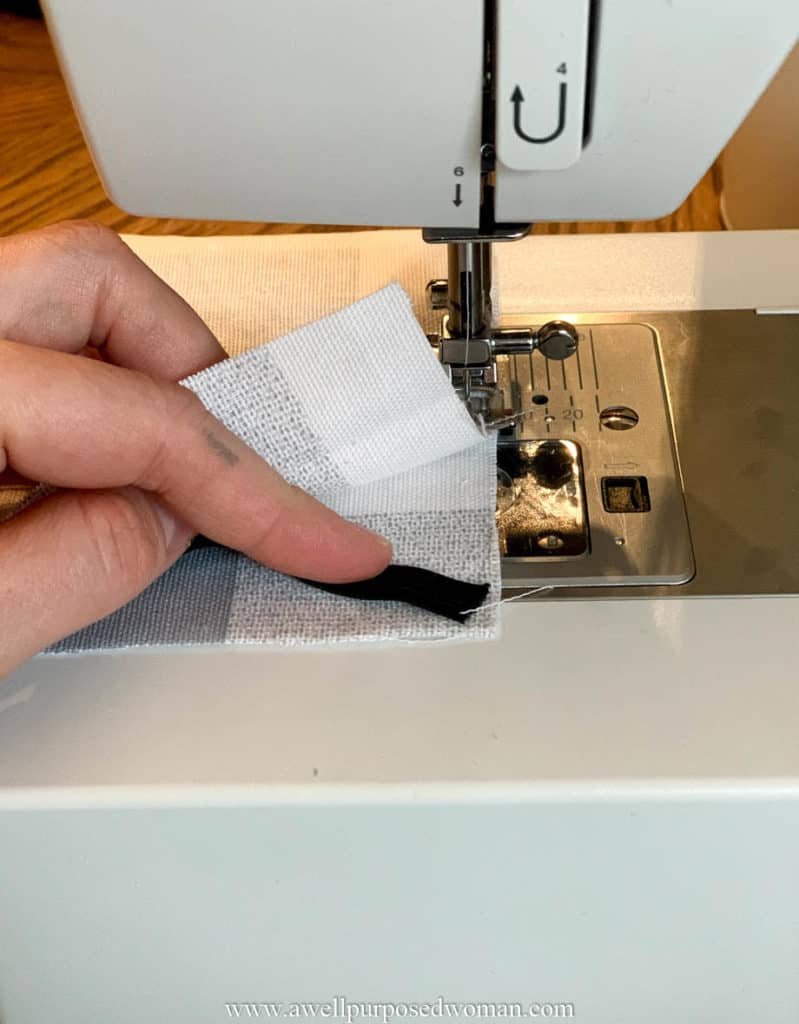
a. Placing your fabric rectangles right sides together. Start sewing in the middle of one of the longer (9″) sides. Sew until you get 1″ from the corner.
b. Place one of the ends of your elastic diagonally (45 degree angle) on the corner. Then sew the remaining 1″ of 9″ side, sewing the elastic in place.
c. Then sew down the 6″ side (shorter side). Attaching the other end of the elastic to the bottom corner of your rectangle. Sew the elastic in place. (Now the elastic will be sewn on the top and bottom corners.
d. Sew the second 9″ side (longer side) all the way until you are 1″ from the next corner. Insert the elastic diagonally again. Sew the last 1″ of the corner, including the elastic cord.
e. Sew the second 6″ side (shorter side) until you reach the top corner. Sew the other side of the elastic in place.
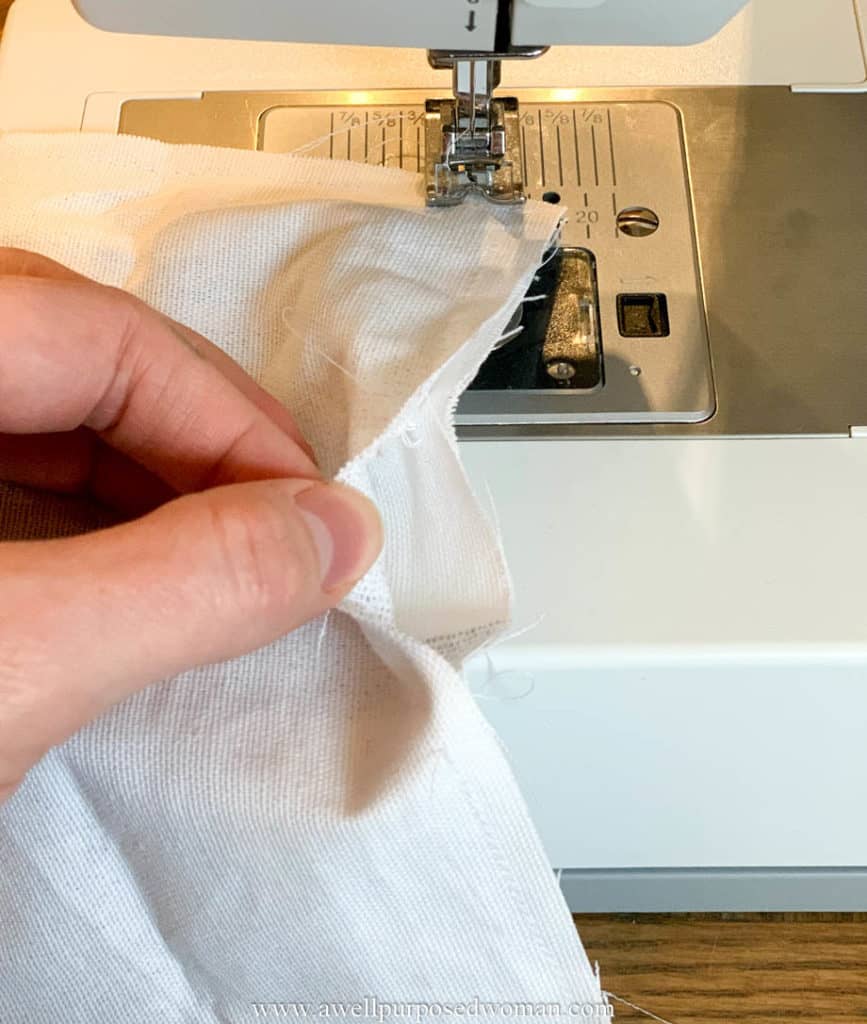
f. Now continue sewing the other half of the 9″ side (longer side) you started with, remembering to leave a 1.5″-2″ opening to turn your fabric right sides out.
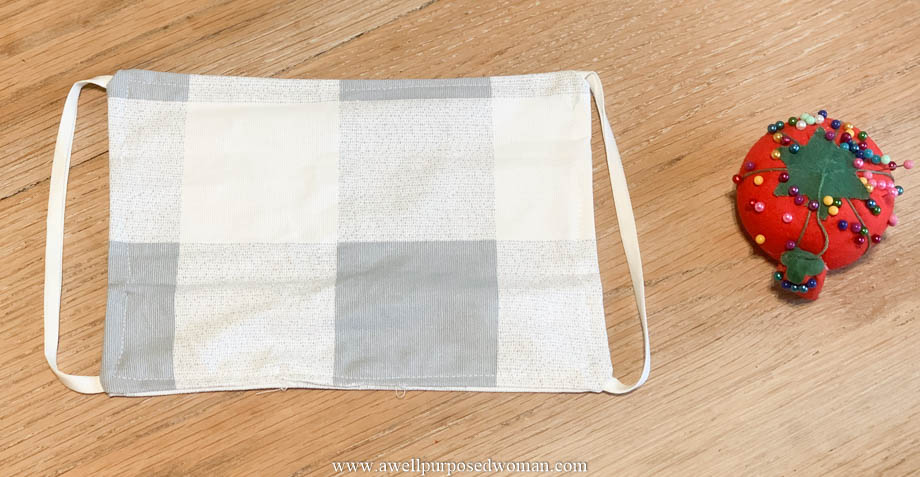
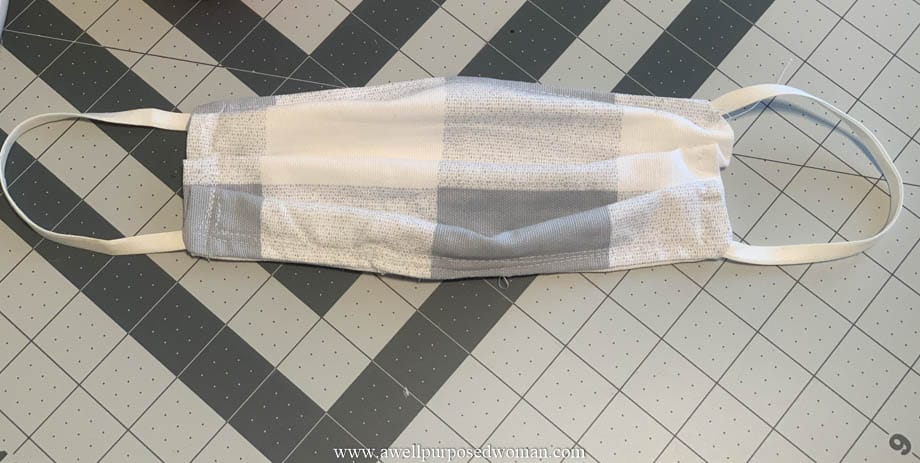
Step 3: Turn the fabric of the DIY Face Mask inside out
You will have a rectangle mask now with elastic loops on both of the shorter sides.
Tip: At this point you could also add a metal nose piece where the opening is on the top of the 9″ side.
Here is another video that shows you how to complete the mask. Once you turn it inside out.
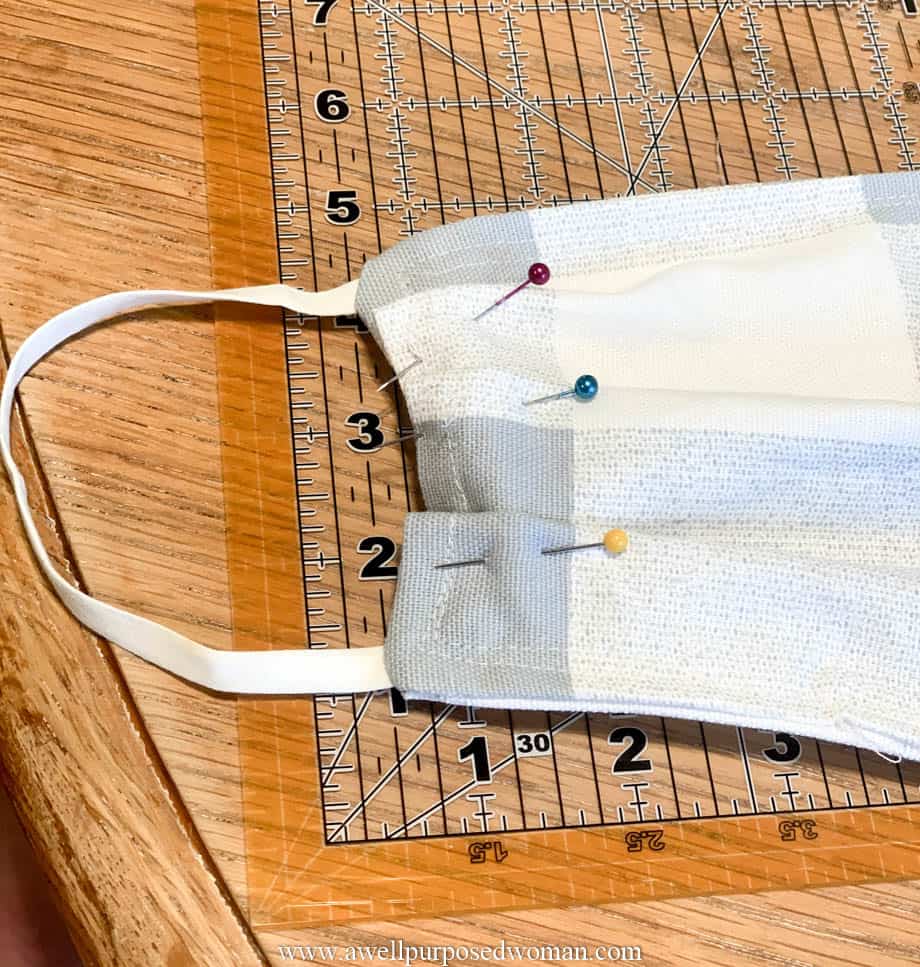
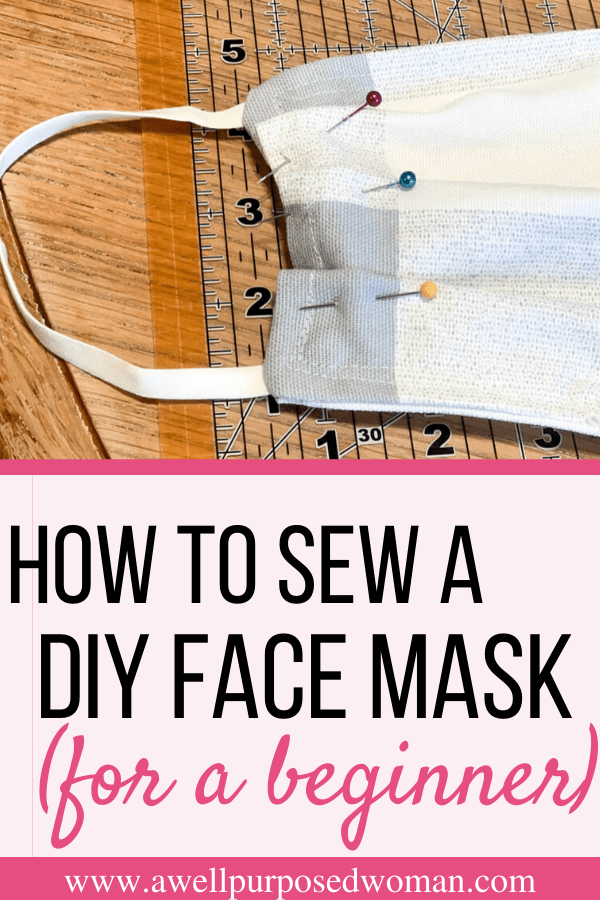
Step 4: Sew Tucks/ Pleats in your DIY Face Mask
Scrunch the sides of your mask and pin 3 tucks/ pleats that are going in the same direction. It is important all the tucks are going in the same direction for the best protection.
Step 5: Sew around your DIY face mask
Although not technically PPE, these masks are going to be used to help protect from illness so you want it as a secure as possible.
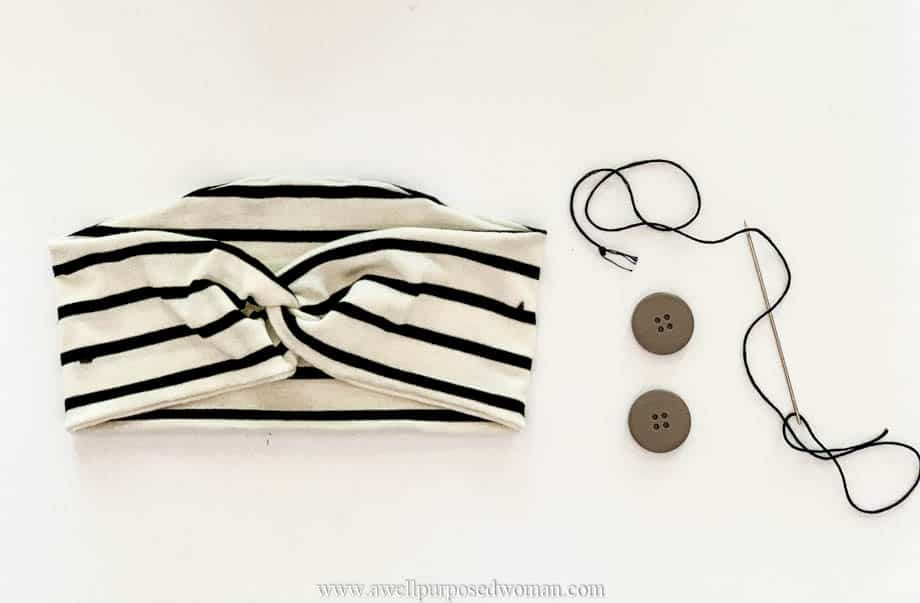
You may also want to know how to make a Headband with Buttons to hold your mask.
Click here for how to make a headband with buttons!
If you can’t find elastic for your DIY Face Masks:
If you are not able to find elastic for your DIY Face Masks the good news is there are some great alternatives. Here are just a few of them:
- Make fabric ties with your sewing machine.
- Use elastic hair ties instead of flat elastic
- Re-purpose fabric from other clothing and cut strips for your masks.
DIY Face Mask with a Filter
If you are wanting to make a face mask with a filter. Here is an excellent resource for a tutorial and pattern put out by North Memorial Health.
Where to do deliver the DIY Face Masks
- Reach out to anyone you already know in your community. There are a ton of home health agencies, clinics, nursing homes, assisted living communities who could very likely be in need. Supporting your own community of course is always where we want to start first.
- Spread the word! Be sure to share this post and pin on social media! Let’s do what we can when we are at home to help out our communities!
If you are staying inside this weekend this might be an AMAZING way to use your sewing skills! Let’s help beat this thing and use everything we have to do it! #flattenthecurve
Remember to share or pin this post to get the word out!
God bless and keep you!

What seam allowance do you use when starting putting the pieces together? Thanks!
Hi Julia, I allowed for about a 1/4″ seam allowance, but really I sewed as close to the edges as poss
I use 100 percent cotton material, but the Pattern I have been using required a lining in between so I would use 100 muslin.is that ok? Or just two pieces of material is fine? thank you Tena
Hi Tena, what I have seen recommended for the filter material are coffee filters. I have not heard anything about using muslin as a filter. As long as the mask is breathable I don’t see how it could hurt. Here are the CDC recommendations. Elizabeth
Loved your video, especially the method you used for tucks.
I have the same machine, and have a tough time sewing over the tucks without it bogging down. Can you please share what tension you have set as well as the needle size you use? Thanks much!
Hi Ronni, I used a tension of 4 and just the original needle that came with the machine. Elizabeth
Thanks much!
Nice simple directions! For the metal piece for nose, I have used the rolls of wire used in gardening to attach plants or shades to poles. It looks like a plastic bag tie but comes on a spool and is easy to cut.
Thanks for the post!
Hi Judy, what a great idea! Thanks for sharing. Elizabeth
Hi I’m really trying to read this pattern but having a hard time… Are so many advertisements that keep popping up on the screen until the side I can’t follow along and I accidentally click on these different links is there an ad free link please
Hi Barbara, I apologize for that. Thanks for letting me know. You can download the free pattern and tutorial. That will go right to your inbox. Elizabeth
Just a notice on the picture of you in the mask…the pleats are supposed to face down on the outside when wearing the mask. Thanks for posting the instructions. Great to have people want ot help!!
Hi Shana, very good point. Thanks! Elizabeth
Hello!
I came across your patter when I was searching the internet and Pinterest for a simpler version of the latter I had. Your instructions and videos were very simple to follow.
I agree a slightly heavier duty machine may be helpful. Or at least a different needle. I only have a Singer Sinple machine and the needle broke going over the folds on my fourth mask. I had more but am looking for maybe a denim needle or something of the sort.
Thank you so much for posting this. It’s excellent.
Hi Jennifer, thanks for visiting! I am sorry about your needle. Thanks for sewing masks! It is a huge blessing to use your sewing skills to help others. Elizabeth
Liz,
I am truly impressed with this blog! Don’t know where you find the time to produce such excellent ideas and pictures! You and your family are amazing! I think that the step-by-step instructions for each creative project is truly phenomenal! The face mask project is timely and very helpful to many. Wish you the best of blessings with the birth of your baby!
Thanks for your encouragement Mom! It is hard to find time sometimes, but this project was very motivating to me because I felt like it could actually help people out. Love you! Elizabeth
Make sure when you wear your mask you wear it with the least facing down towards the ground away from your face!!
Good point! Thanks Stacy! Elizabeth
I asked this question before but I never got a response so I’m wondering if maybe it never went through but I was wondering what length to use on the elastic pieces? Everything else is wonderful and your directions are very precise and I appreciate that. I use the 1/4 inch width but I never seem to get the length right. Please help and thank you for these instructions.
Hi Nancy, I tried to respond before. You want to cut your elastic to 7″ strips. The CDC says 6″ so I would say it depends slightly on the size of the person’s face, distance to ear, etc. If you plan to donate a good number of them you could rotate between 6″ and 7″. Elizabeth
Your instructions were great, but when it came to the actual sewing of the pleats you’re arm hid the whole thing….very frustrating.
Hi Lula, I am sorry to hear that it was frustrating for you. I have to admit video is not my strong suit yet, still learning how to get the best angle. Basically, I pin the pleats and then just sew a straight stitch down the side (about 1/4″) from the edge. I do a reverse stitch and go back up along the same side to reinforce it. I will try to do a video on sewing just the pleats if I can before baby #3 comes! Elizabeth
I RENE I used cotton Buds for the nose wire they do not stick in your face
Great idea! Thanks for sharing. Elizabeth
Hello,
Thank you so much for posting the instructions on how to make this. I have been looking for a good instructional video. My only question is one that it doesn’t look like anyone else has asked so it’s probably a stupid question but I’ll ask anyways. What length do you use for the elastic pieces? I see you are using a quarter inch width but what length do you use for each piece? Thanks again.
Hi Nancy, That is not a dumb question. It is a very good question. The elastic strips should be cut into 7″ pieces for adults and 5″ for children. Please let me know if you have any other questions. Elizabeth
Thank you for your compassion, also thank you for sharing your sewing skills in a very easy to understand format.
Sure, I am learning every day about the best way to make these masks. But this was an idea for a simple mask. I hope that it is helpful for you. God bless, Elizabeth
The best out all very clear at a speed everyone can learn n make a face mask! Thank you so much. Sending love, Take care and stay safe everyone
You may also like these masks:
16 How To Make A 5 Minute Face Masks
https://www.diytomake.com/how-to-make-face-mask/
Thank you for taking the time to write and post this material.
King regards,
Thompson Dencker
Hi, I have been trying to make masks VERY similar to this, but only have problems when i encounter sewing the pleats. Any advice or what kind of needle you use when sewing the pleats? I have a 80/12 & 90/14 needles. Woukd those work?
Hi Roxanne, I think those should work fine. Let me know what your end up using and works best. Elizabeth
HI Elizabeth,
Thanks so much for sharing this.
I kind of had an idea how to do this but your post really helped.
My cousin manages a hotel in the Houston area and asked me if I could make her some masks as she is constantly in contact with the public.
Hotels would be another good idea for donations for those who don’t know where to donate their masks.
May God richly bless you for sharing and encouraging others to make masks.
Hi Alma, That’s a great idea! I am glad you are able to help your cousin out. Hotels would definitely be another good idea! Let’s keep on doing what we can. God Bless you and your family too! Elizabeth
I haven’t sewed in years and I want to try this but I’m more of a visual learner and your video cuts off just as you are turning the mask inside out. Do you have a full video of the whole process, beginning to end? Thank you.
Hi, yes I will try to upload how to finish the mask after it is turned inside out soon. You can also email me elizabeth@awellpurposedwoman.com with more questions! Elizabeth
Nice work. The DIY mask can also reduce the risk of virus spreading. Thanks.
Thanks Yang! I hope so or slow it down, at least it seems something is better than nothing! Elizabeth
I can’t find a way to contact you directly but I wanted to let you know that in the photo you are wearing the facemask upside down. The plate should always face down word so that they are not catching anything that drops in. Might be a good idea to replace that photo so people aren’t wearing masks in correctly that don’t know better.
Good point! Oops…thanks for pointing that out. Folds should definitely be downward! Elizabeth
I might try making this when I can. Seems easy to follow & I might as well use my mom’s sewing machine too.
I was just thinking of where to get a bendy piece of metal to form the nose part better.
I thought of those long two prong paper holders people use for filing. The ones that go on top of the paper.
I think you could get 2 or more masks from one & office supplies has them relatively cheap. Just use something to file the possible sharp edges off. Cement might work. Then put them in with a few stitches before turning the fabric around maybe.
Just an idea & someone who actually sews might have a better way.
Hi Donna, what a great idea. Yes, I have seen people use those nose clasps before. Not sure how comfortable they are or if they add a lot to the masks. These ones do stay pretty well on top of the nose, but love to hear if you try using the clasps. Elizabeth
I was reading your post and the idea came to me to use a plastic covered twistie (twist tie?) off of a pkg. of bread (or whatever)…..straighten it out then slip it into the top seam area that goes over the nose. If you whip stitch both sides once you have it in, it should keep it in place.
The plastic covering over the twistie wire should keep it from rusting if you need to ever wash the mask.
What an awesome idea!! I love that. Have you done this? Will have to try that. Take care, Elizabeth
Could you please tell me if you used the 1/8″ elastic or the 1/4″? Luckily, I have some of both as elastic is also hard to come by now around here. I’m wondering which is more comfortable and less digging in for wearing? What width are the elastics on your husband’s medical grade masks? Thanks much! Barb
Hi Barb, I think the surgical masks my husband has are closer to 1/8″. They are quite thin. Really I think either size would work. The 1/4″ has been ok for the masks we have used. Please let me know if you have any other questions.
You made a good mask. I made a similar mask for children https://www.youtube.com/watch?v=mU2aP6gR-YY
Hey, thank you for sharing this. But could you please add more Pictures of ALL the steps, because I dont understand english so very much. That would help a lot! Thank you ❤
Hi Rauni, I updated the post with pictures and a short video. Please let me know if you have any further questions. Thanks, Elizabeth
Thank you for posting this. I appreciate you creativity and sharing for others to find a way to contribute.
Victoria
Yes, it’s a wonderful thing when we can use our skills and talents to help out for real needs! Hoping the more people hear about it the more we can do to help!! Elizabeth
The directions are so clear and easy to understand. Thank you for making it easy for everyone to make these masks.
Hi Tammy, I am glad they are easy to understand. I did the post really quickly when I realized there was a way we could help healthcare workers and others. Hoping it helps! Elizabeth
I’ve heard and read about this but still ‘what a concept! Could be a life saving intervention for many.
But a question (whose answer I probably overlooked somewhere)–what do you do after you make them? Who do you donate them to?
-specific destinations?
-ad lib donations? On your own?
Thanks.
-Danny-
Hi Danny! Great questions I put up the post so quickly yesterday didn’t have time to add donation ideas. I would definitely reach out to places right in your community first. Local hospital, clinic, nursing home. There is a shortage everywhere so most places are willing to accept them. If you can’t find any place locally let me know. I have people who are wiling to accept donations in our area. Thanks for being so willing to do this! elizabeth@awellpurposedwoman.com
Maybe I missed it, but where do we deliver/mail/send the masks that we have completed?
Hi Cheri, since we live in the same area you could send them/ deliver them to me and I can distribute them. My husband works for a home health agency and they can use them. Thanks so much! elizabeth@awellpurposedwoman.com
Lizzie, how wonderful. You never cease to amaze me!
Thanks Colleen! I saw the idea today in some posts and thought it was great to spread the word! 🙂