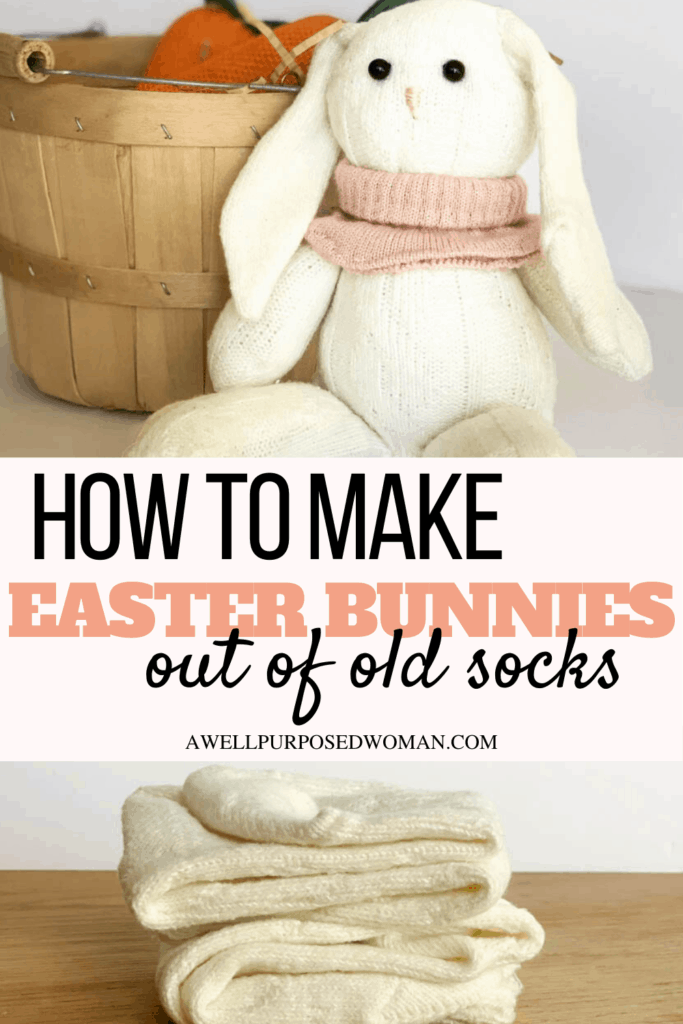
Learn how to make Easter bunnies out of old socks. Did you know you can make adorable Easter bunnies by using items from your sock drawer? This step-by-step tutorial shows you how to make these adorable Easter bunnies.
I had planned to do a tutorial on how to make Easter bunnies out of old socks for quite awhile now. But with all the adjustments that we have been making over the past month it has been on hold. Today I decided it was time to get back to a DIY project with you using old socks.
As you know I like making projects out of socks. You may remember the sock pumpkins from the fall. Or the DIY gnomes I made for Christmas, Valentine’s Day and Easter. Well here is yet another sock project for Easter! A DIY sock Easter bunny.
Truth be told I am not a huge fan of the Easter bunny. But this bunny is more of a doll in my mind and goes along well with spring. I think these little bunnies would be a perfect present for a child or grandchild!
Since my youngest daughter already claimed this sock bunny, I know this bunny is a success! These bunnies are soft, snugly and not overly complicated to make. You may already have most of the supplies on hand. So let’s get started!

Here’s what you need to make Easter bunnies out of socks:
- Easter bunny pattern
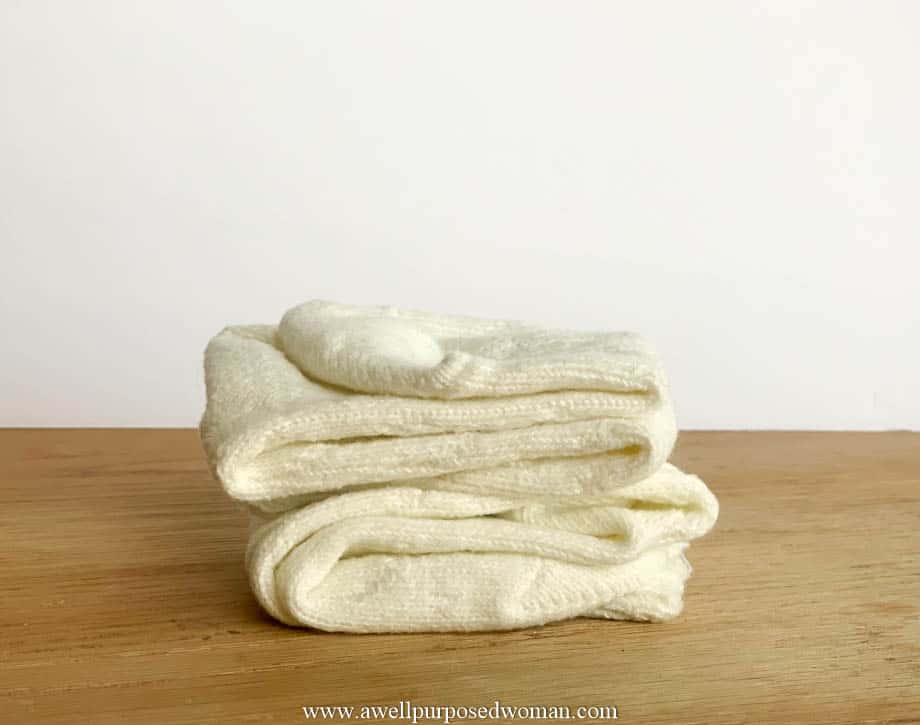
- A pair of longer socks, I used boot socks for mine
- Embroidery thread or dental floss
- Poly Fil or other stuffing
- Rice
- Sewing machine or needle and thread
- Buttons and other embelishements for the face
Here’s how to make Easter bunnies out of socks:
Step 1: Download your Easter bunny pattern
Start by downloading your Easter bunny pattern above or below. Then cut out the pattern.
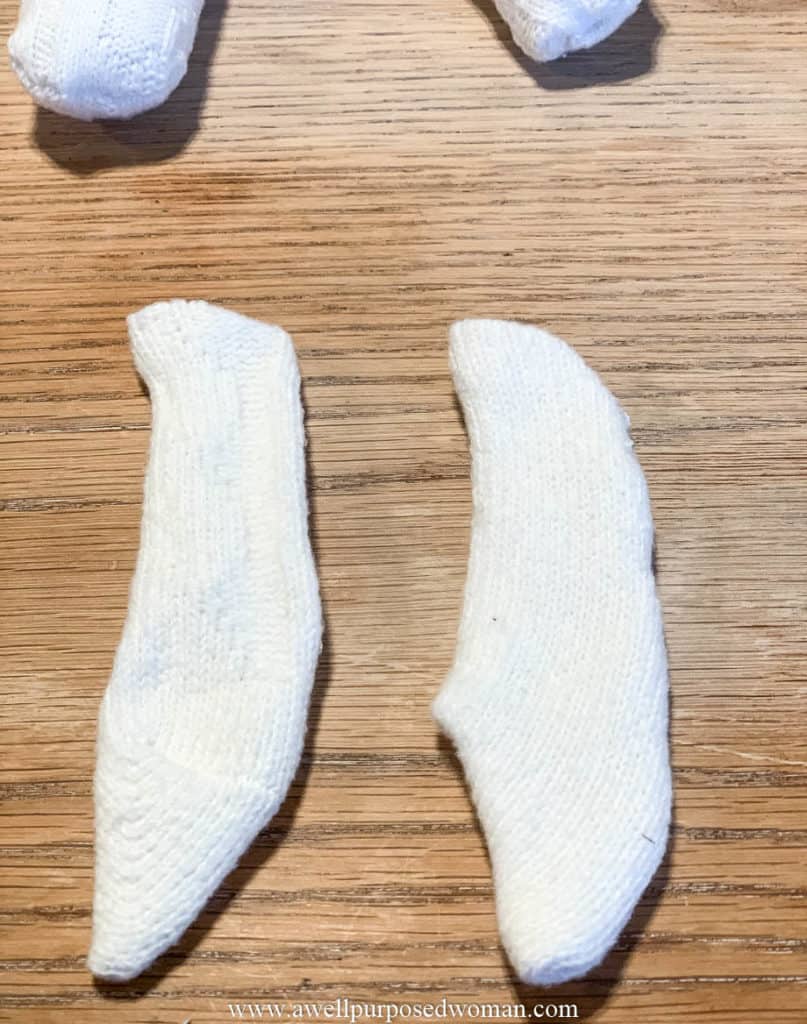
Step 2: Cut out your fabric pieces
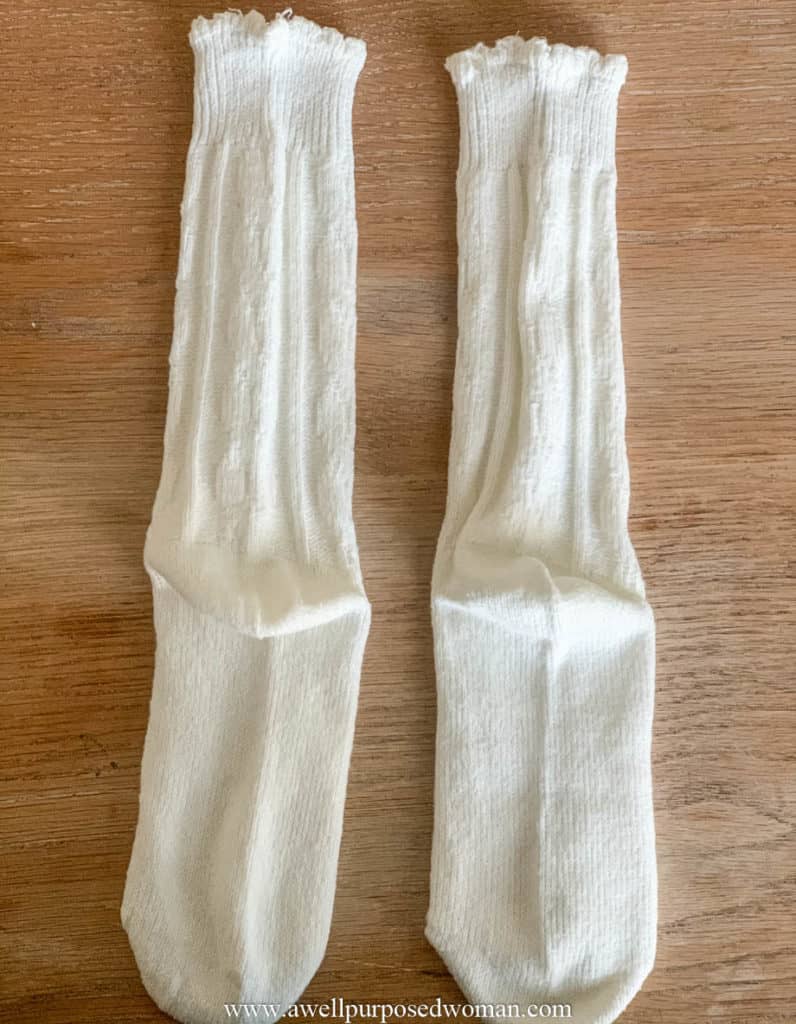
Next take your pattern and cut our your fabric pieces.
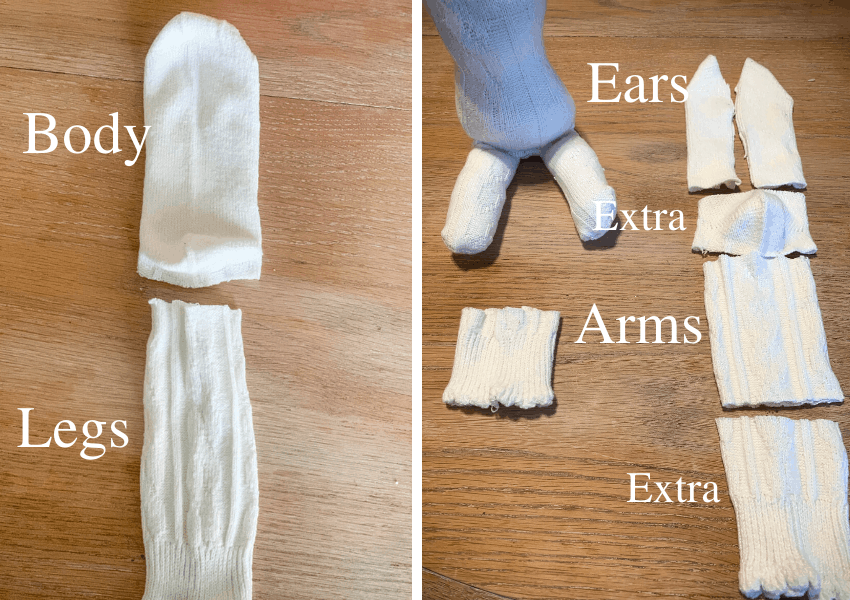
First Sock: Body and Legs
Second Sock: Arms, Ears
Step 3: Make the body of the Easter bunny from the first sock
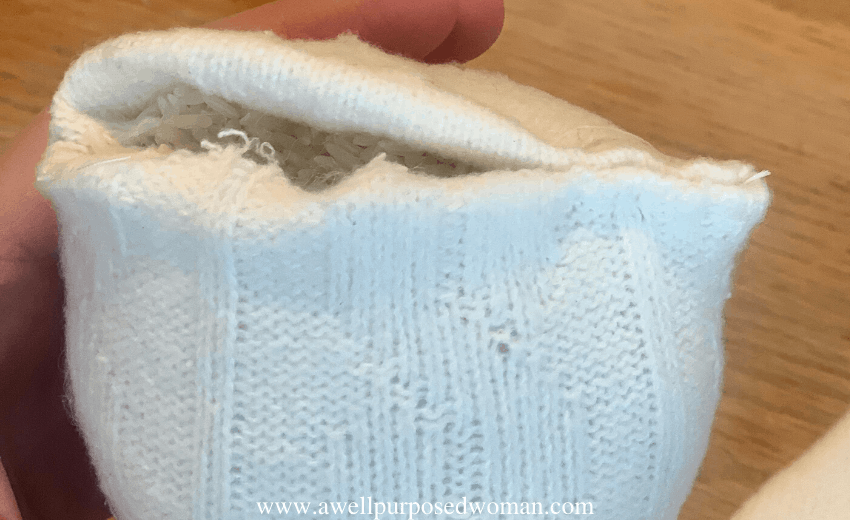
Taking the body of your Easter bunny, fill the top of the sock with polyfil. Making a smaller sphere for the head. Use a rubber band to tie of the head. Then fill the bottom of the body with poly fil and rice.
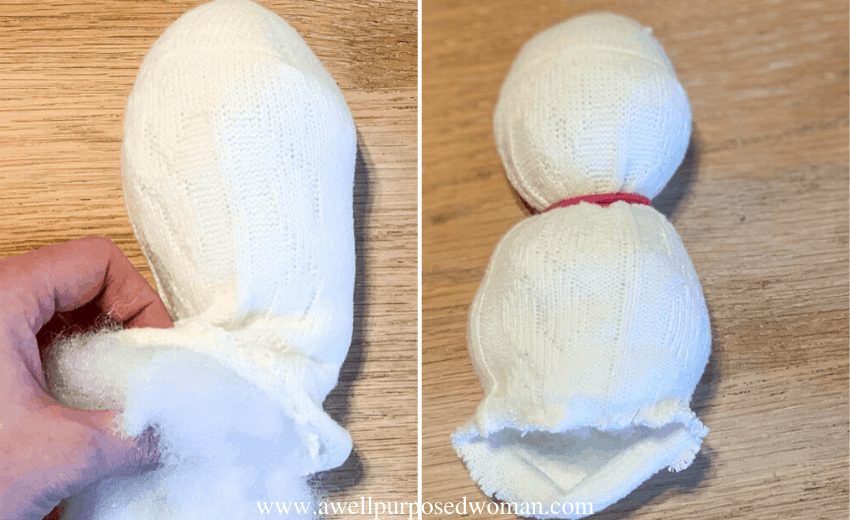
Sew the bottom of the Easter bunny’s body closed.
Now you will have the body of the Easter bunny.
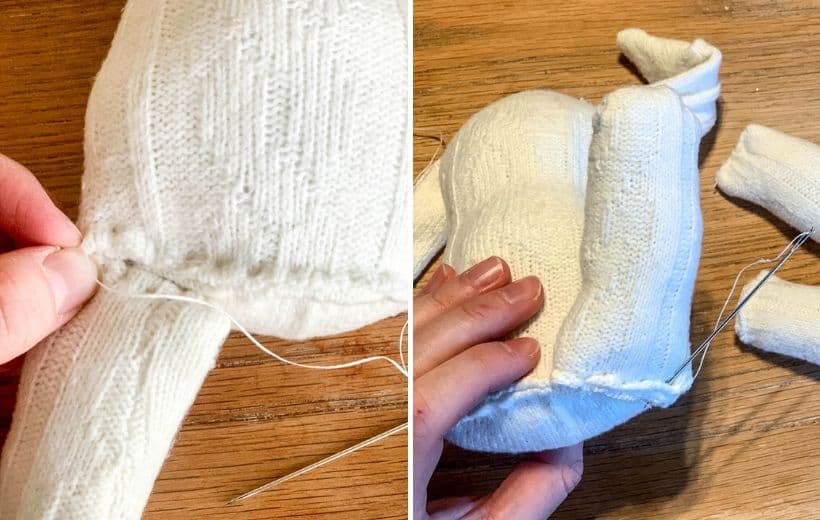
Step 3: Make the arms, legs and ears of your Easter bunny
Now take the arm, leg and ear pieces and sew a seam around the open sides.
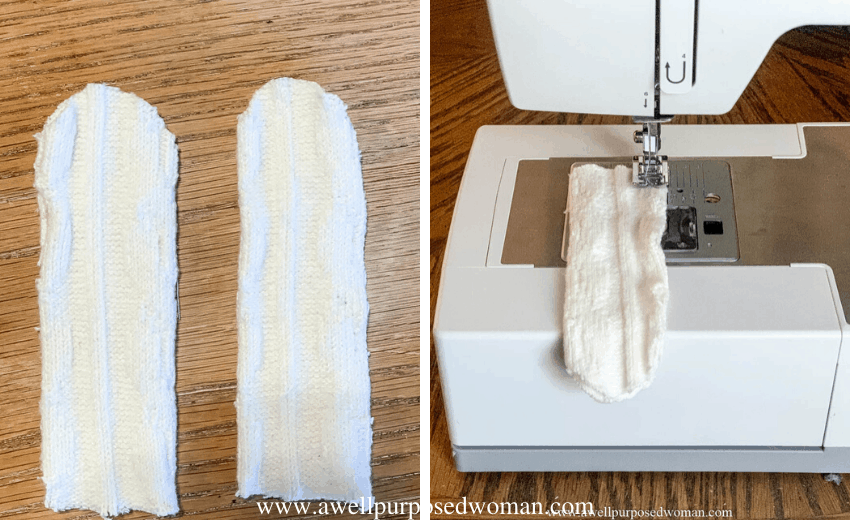
With the arms and legs make sure to leave an opening on one side to stuff them with polyfil. The ears do not need to be stuffed with poly fil.
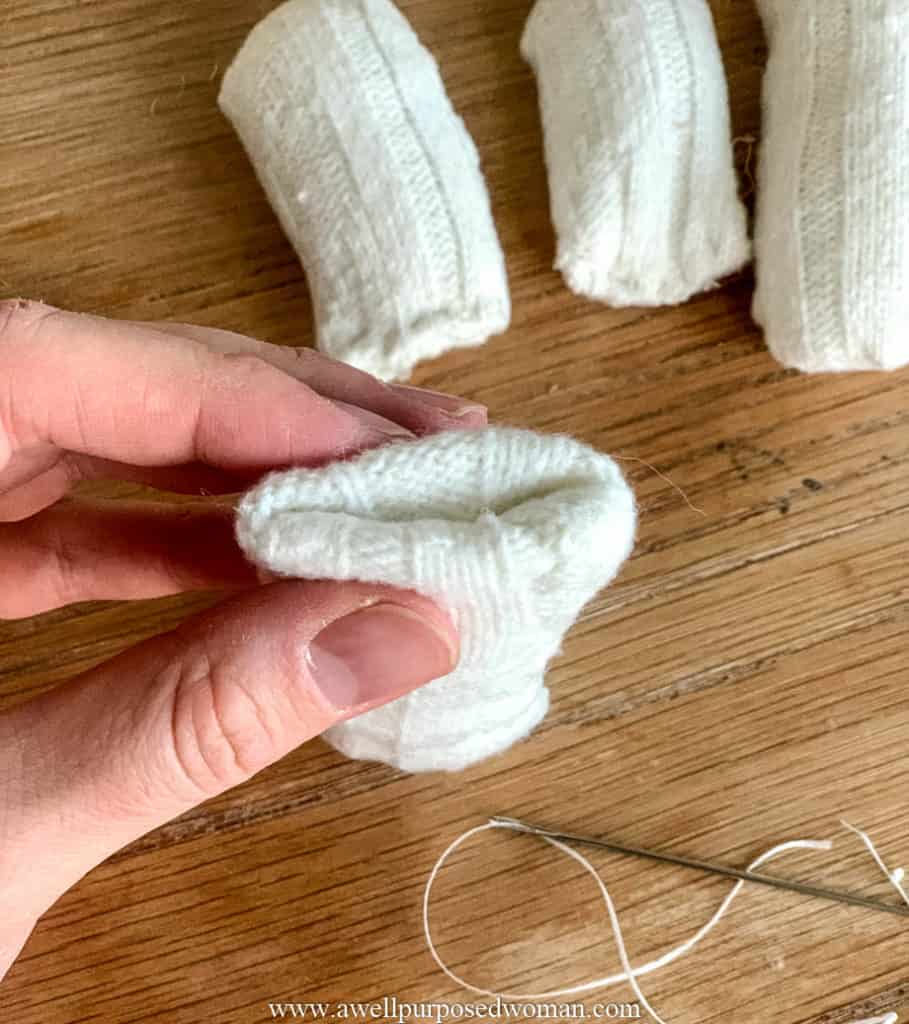
Stuff the arms and legs with poly fil. After filling, use your embroidery thread/ dental floss to sew up the open end.
The bunny ears do not need to be stuffed. So once you have sewn a seam closing them up you are done.
Step 4: Attach the legs, arms and ears to your Easter bunny
Now take your embroidery floss and attach the legs, arms and ears of your sock Easter bunny.
Stitch your Easter bunny’s ears in place.
I attached the ears first. Start by placing your ears on the sides of your Easter bunny’s head. I wanted my ears to be a little bit droopy so I put them off to the side. Now take your embroidery floss or dental floss and sew stitches on the underside of your ears in and out of the Easter bunny’s head.
Tip: When you sew on the underside of your Easter bunny’s ears you are hiding the stitches.
Next sew your Legs on your sock Easter bunny.
Again I found it worked best to sew on the underside of the legs.
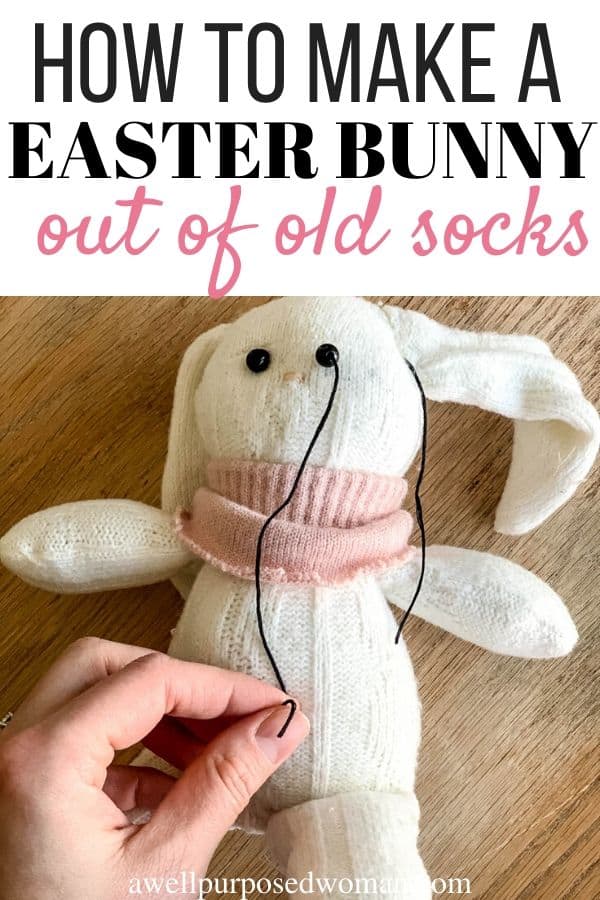
Stitch your arms in place.
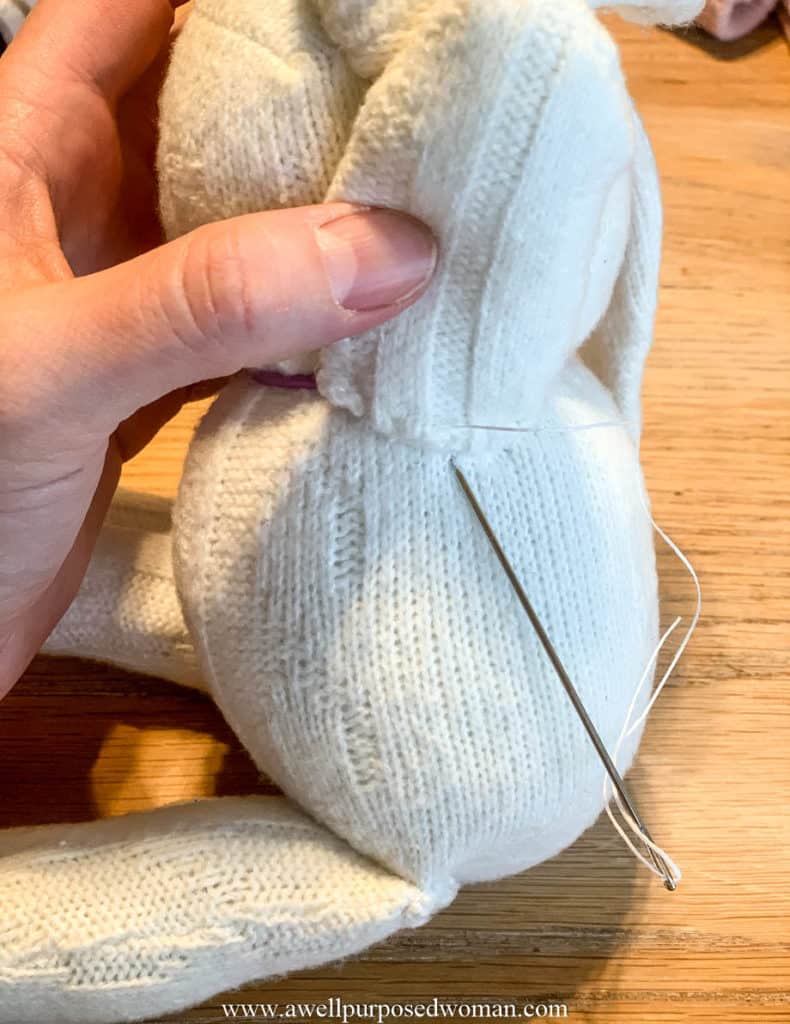
Last but not least stitch your Easter bunny’s arms in place. Again starting on the underside of the arms and sewing up and down into your Easter bunny’s body.
Now your little Easter bunny will look like a face less sock body. I played around with different colors at this point to see how I would decorate my little Easter bunny.
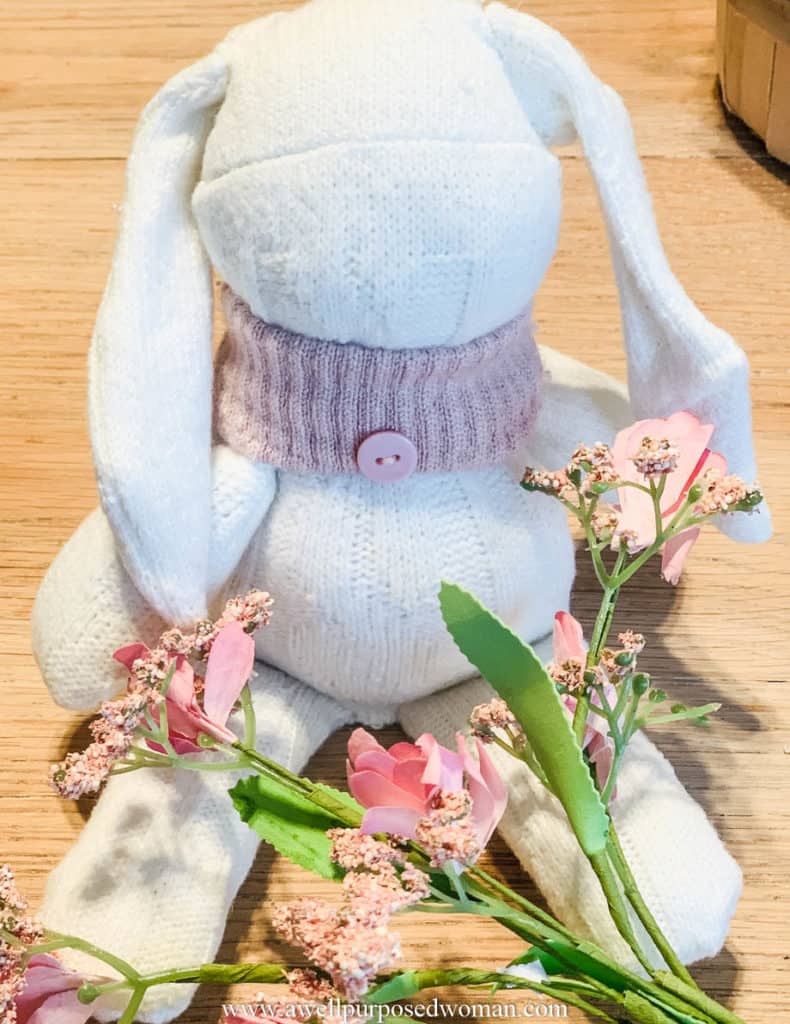
I took an old glove I found on clearance and cut off the bottom of it to put around my Easter bunny’s neck. It acts like a little cowl type scarf. Now it’s time to give your Easter bunny a face!!
Step 5: Give your sock Easter bunny a face
With this final step you can get creative. I knew I wanted a very simple face as opposed to anything to prominent. So I decided to use some simple black buttons for the eyes and embroidery floss for the nose. At this point you can play around with different designs. See what type of embellishments you like best.
Next I stitched the button eyes on the bunny. I pulled my embroidery thread through the back of the Easter bunny’s head and then tied the floss off underneath the Easter bunny’s ears.
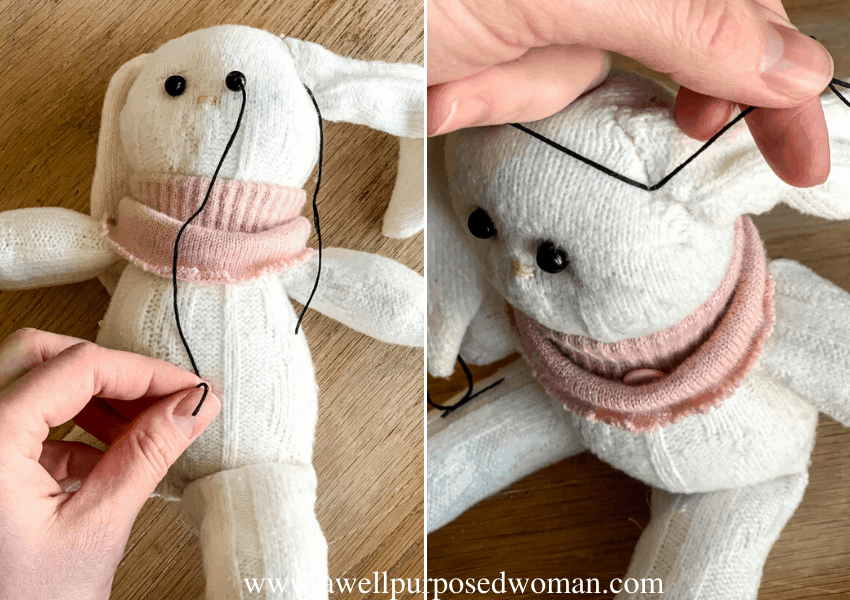
Then I finished by doing embroidering a straight stitch on the Easter bunny’s nose. And here’s my little snugly Easter bunny with his basket of carrots!
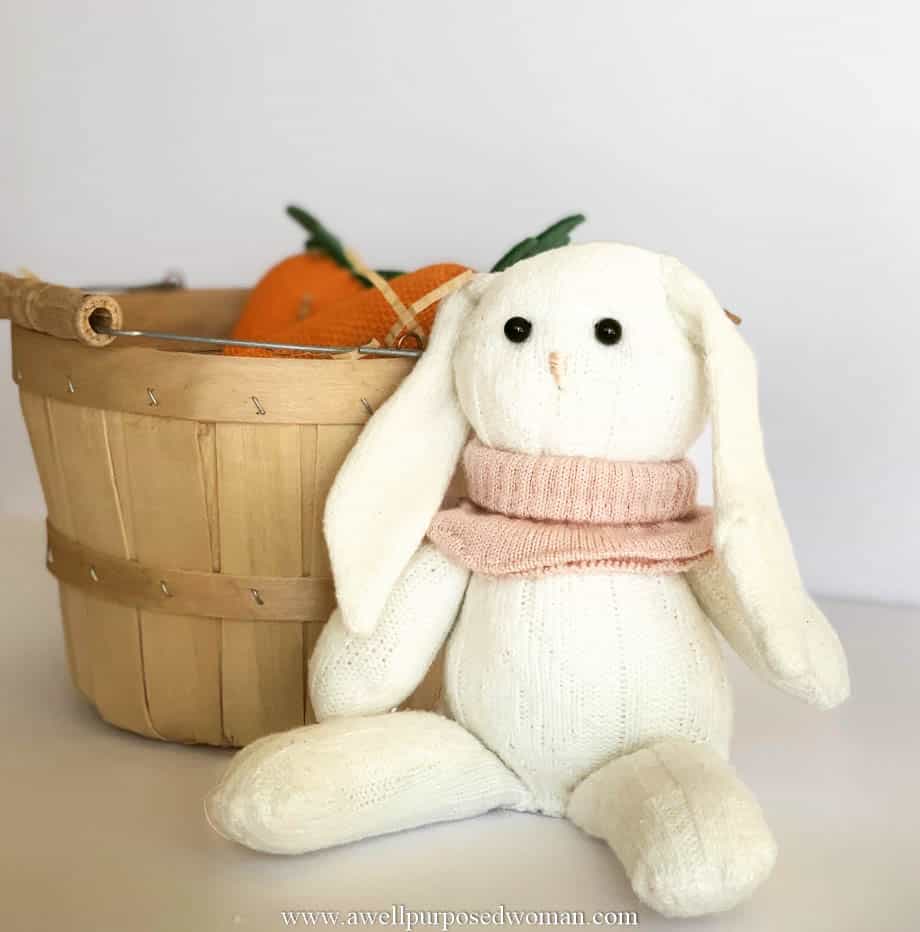
Although this bunny already belongs to a little girl. She agreed to let me put the bunny up with our Easter decorations for a few days. What do you think? Overall I was pleased with this little bunny and how you can make such a cute little Easter bunny from a pair of socks!

Thrifty Thursday Blog Link-Up
Today I have the privilege of linking up with other DIY bloggers for Thrifty Thursday. Where we take something from a thrift store or is re-purposing to make something new or improved. So please take a few minutes to check out these talented ladies’ posts today as well! 🙂
Practical Whimsy Designs– How to paint Ceramic Bronze Pots
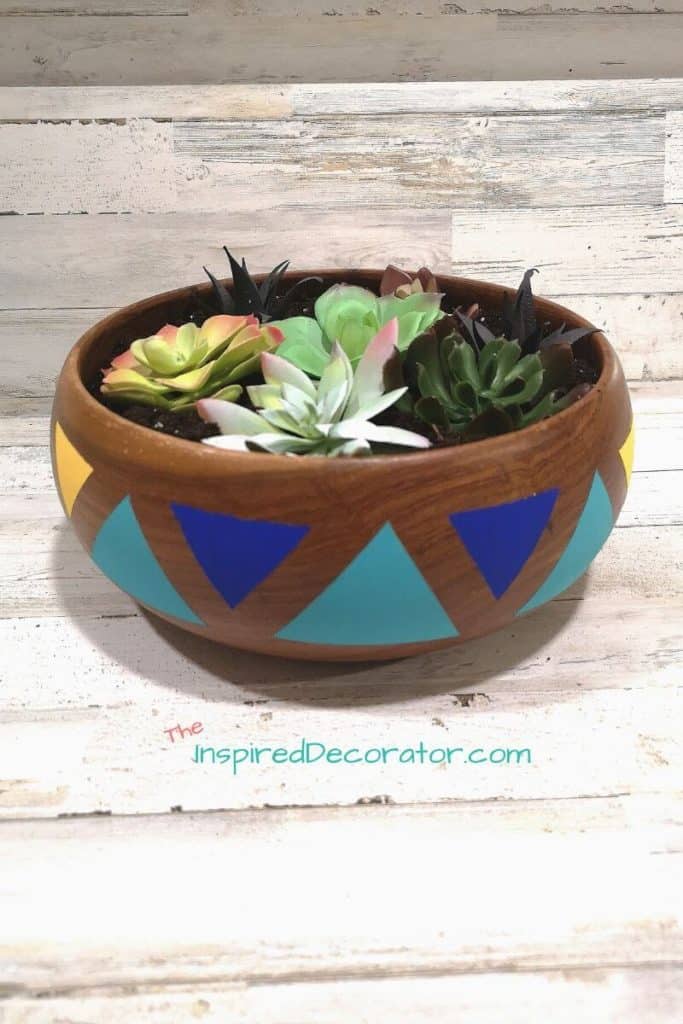
The Inspired Decorator-Wood Bowl Succulent Planter
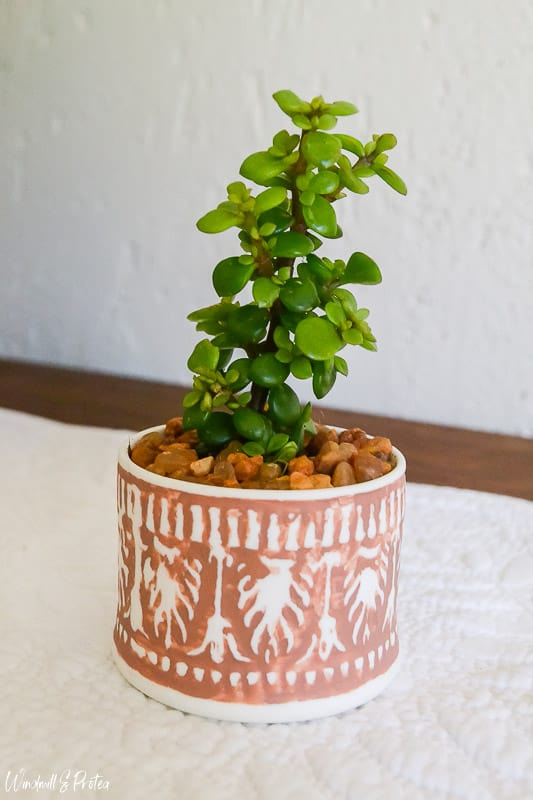
Widmill & Protea- DIY Boho Terracotta Planter
The Lived-In Look– One Minute Dollar Tree Decor
Thanks for visiting our sites today! Take care and I hope some of these projects inspire you to consider crafting during this uncertain time. It’s a nice break from everything we are seeing in the news these day!
That’s it for now!
God bless,

P.S. No time now? Just pin how to make a Easter bunny out of old socks for later!
You are one talented person! Holy smokes! Your blog is very impressive. This little sock bunny melted my heart. I am going to try to make this next year and put them in Easter baskets. Thank you for sharing.
Hi Anna! Thanks so much! I feel the same way about you. I was thinking we should do some projects and colloborate! Thanks so much. They are pretty simple and super inexpensive. Let me know how it goes! Thanks for stopping by! Elizabeth
This sock bunny is adorable and so easy to make. Thank you for sharing instructions as well as photos, makes it so much easier to follow. I am going to make a few of these. My children are grown adults but they will love to have one. Thank you again for sharing your beautiful craft.
Hi Cheryl! You are welcome. Thanks for reading and Happy Crafting! Elizabeth
This is absolutely adorable Elizabeth! Thanks so much for the instructions, I think I have the perfect socks for this little bunny!
Thanks so much Martina! Yay! can’t wait to see what you come up with 🙂 Elizabeth
This bunny is so cute! What a fun idea and what a great DIY gift for Easter or a little one.
Thanks Erin! Elizabeth
I love this little bunny Elizabeth! They would work great as first for baby showers too! You are always so creative with your sock projects!
Thanks Junette!! What a great idea with the baby shower. I love that! Elizabeth
So cute, what a great idea!
Thanks Alexis! 🙂 Elizabeth
Thank you Elizabeth for the instructions. I am not crafty but want to try making this cute bunny 🐇
Laura Wright. I also love your site.
Thanks Laura! Let me know if you have any questions. If you want to do a sample on an old pair of socks that isn’t your final copy that might work well too. Thanks for visiting! Elizabeth