Disclosure: This post contains affiliate links.
Have you ever wanted to re-upholster an old chair, but get stuck on things like how to sew upholstery piping? Well it’s time to get unstuck. Making upholstery piping doesn’t have to be difficult. Today’s method to sewing upholstery piping is a cinch! And just for the day I am giving you permission to cut corners and still get a fabulous result!
Truly It is so simple! Its exciting to me because it opens up a whole new level of DIY, even with very beginner sewing skills. 🙂 In my tutorial today I do use a sew machine, but you will only need an absolute beginner level of sewing skills for this tutorial. All you need to know is how to sew a seam.
If you are reading this and not sure how to sew a seam. Let me know because I would be very happy to also show you how to do that. I have considered doing a basic sewing series, so let me know if that interests you.
But back to today’s tutorial. If you have been on my site recently you know last week I re-upholstered an old barrel cane chair. I jumped the gun and decided to post the actual makeover before I did any tutorials for the chair. But because I want to not only show you what I did, but also inspire you to do it too, I am taking time this week to make a series of tutorials.
Today we will be learning how to make upholstery piping. It is a super easy project that will inspire you, empower you to diy more and hopefully also save you money.
So here’s what you need to make upholstery piping:
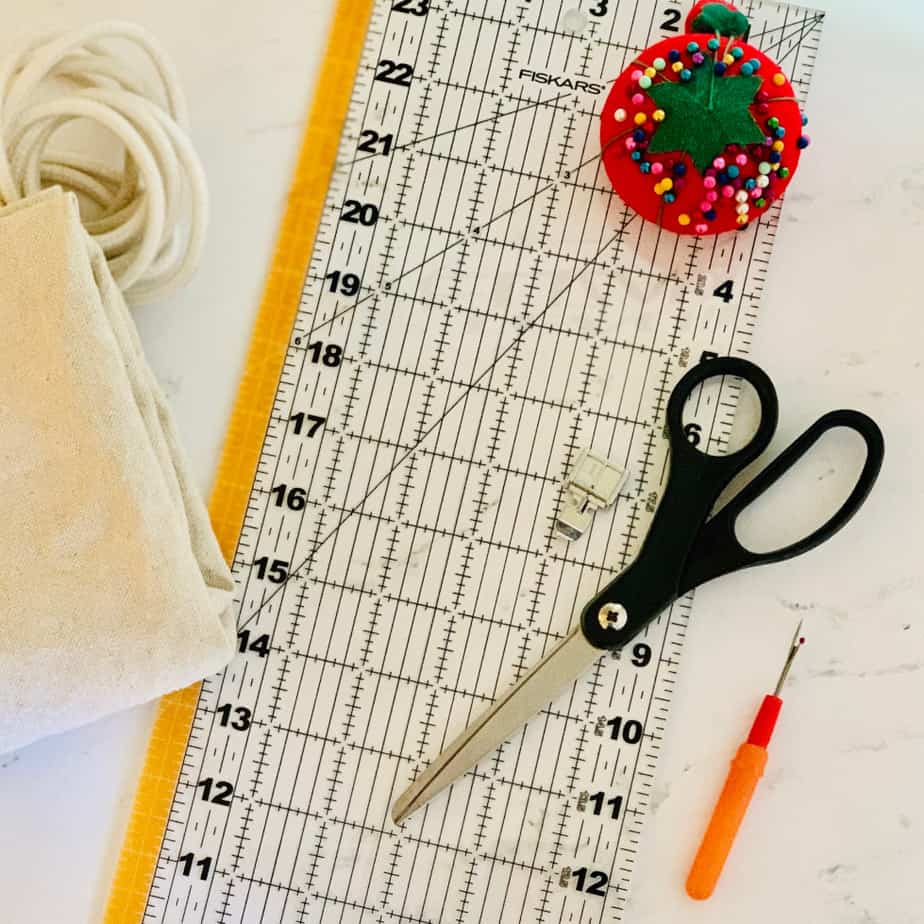
- Sewing Machine with a zipper foot
- Fabric
- Scissors
- Seam ripper
- Upholstery Cording (I used the cording from the old chair in my new chair)
- Pins
Here’s how you make upholstery piping:
1. Measure for how much upholstery piping you need
If you are re-upholstering a chair. The easiest way to do this is to measure the piping you are removing from the chair. Use your seam ripper and remove the cording from the old piping. You can use the length of the old fabric as a pattern for your new piping. Just add 3-5 inches for some wiggle room.

If you are adding piping in places where there wasn’t any before. Just add that length onto your total. Again I always think it’s a good idea to add some extra inches to your total length so add a few onto your total just so you won’t come up short.
2. Cut the fabric for your upholstery piping
Now that you have your measurements. Cut your fabric in 2″ strips by the length you measured. You need the fabric to be wide enough to create a seam around your cording and also have some edging left once the seam is sewn. 2″ was more than enough for my project.
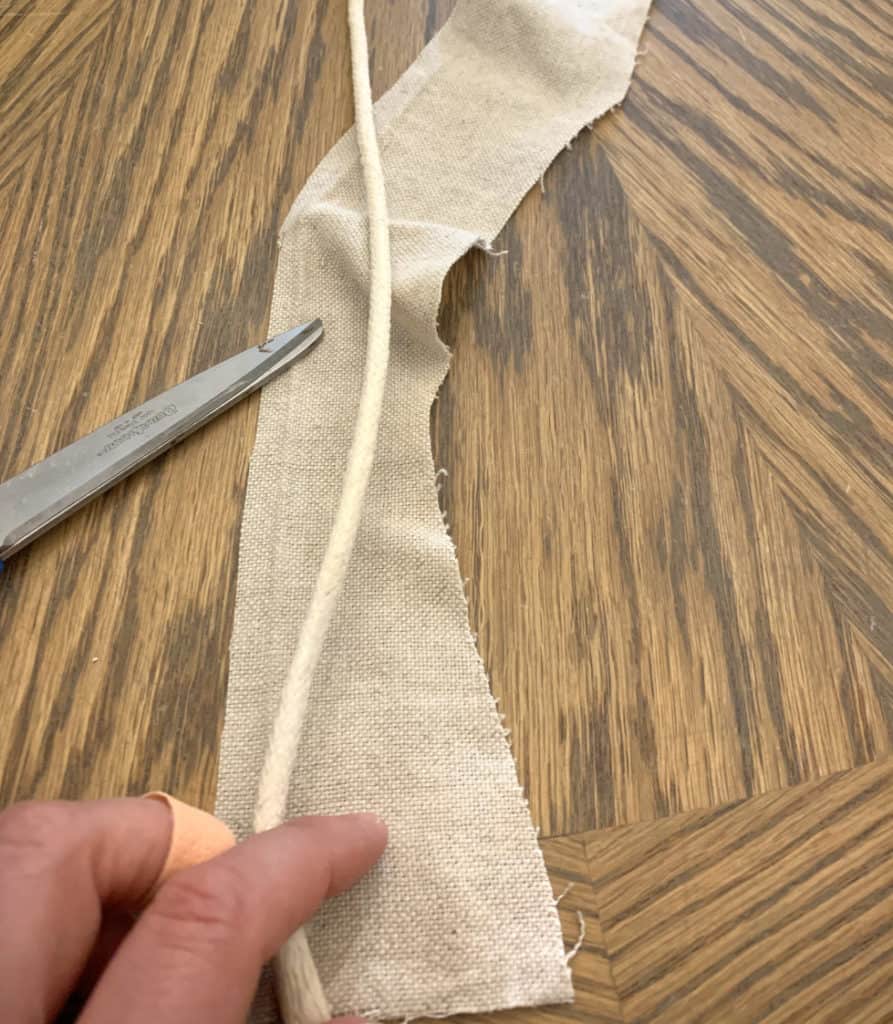
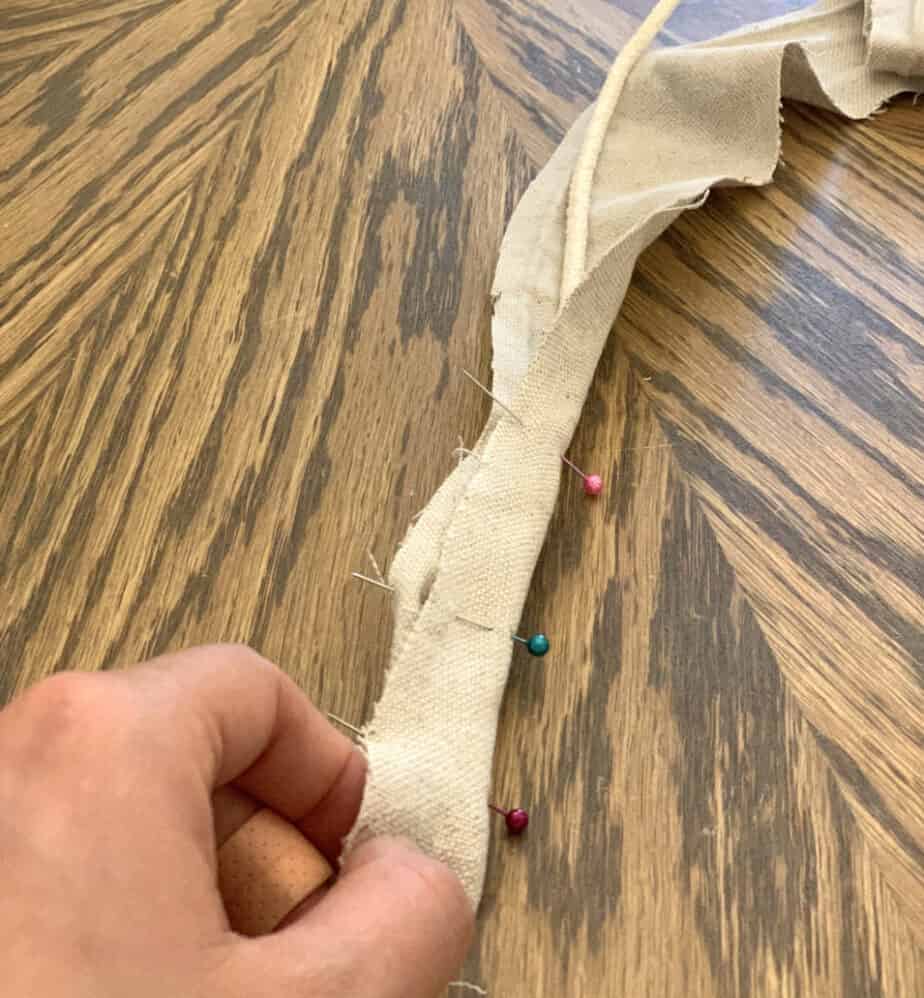
3. Pin the fabric around the piping cord
Now that your fabric is cut into two inch strips. Pin the fabric around the cording.
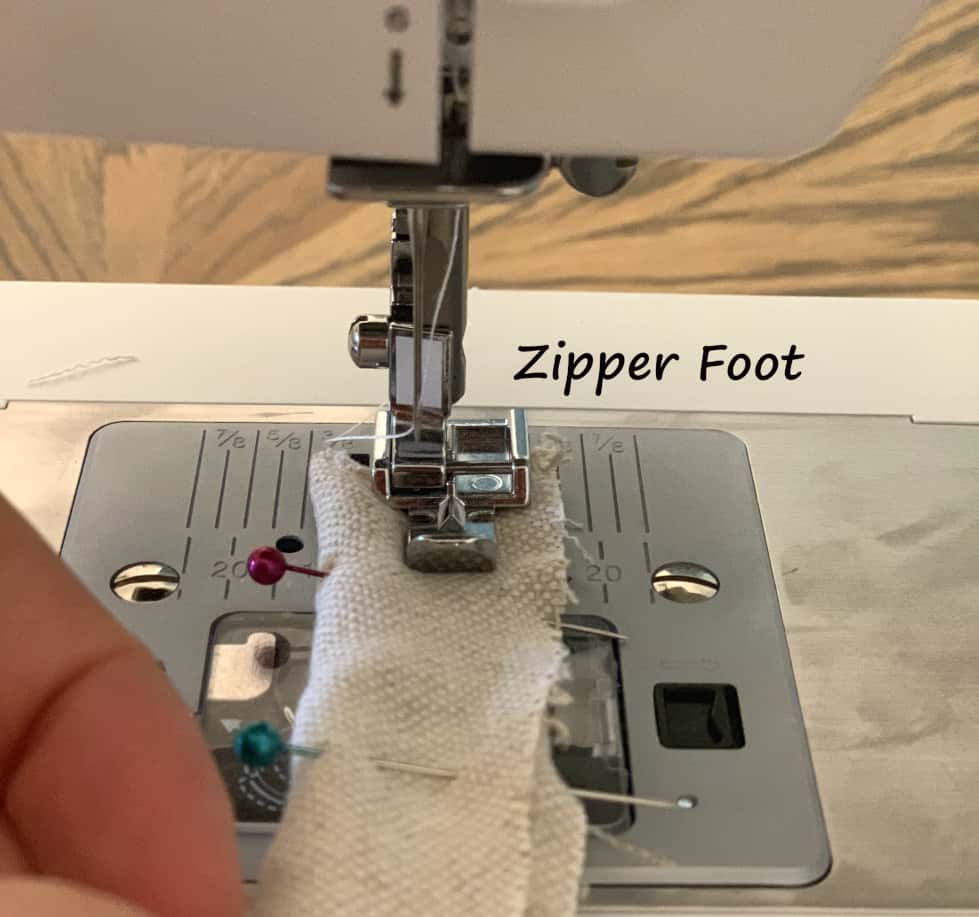
4. Sew around piping cord with a zipper foot
You will need to be able to sew closer to the cording than the presser foot allows. Switch the presser foot in your sewing machine for the zipper foot. Sew a seam along the cording.
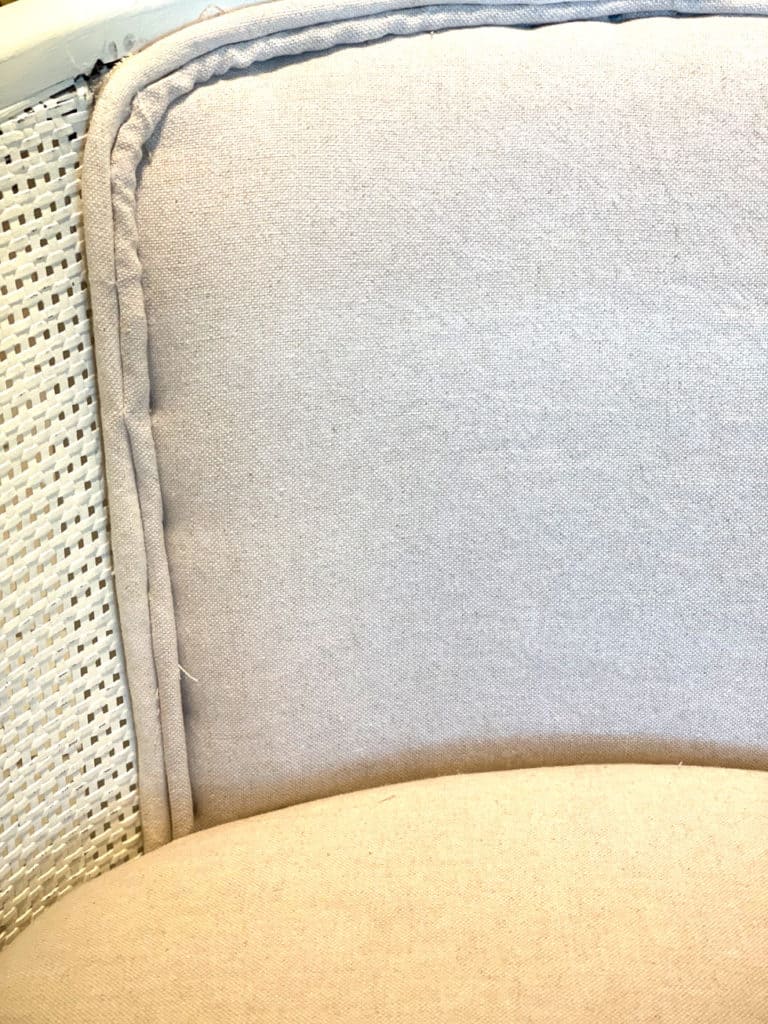
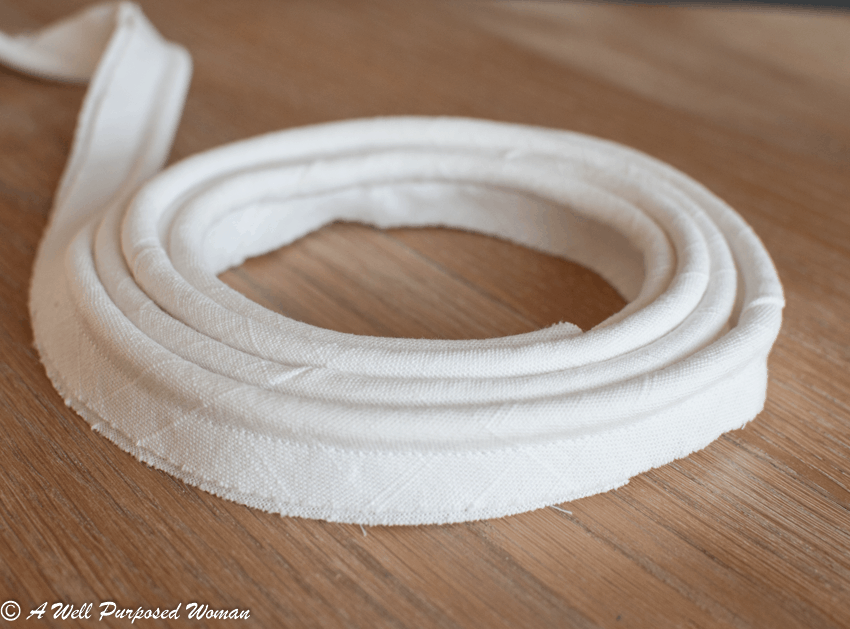
Once you sew a seam along the cording you are done with making your upholstery piping. You will not want to trim your piping until you place it onto your chair. With my chair there was a grove in the back of the chair where the piping was pushed into.
5. Attach the upholstery piping to your chair.
Unfortunately, I didn’t get a lot of pictures of the next steps because I was ready to be done with the chair at this point 🙂 But take your piping and re-attach it to the chair in the same places that you removed it. You can use a staple gun or a hot glue gun to attach the piping. For my project I used a staple gun for the seat and a glue gun for the back.
Re-attaching the upholstery piping to the back was probably the hardest part of re-doing this chair. This was primarily because I ended up using tacks in the back of the chair and they sat lower than the staples did previously. I created a double welt of the piping to accommodate for this difference. I did this by following the tutorial again and then sewing the two cords together.
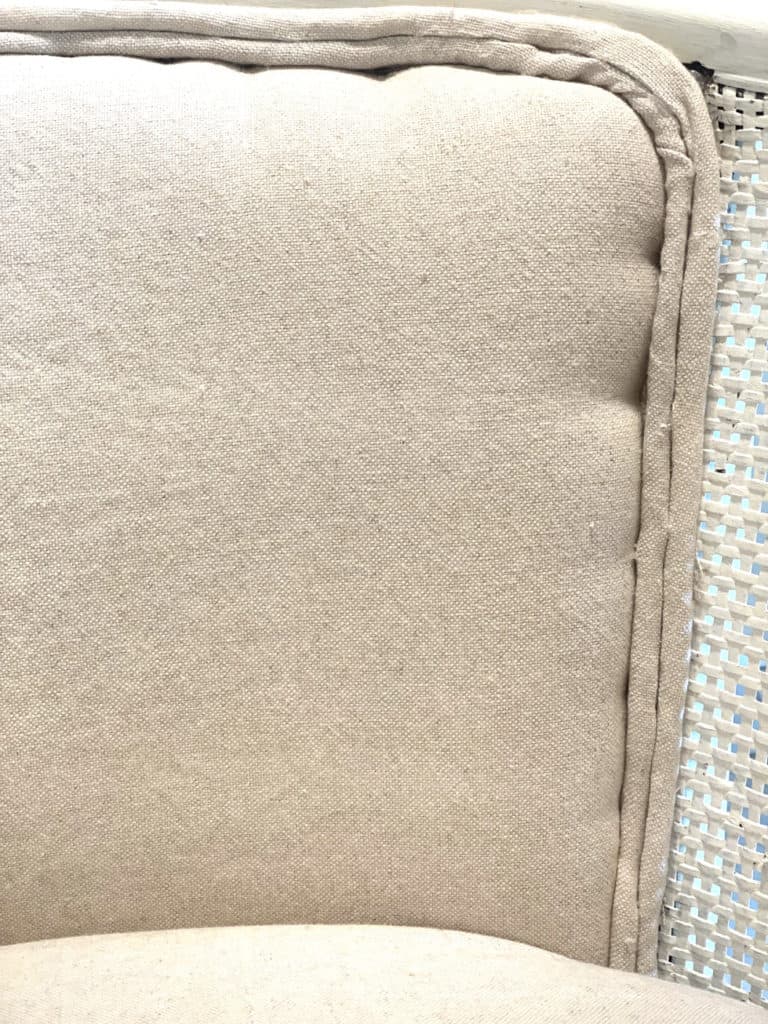
Here’s a close up of what the double welt piping looks like. And that’s it, your upholstery piping is complete! I hope you feel like this is totally doable now and that you are no longer afraid to get started on that chair you have been stuck on! If I can do it, you can too! And really the only way to get better is to start!
So if you are ready to get started. Start at the beginning of this tutorial series and get to work removing that fabric! Also if you are curious to see the final result of the chair checkout the full makeover here.
If you would rather sew piping the correct way which still isn’t to difficult check out this tutorial.
Have a great weekend!

Hi everyone,
I truly enjoy your work and your site is very interesting.
I have to appreciate your work and efforts . It is incredible.
King regards,
Thompson Valenzuela
Sure!
If you cut you fabric on the bias, it won’t bunch around the corners. Smooth all around!
Hi Kathy, thanks for stopping by! Guess what my post is today? So crazy you just posted this…making piping by cutting fabric on the bias. I didn’t have much trouble with the corners on the small project I did, but I definitely wanted more flexible corners with today’s project! Stop back later today and let me know what you think of the new post. Come again!