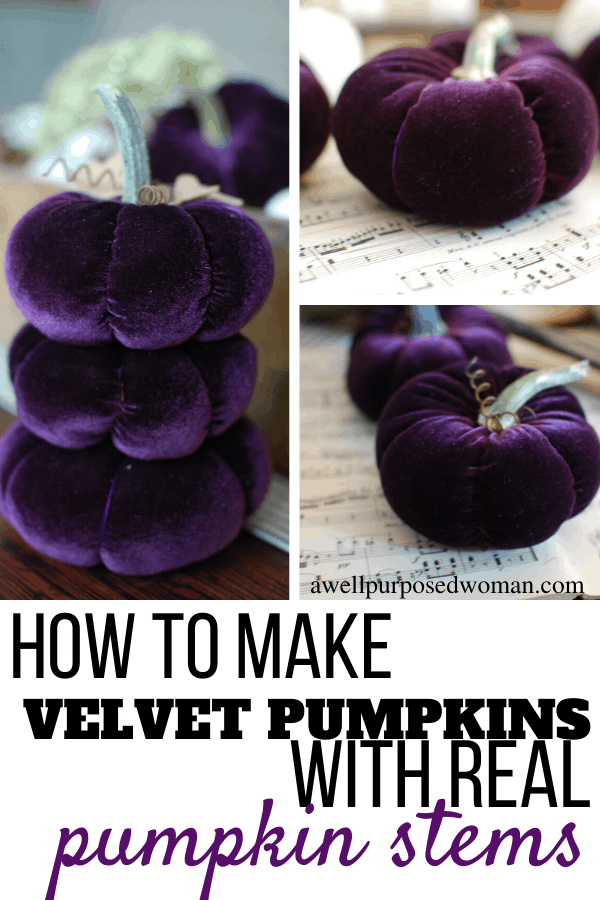
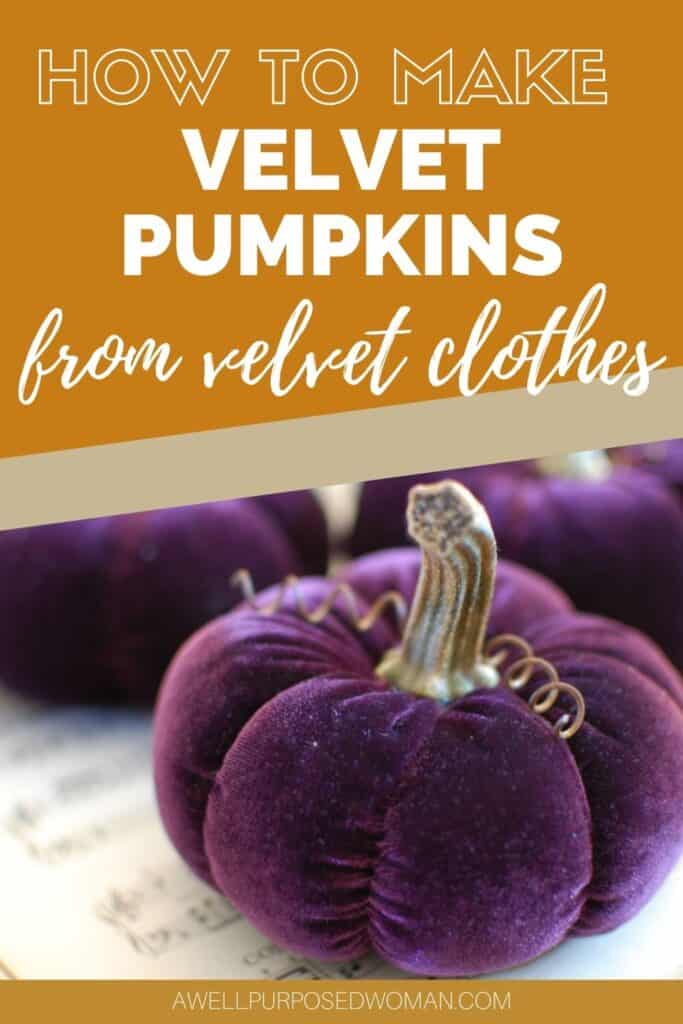
Learn how to make velvet pumpkins the easy way. Velvet pumpkins are a beautiful decoration for fall. This tutorial will show you step by step how to make velvet pumpkins with real pumpkin stems.
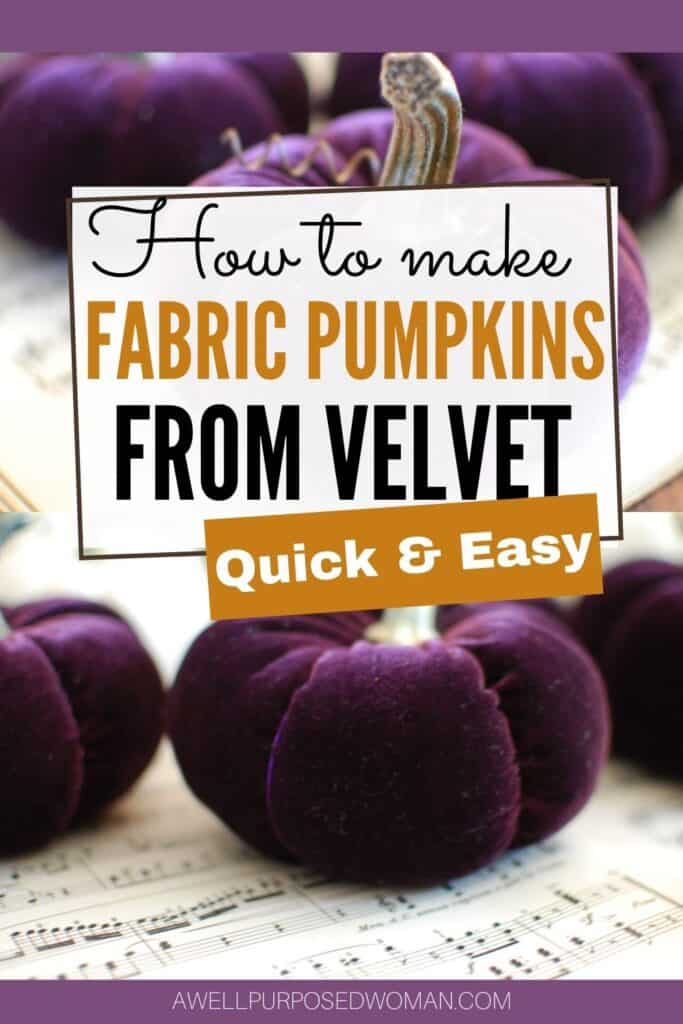
You may have seen a lot of tutorials on how to make velvet pumpkins all over lately. There are a lot of tutorials out there but I have noticed that most of them use the same technique. Although I really like them, you end up with a pumpkin that is bunched around the stem but doesn’t have cute little sections that give it that characteristic pumpkin look.
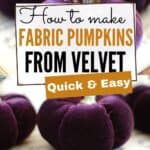
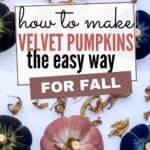
In this tutorial I want to show you a slightly different way to make velvet pumpkins with sections in them. Like these ones below.
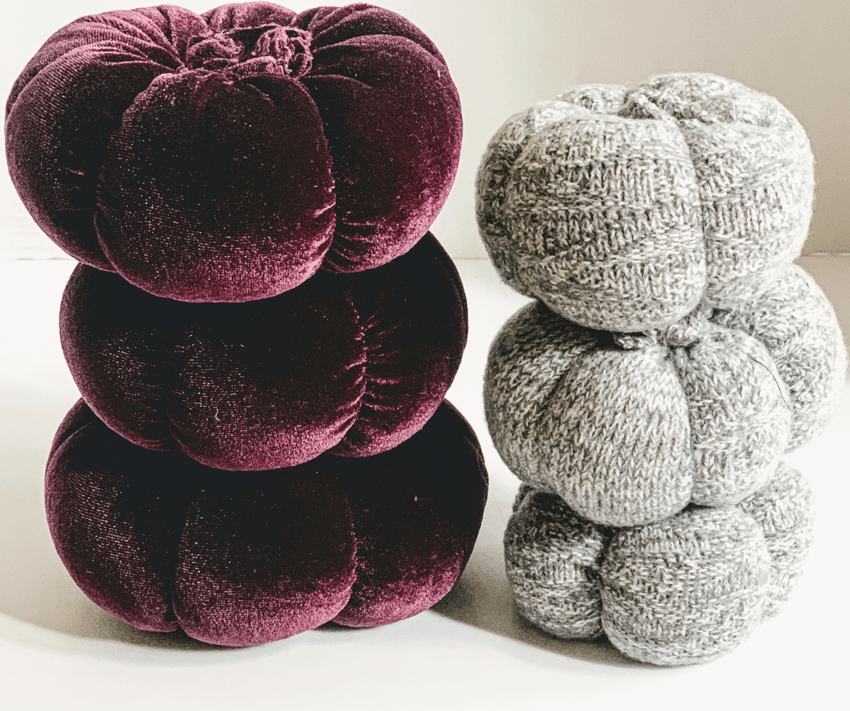
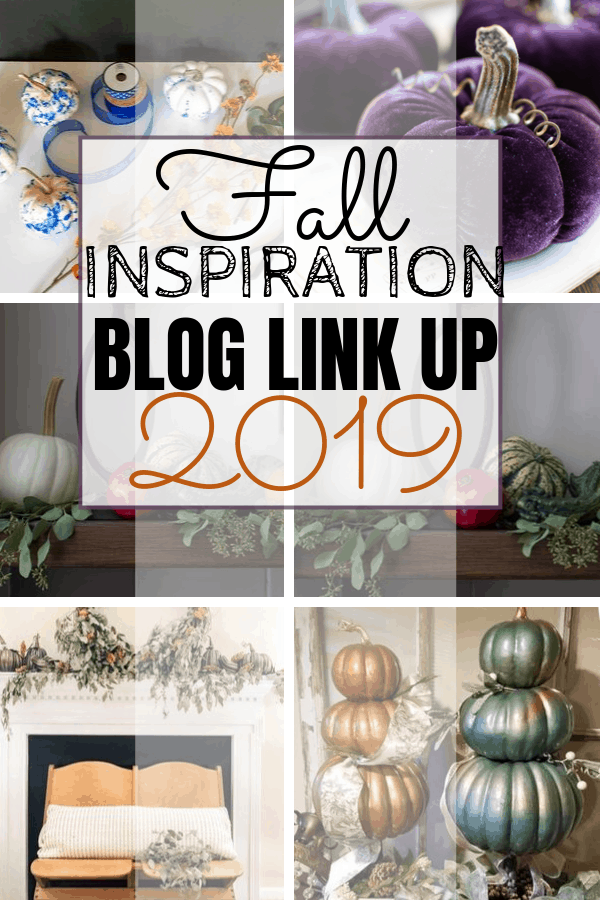
It is actually the exact same technique I used for the sock pumpkins and the sweater pumpkins. But since the Miss Mustard Seed Mentoring group I am a part of wanted to do a Fall Inspiration theme for our link up today. I thought I would just go ahead and make a tutorial specifically for how to make velvet pumpkins with sections. I used an old skirt I found at a thrift store.

Since June I have been participating in this mentorship program with Miss Mustard Seed. It has been exceptional and such a treat learning from such amazing women! If you are not familiar with Miss Mustard Seed you can check out my interview with her. But one of the best parts of the group is getting to meet other creatives who are blogging or other creative businesses. I have links to the other four women’s sites and posts at the end of this post. So please be sure to check out their sites!
But without further delay here’s how to make cute little velvet pumpkins with sections from an old skirt.
This post contains affiliate links, which means if items are purchased through the link I receive a small compensation, without an extra charge to you.
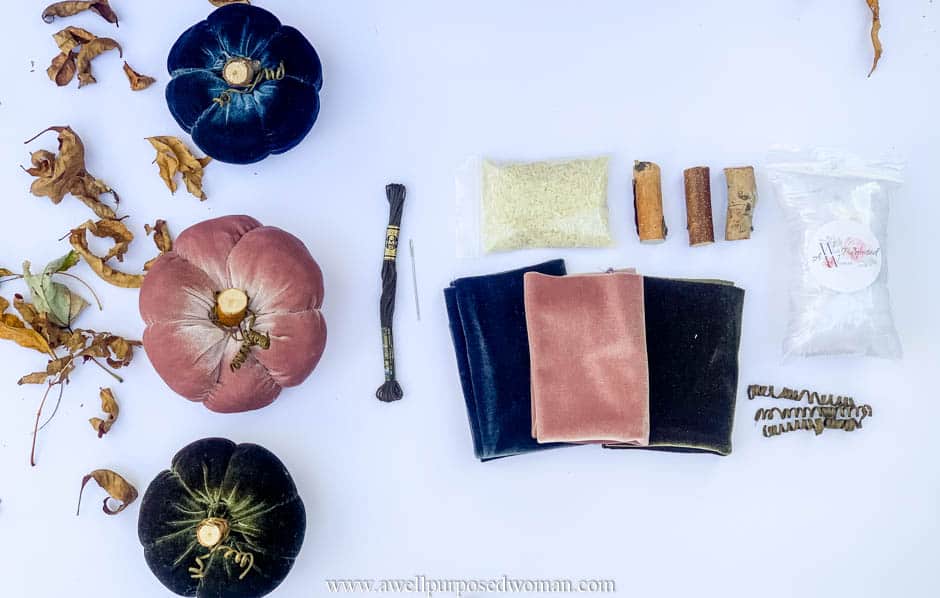
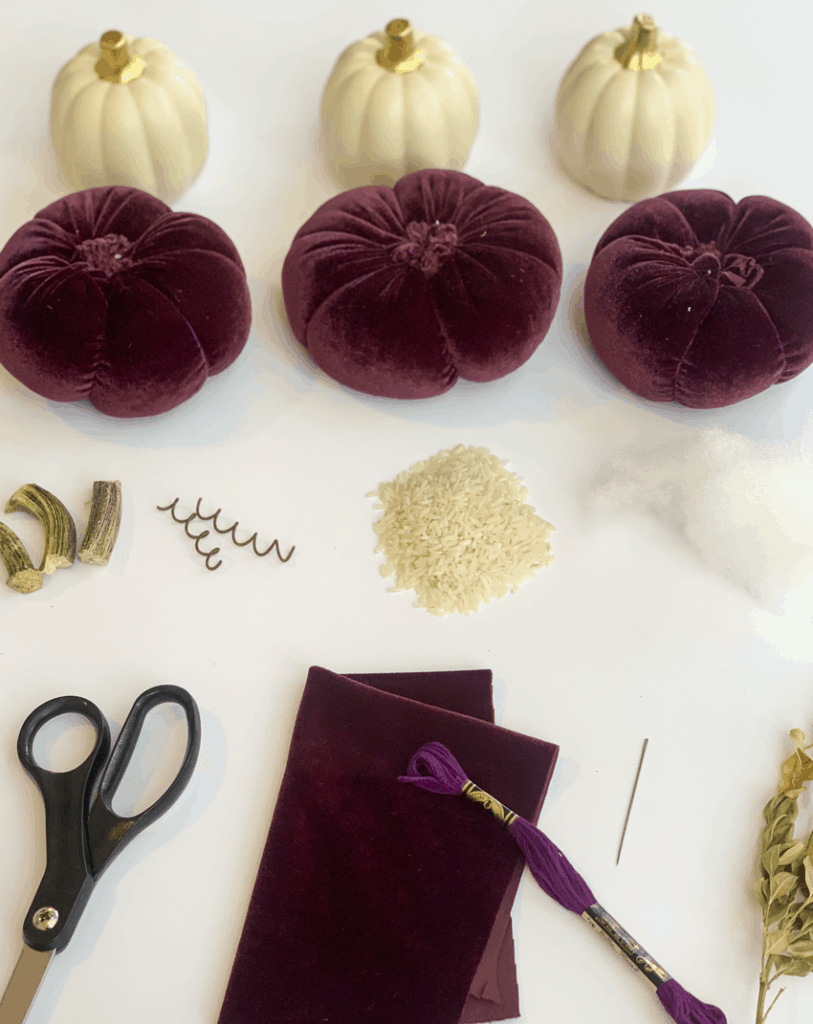
Here’s the supplies you will need to make velvet pumpkins:
- Free Pumpkin Guide
- Velvet(I used an old dress) Each pumpkin requires a 13″ x 7″ piece.
- Embroidery floss or dental floss also works. Try to match or compliment the colors of your fabric.
- Needle with a large eye
- Polyfil Stuffing
- Rice (optional)
- Pumpkin stem or small twig, felt for leaves (optional), paper covered wire (optional)
- Hot glue gun and glue sticks
If you prefer to purchase a velvet pumpkin kit:
Update: If you have found finding the right velvet to use a little bit tricky. I have added complete velvet pumpkin making kits to my shop. No searching for the right velvet. This way you have everything you need in one place.
Here’s how you make velvet pumpkins:
Step 1: Cut a piece of the velvet.
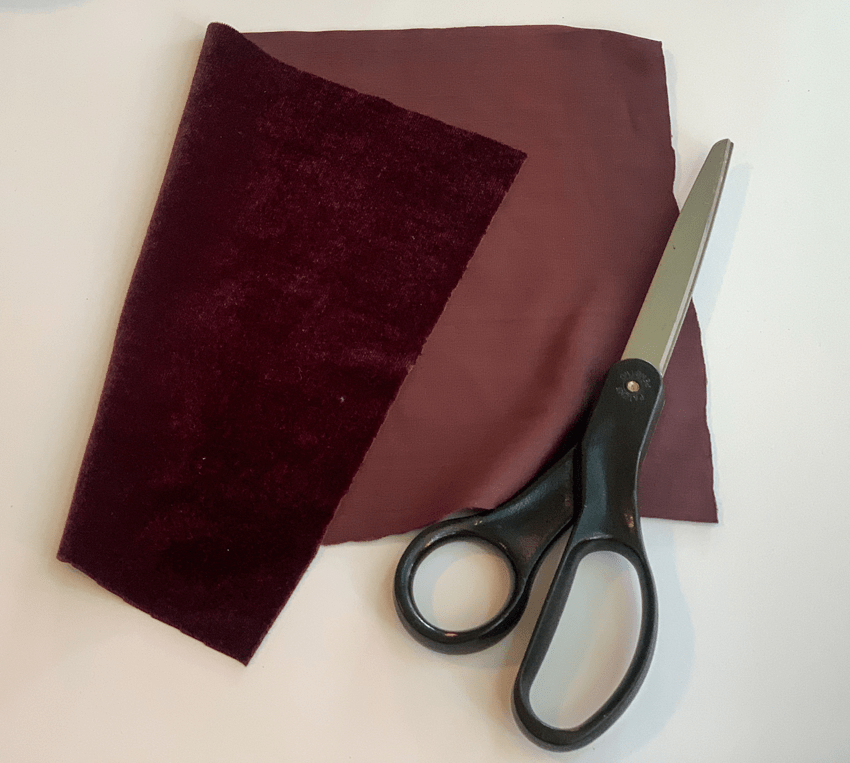
You will cut a 13″x7″ piece of velvet to make these little pumpkins. You can vary the sizes of your pumpkins. If you want a larger one I would just double the size and so on.
Step 2: Fold your velvet in half.
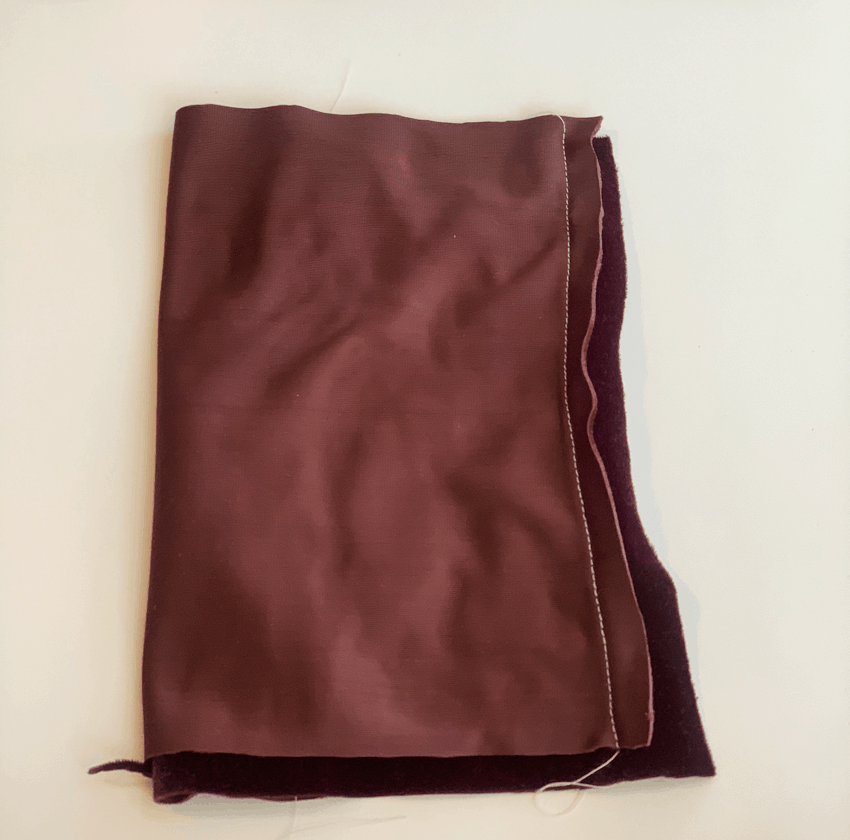
Taking your velvet. Fold your velvet in half. Sew a seam to close up the long side of your velvet. Now both of your long sides should be closed and you will have a tube of velvet.
Tip: If you want to avoid using a sewing machine or don’t know how to sew with a machine you can also hot glue this edge.
Step 3: Use your floss and close up the bottom side of the velvet tube
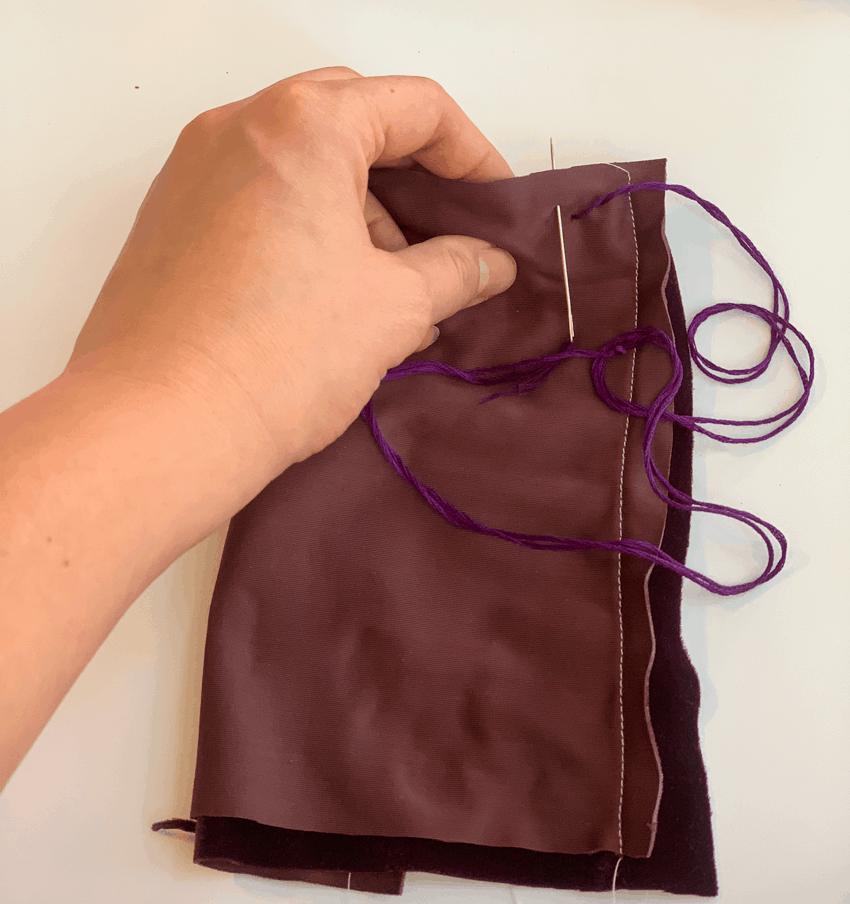
Keeping the velvet tube inside out, use the needle and thread to sew up the bottom of the tube with your floss.
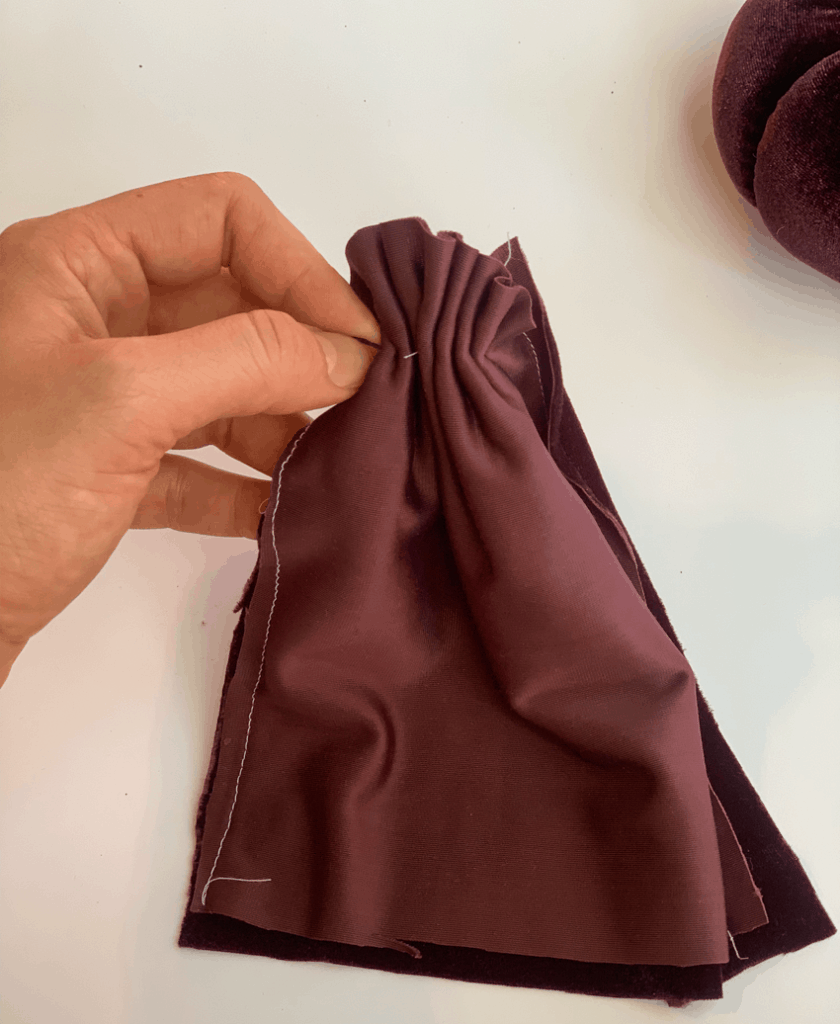
Pull the seam tight so it is bunched together. Sew a few more stitches through the center of the bunch. You basically want your fabric to be bunched as tightly as possible. This is going to be the bottom of your pumpkin.
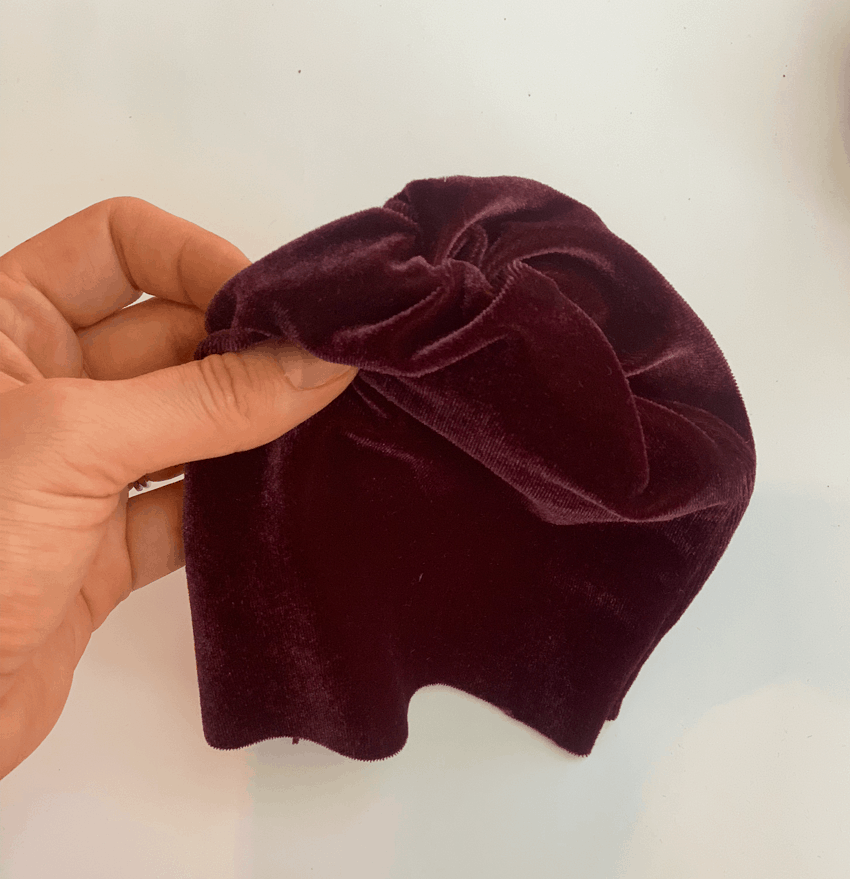
Then turn your fabric right side up.
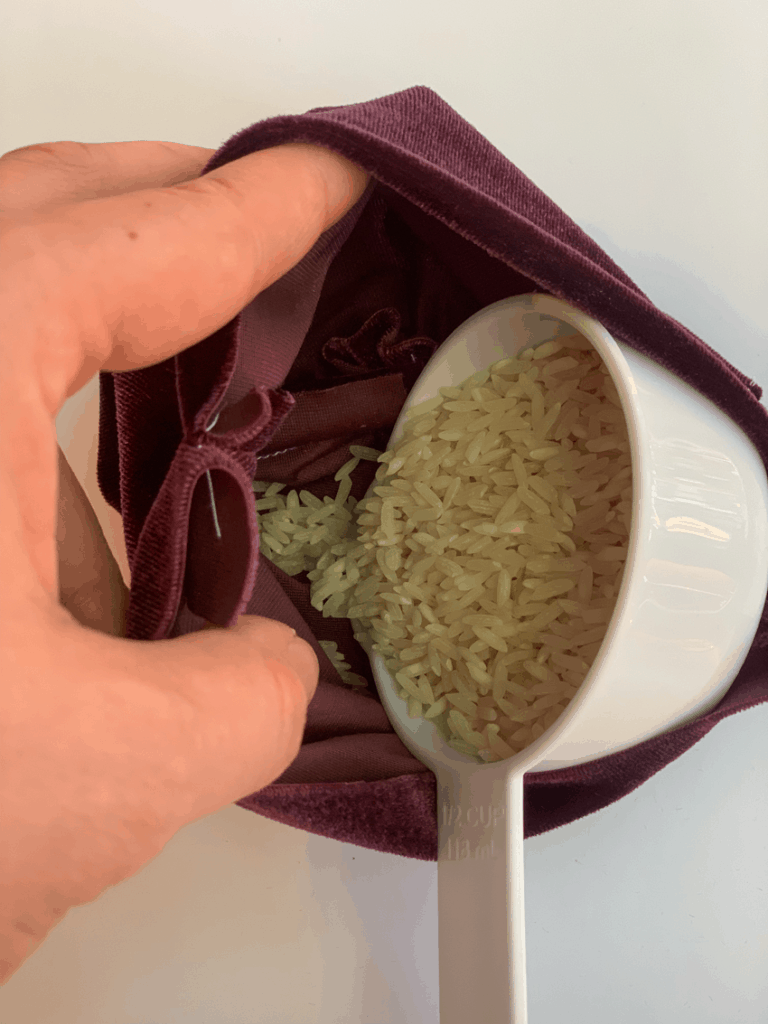
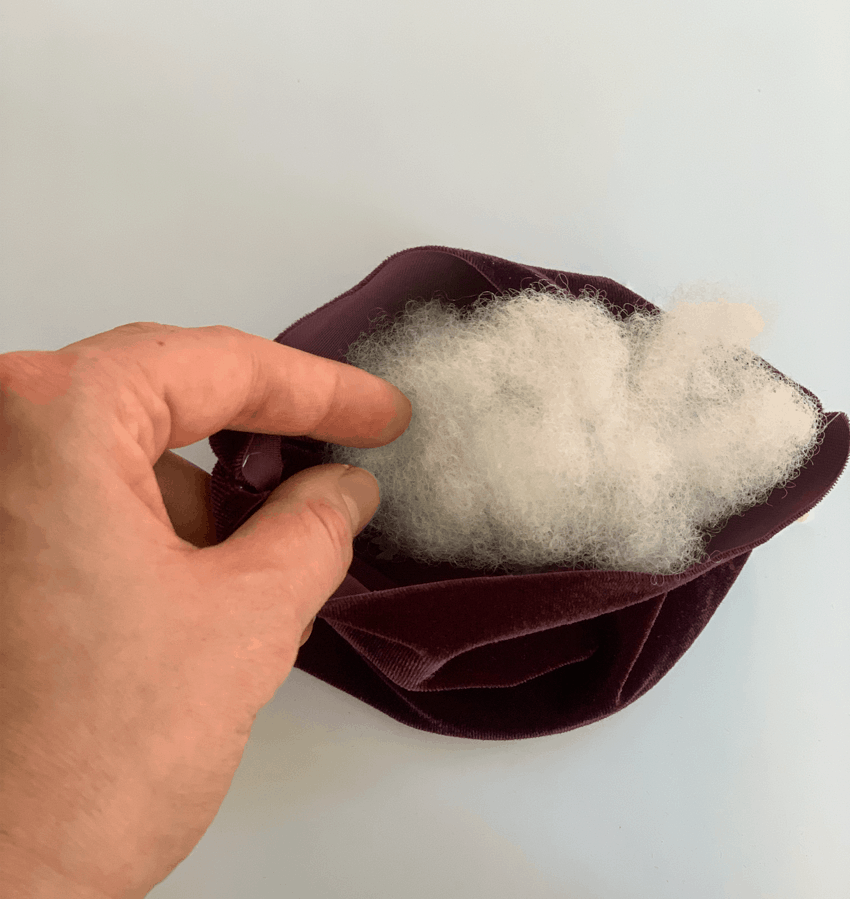
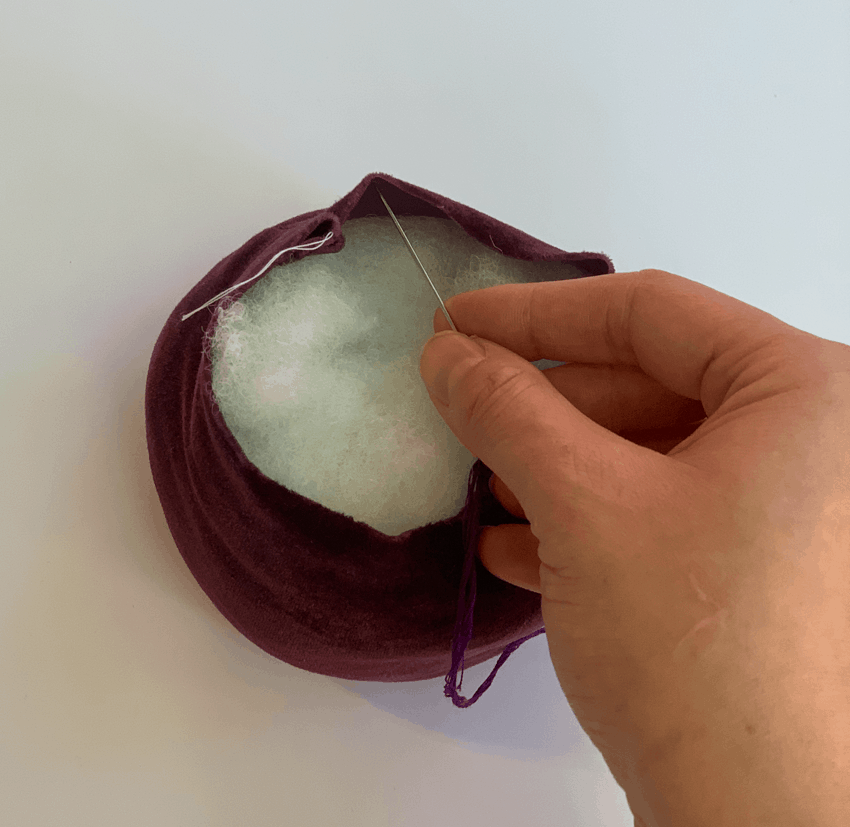
Step 4: Stuff your fabric pumpkin with rice and poly-fil
Now it’s time to fill your pumpkin. I like to use about 1/2 cup of rice in the bottom of the pumpkin for some extra weight.
Then I fill the rest of the pumpkin with Poly-fil. I like to make a plump pumpkin. Just stuff it to your liking.
Step 5: Stitch the top of your fabric pumpkin to close it.
With 12″ of embroidery floss, stitch around the top of your pumpkin. Then pull the embroidery floss tight to close your pumpkin. Stitch through the center a few more times to make sure your pumpkin is nice and secure.
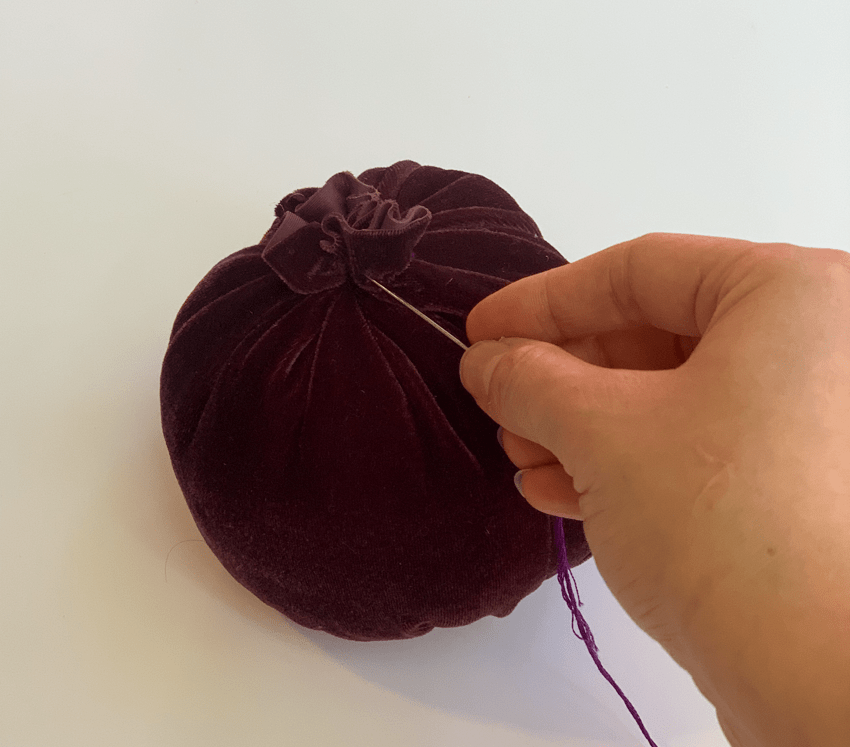
Cut off any extra fabric above the seam you have just sewed. But do not cut or tie off your embroidery floss.
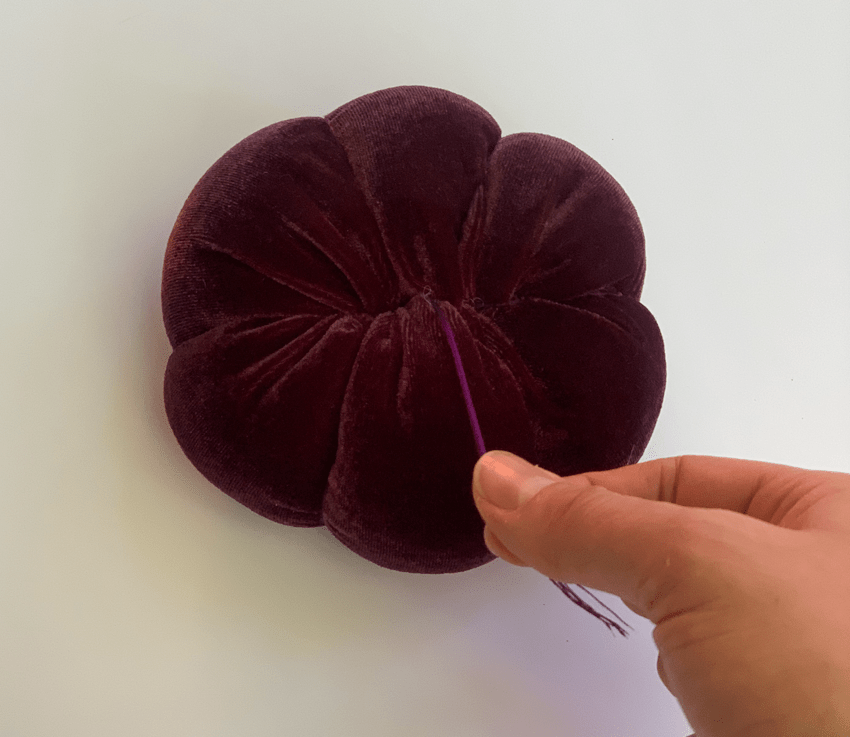
Step 5: Create sections with the embroidery floss.
Now here’s where you will make the sections in your pumpkin. Take the embroidery floss and go through the center of the pumpkin. Divide your pumpkin into sections by bringing your floss through the center of the pumpkin and then around the pumpkin, making six sections.

When you make the last section pull the floss tight and tie it on the underside of the pumpkin.
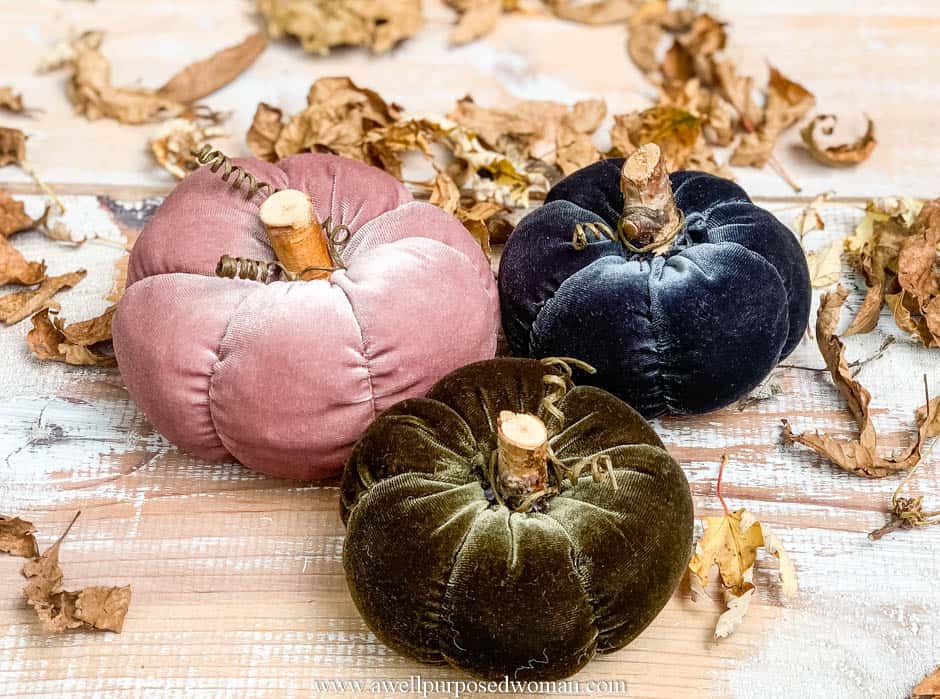
Step 6: Glue on your stem, leaves, or other accessories
The final step is to use your hot glue and attach your stem and leaves. You can dry out pumpkin stems within 24 hours using this method.

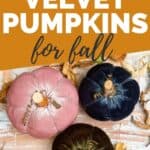
Velvet pumpkins are exquisite and I think creating sections makes them look even more elegant. Here are a couple of the other pumpkins I made with some branch stems instead of real stems. As you can see these look lovely as well!
I hope you will try this tutorial and let me know what you think. Last week I did a post on how to style these velvet pumpkins in a planter box for fall. Please remember to check out the blogs and posts below! Also if you liked it don’t forget to pin it for later!
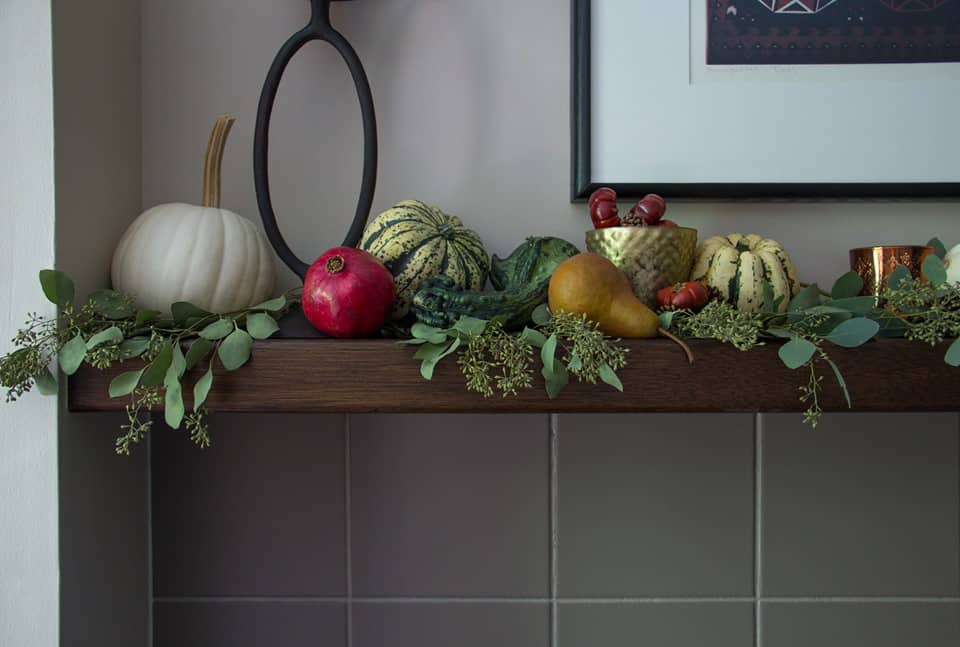
Aesthetic Interiors: Fall Inspiration: Fall Fireplace Decor
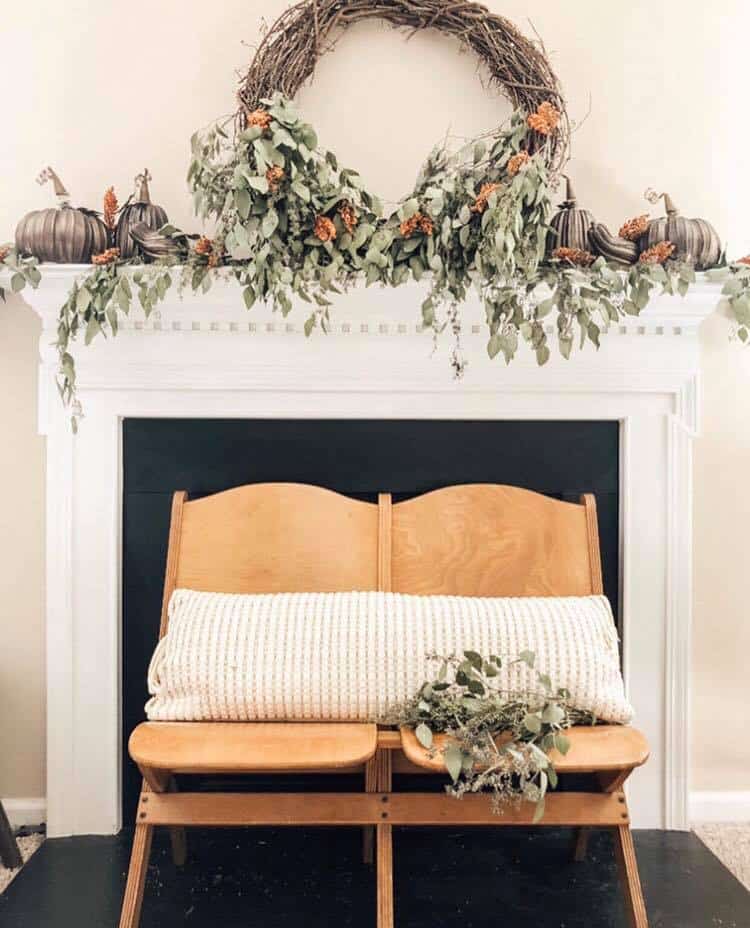
Positively Purvis: Fall Inspiration: Update to Fresh Eucalyptus Wreath & Garland
The Lemon Tree Home by Julie: Fall Inspiration: Blue & White Pumpkins

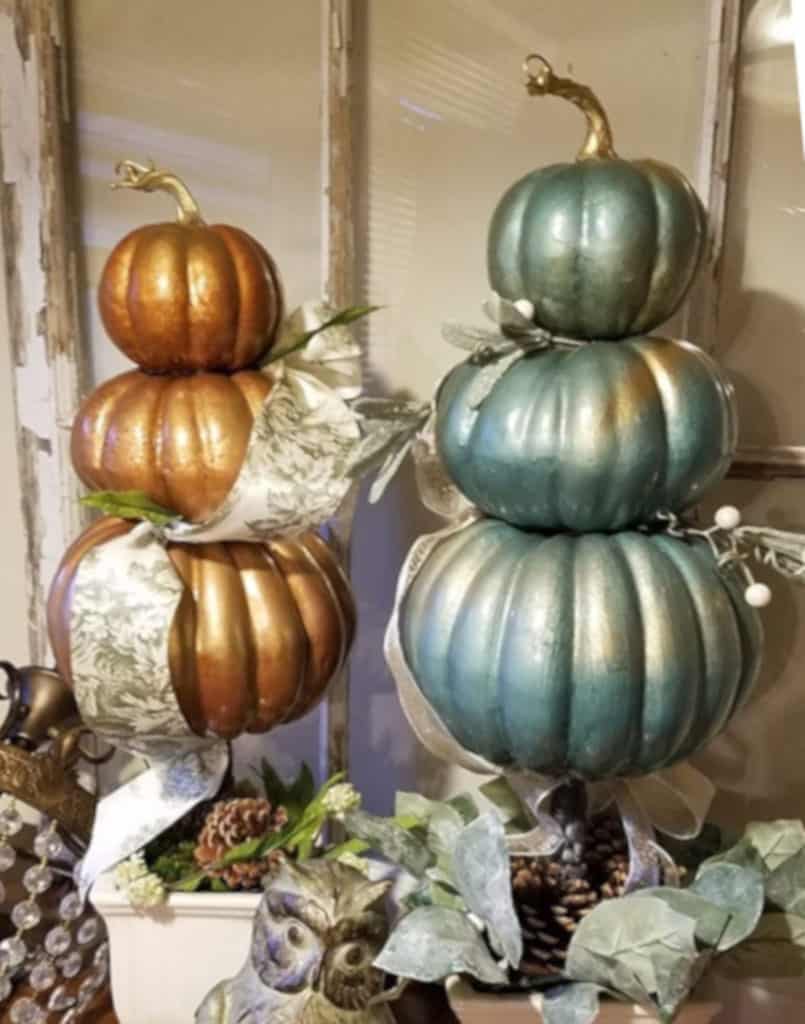
Loverly Cottage: Gold Kissed Pumpkin Topiary

P.S. Don’t forget to pin for later! 🙂
Hi Elizabeth, I am very pleased with your tutorial I have made them from the circle but the nap changes when you gather the top and they aren’t the same I’m very anxious to try this way. Thank You. Janice
Hi Janice, Yes I have done it that way as well. I think this way will give you a sturdier pumpkin, let me know how they turn out. And thanks for being here! Happy Crafting! Elizabeth
Love making the pumpkins from your kit. They turned out great. Where could I get the stems and curly thinks you had in the kit. I really like that look.
Hi Jacque, I am so glad you loved making the pumpkins from the kit! The curly things are paper covered wire that has been wrapped around a wood dowel to get the spiral effect. The stems were real pumpkin stems. You can see how to dry out stems HERE. Take care, Elizabeth
Love making the pumpkins from your kit. They turned out great. Where could I get the stems and curly thinks you had in the kit. I really like that look.
Enjoyed the tutorial, easy to follow and lovely pumpkins.
Thanks Connie! Thanks for all your support and encouragement! 🙂
Such a great tutorial, Elizabeth! It was very clear and organized and easy to follow! They are so cute! Such a fun project for fall decorating. Great job!
Hey Ellie, thanks so much for stopping by! I hope that we an do the next blog hop together. Hope you and family are doing well, praying for you! Thanks again for stopping!
I enjoyed your tutorial and am enjoying the hop
Thanks so much for stopping by! I love our group!