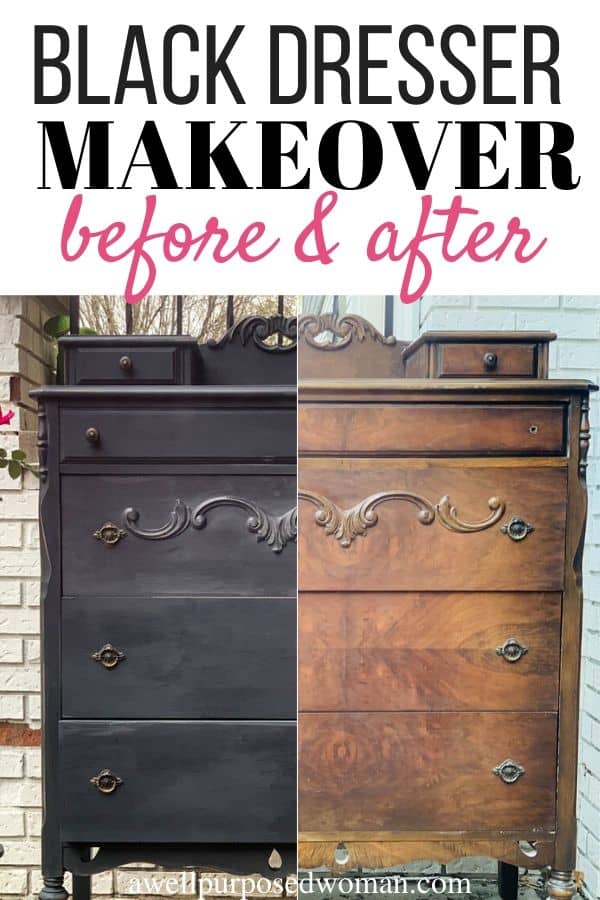
Read about how to paint furniture with black chalk paint. This step by step tutorial will show you how to prepare, paint, distress, wax and seal furniture with black chalk paint. Black chalk paint is easy to use and is very durable.

This series is a two part series on how to paint furniture with black chalk paint. And it all started last summer when we had a garage sale. One of our neighbors saw our garage sale and next thing I knew he was wheeling up an old dresser.
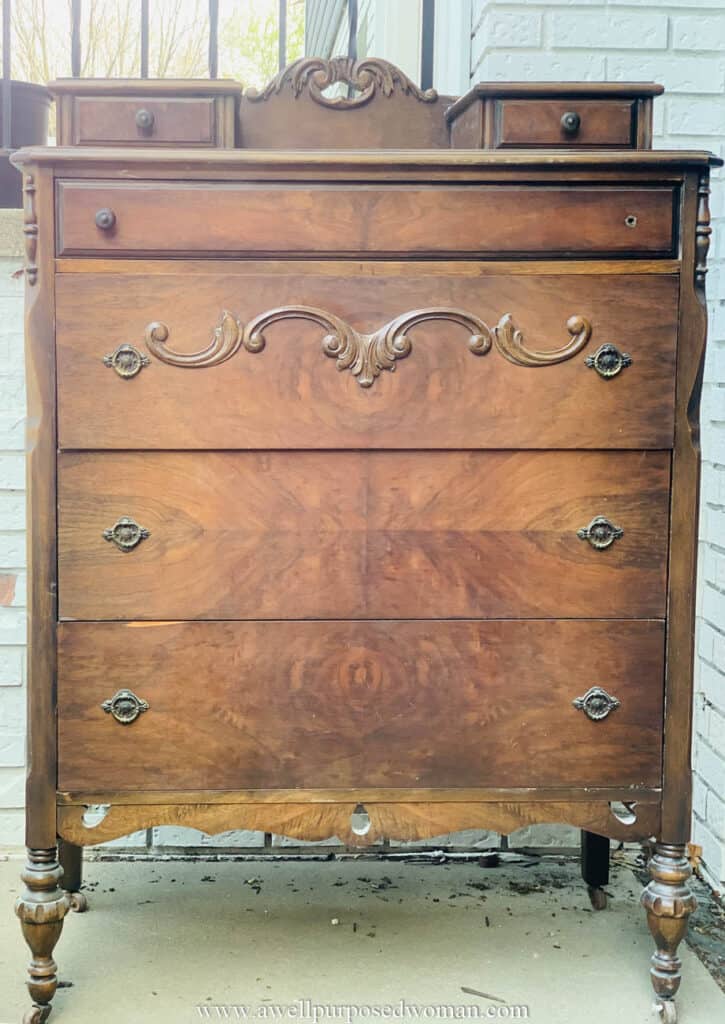
When I saw him rolling up with the dresser my heart leapt! It was beautiful in my eyes and would be an amazing project to do. I wasn’t interested in a dresser myself, but when I see nice pieces of furniture I just get excited! I told him it was a very fun dresser and he should consider re-doing it. He didn’t seem at all interested.
Fortunately, it didn’t sell. Because soon after the sale I talked with his wife (fiance at the time), Brittney, and encouraged her to consider keeping it. She seemed more interested in it, and I told her I would help her re-do it. Luckily she wanted to give it a try!
Well that was about a year ago. Several things happened in between that time. They got married, and renovated the rest of their home. And we had our third child, and let’s not forget about the world pandemic that we are still in! But since it is nice outside now, we got to work on it in their driveway.
So here’s how we prepared this dresser for a black chalk paint makeover. And if you are considering painting your own dresser or piece of furniture with black chalk paint I will give instructions for you to follow along. Also you can download a free guide I created for getting started with chalk painting furniture below.

This post contains affiliate links. Which means I receive a small commission, at no extra charge to you, for sharing the products I used.
Here’s the supplies needed for this black chalk paint dresser makeover:
- Free Chalk Paint Guide
- Rustoleum Charcoal (Black) Chalk Paint
- Bristle brush or Wooster brush
- Wood filler
- Screwdriver (for removing knobs)
- Wash cloth and soap
- Clear Wax
- 100 grit sandpaper (for distressing)
Here’s how we prepped for the black chalk paint dresser makeover:
The best part about using chalk paint is little to no prep is needed. If you have never painted furniture before you may find it hard to believe that it can be so easy. But it truly is that easy! And Brittney was just as surprised as most people, at how easy it is to paint with chalk paint.
Step 1: Removed the hardware from the dresser
One of my favorite things about the original shape of this dresser were the antique knobs and pulls. There was a nice combination of petite knobs on the small upper jewelry drawers and the first drawer and decorative pulls on the other drawers. (I was secretly hoping Brittney would decide to keep these knobs and pulls on the dresser.)
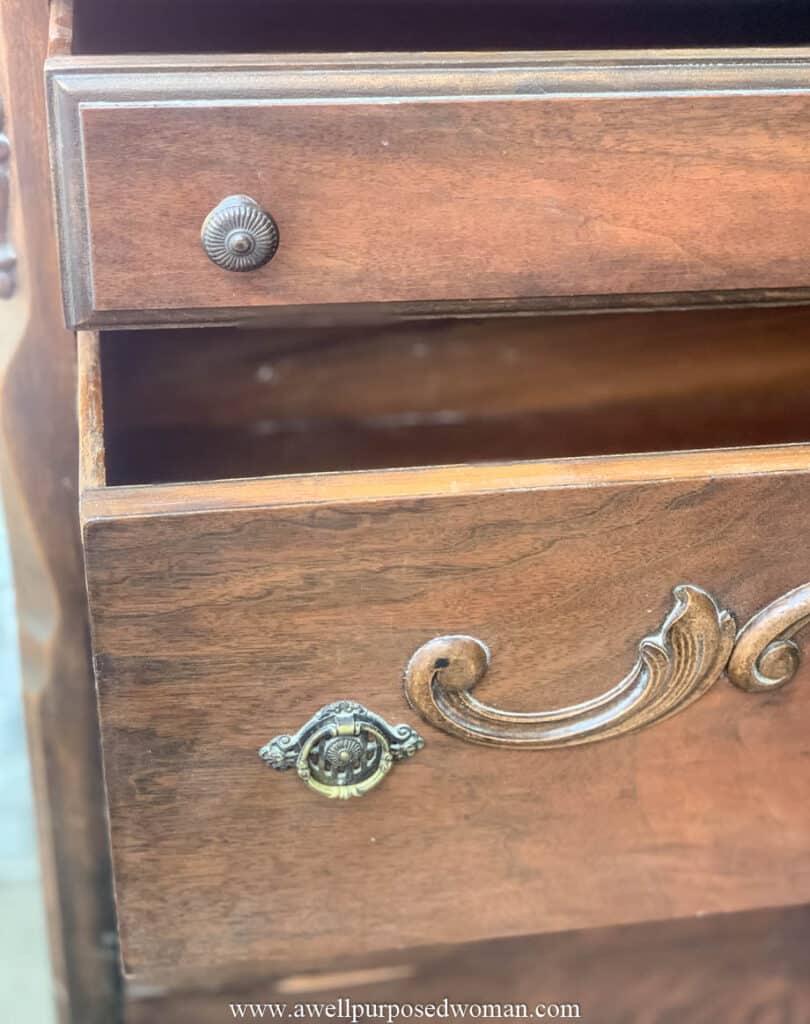
The first thing we did to prep this dresser for its makeover was remove the pulls and knobs with a flat head screw driver.
Step 2: Washed the dresser with soap and water
The first step is to wash the dresser with soap and water. Remove any dirt, dust or gunk from the surface. We washed off some sanding dust and other dirt from the dresser.
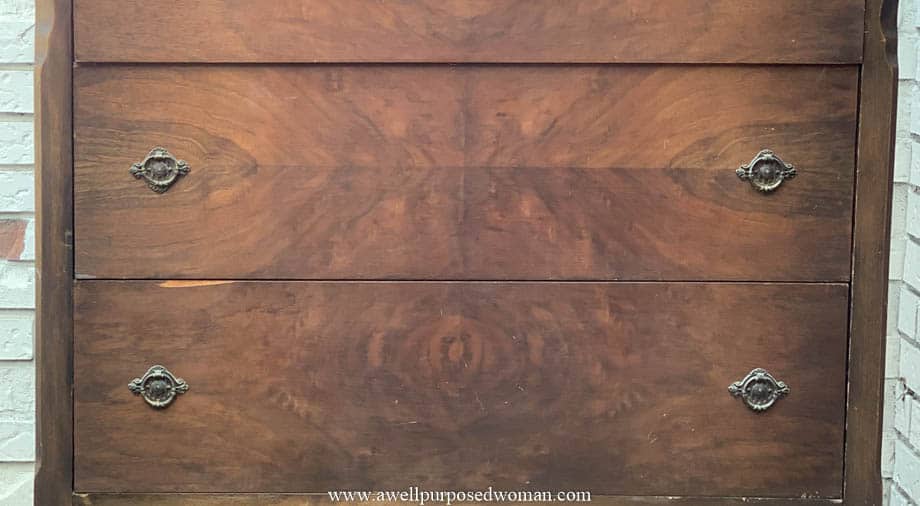
Step 3: Fixed or removed any chipped veneer (optional)
One of the things that made the decision to re-do this dresser a little easier was the chipped veneer. The drawers and long sides of the dresser had some chipping veneer. The easiest way to re-pair chipping veneer is with a wood filler.
You can check out how to repair chipping veneer or totally remove veneer without expensive tools in these posts. If you do not have chipping veneer on your dresser than you can skip this step altogether!
Now the dresser is ready to be chalk painted!
And now this dresser is ready to paint black! Easy peasy! I will show you how we paint the dresser next week. So stay tuned to see how this beauty will be transformed into something extraordinary! If you have a dresser that you would like to re-do than please come along with us.
And if you don’t want to wait until next week to get started, download the free guide. That will guide you through chalk painting for beginners.
Hope you are staying well and have a wonderful weekend!
Check out Part 2 of How to Paint Furniture with Black Chalk Paint for the dresser makeover and tutorial!

P.S. Don’t forget to pin this post for later!
If you would ever like to see another chalk paint makeover. Check out this farmhouse hutch makeover.

I thought that dresser looked familiar! Such a nice piece,can’t wait to see the transformation!
Yes! It is the one that showed up at our garage sale. We finally tackled it! It’s a beauty now! Will share soon.:)