This post has 30 Dollar Tree Craft projects that are affordable and stunning for fall. You don’t need to spend much more than a $1 to make beautiful fall decor. These 30 Dollar Tree craft ideas will inspire you to craft more this fall.
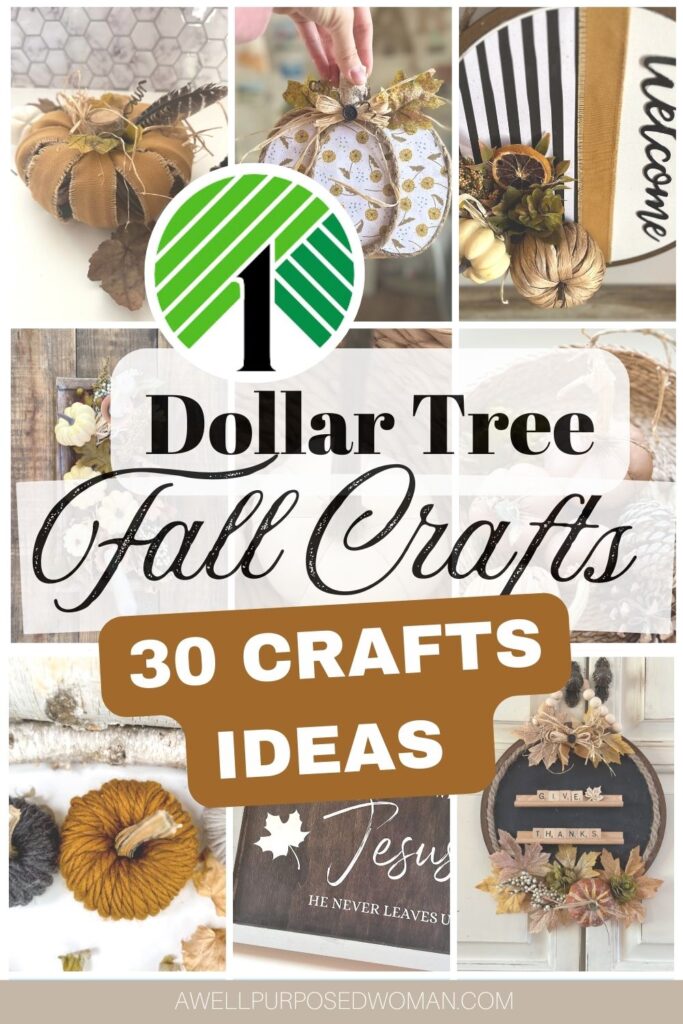
I love trying to make beautiful fall decor using Dollar Tree supplies. The Dollar Tree continues to come up with really cute items and fall and Christmas are the best time to find new craft items!
So this fall I challenged myself to see how many Dollar Tree crafts I could come up with that would fit in with my style and home decor.
Watch a video on the first 10 Gorgeous Dollar Tree Crafts for Fall
Here’s 30 Gorgeous Dollar Tree Fall Decor Ideas for 2023
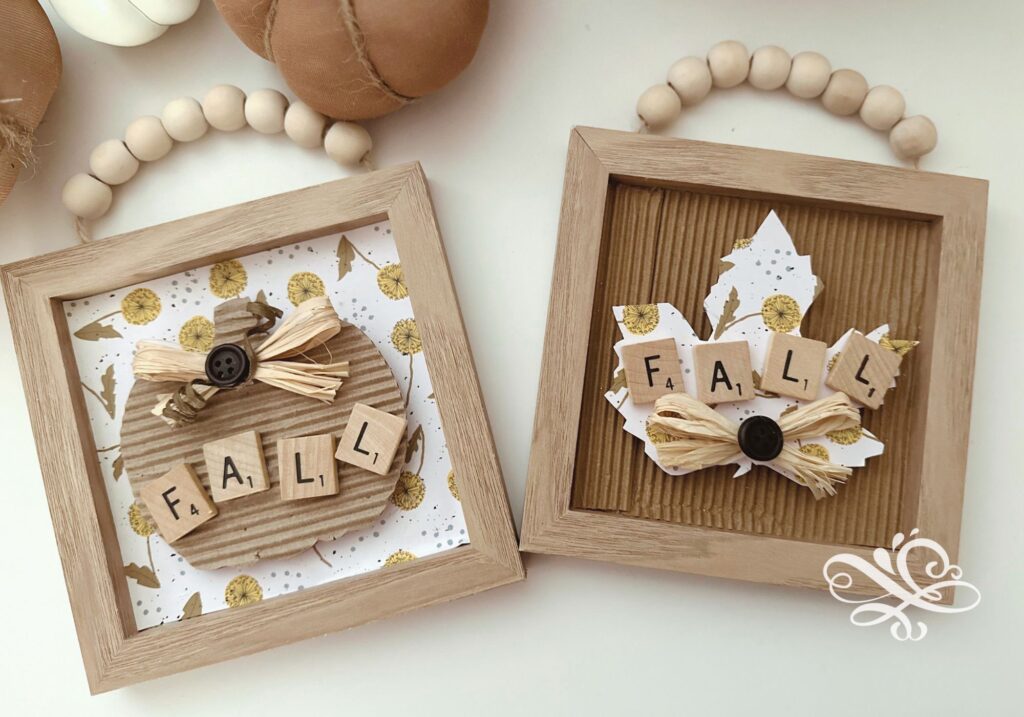
1. Dollar Tree Fall Wooden Signs
Although these little signs from the Dollar Tree were cute with their beaded tops, I wasn’t a huge fan of the colors. So I transformed these little signs into modern neutral colored decor by just adding a new background.
Then I added a leaf or pumpkin cutout and added some other cute embellishmetns. I think making them a little more neutral looking fits in better with my style. You can watch the full tutorial here.
2. Rustic Wooden Pumpkins
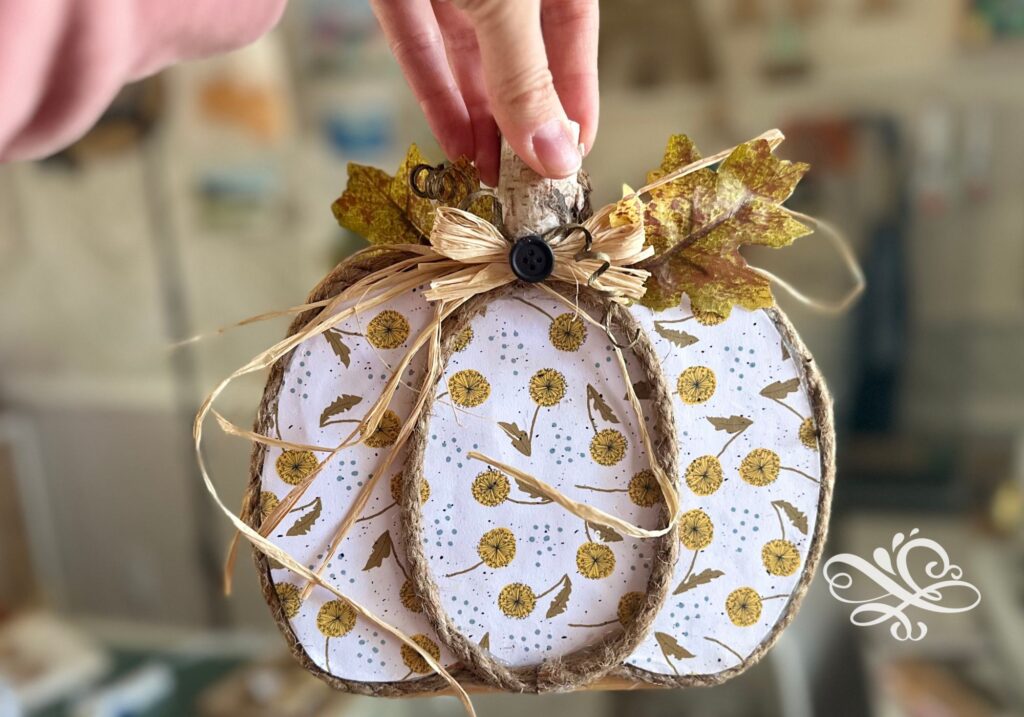
These pumpkins at the Dollar Tree started out with the right shape. But they were definitely not the right colors and style. I transformed these pumpkins by adding a new background color and adding jute twine around the edges and center of the pumpkin.
I added some leaves, raffia and paper covered wire that was twisted with a pencil. I think that is just what this little pumpkin needed to be displayed for fall. To see the how this pumpkins started you can watch it here.
3. Mason Jar Lid Pumpkin
For a long time I had wanted to make a mason jar lid pumpkin. But truth be told I didn’t like the idea of using up so many of my mason jar lids. So I decided to make a mason jar lid pumpkin but add ribbon to each of the mason jar lids. By using the ribbon I was able to make this pumpkin with only 10 lids.
Once I covered all the lids. I add a stem, leaves and raffia to the middle of the pumpkin. I also added some pumpkin curls and a feather to boot! I think it turned out pretty cute! You can watch the tutorial here.

4. Dollar Tree Mason Jar Sign Pumpkin
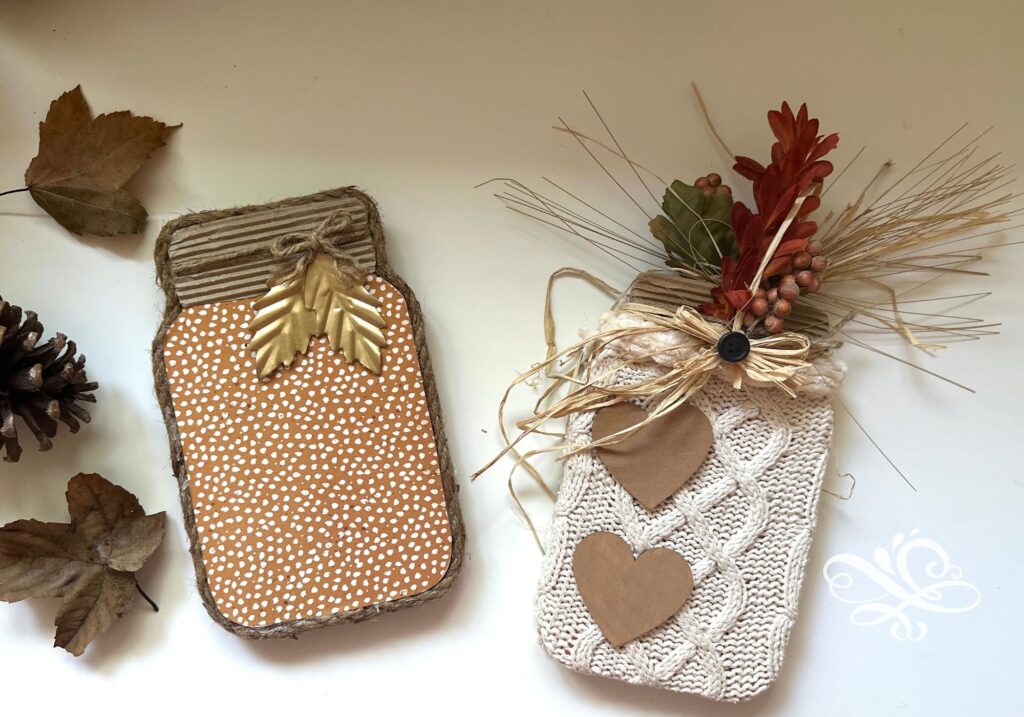
These mason jar signs from the Dollar Tree were pretty cute to begin with but I was determined to make them even cuter. I covered one with an old sweater and the other one with cardstock. Then I dressed them up for fall.
On the sweater mason jar I drilled sveral holes on the top of the mason jar and stuffed them with fall florals. I really like how this added dimension to the top of the mason jar. Then I wrapped raffia around the mason jar and twine.
5. Balloon Pumpkins
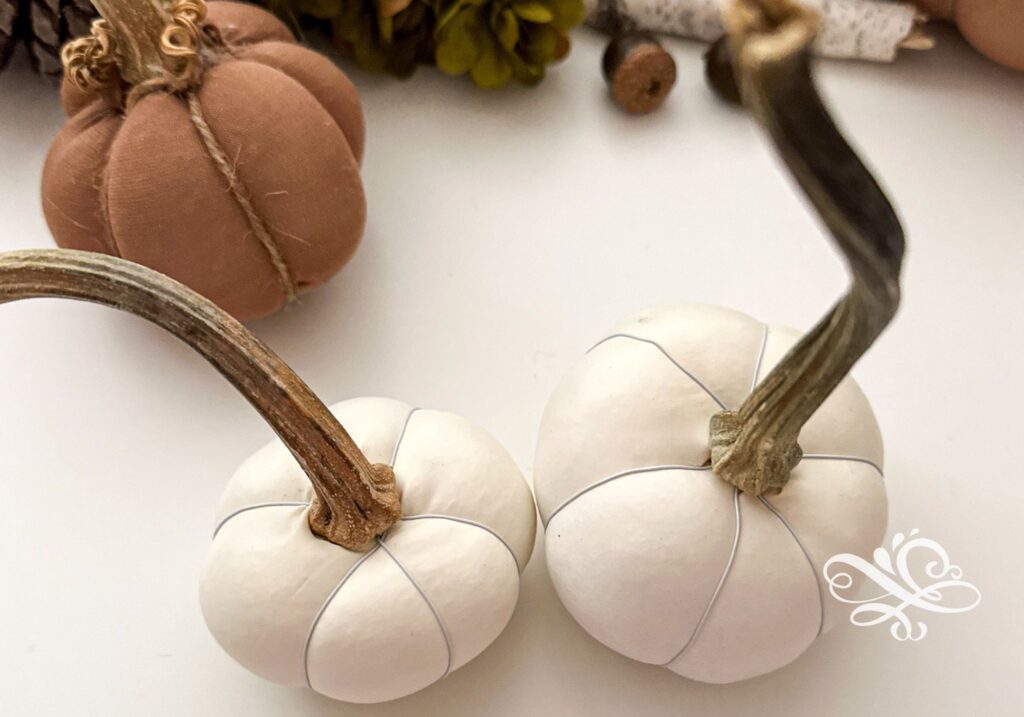
Need some pumpkins for your table in a few minutes but don’t have time to run anywhere? If you have some balloons on hand you can make these cute little pumpkins in literally a few minutes. I love little hacks like these because a lot of times I am running around at the last minute trying to put the finishing touches on things.
Just add some poly fil stuffing to a balloon. Then take wire or twine and make little sections in your pumpkin by wrapping the wire or twine around the balloon. Use a little stem or cinnamon stick on top to finish off your pumpkins!
6. Fall in Love with Jesus Sign
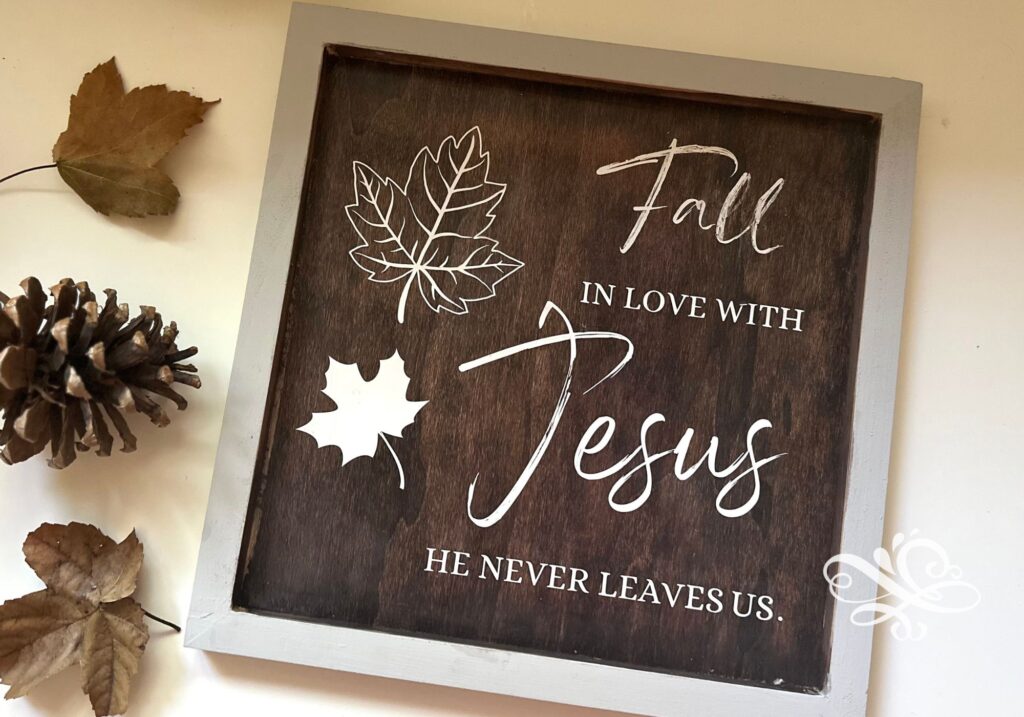
If you have a Cricut machine you can easily turn these Dollar Tree blanks into beautiful fall decor. This SVG file is free and you can find it here. This sign goes from ordinary to really fabulous and you don’t have to spend a lot of time making a sign.
The video tutorial above gives you step by step instructions if you are new to using your Cricut machine.
7. Nylon Pumpkins

Ok so already saw how we could make pumpkins out of balloons, socks, dresses, sweaters, and just about anything. But have you ever seen pantyhose or nylon pumpkins? Me neither! But I have to say these beauties work for fall. The muted colors of the nylon work absolutely marvelously for making last minute pumpkins.
And don’t worry you don’t have to just use skin colored nylons, bright or colorful tight would work just as well! just stuff them with some filling. Use twine and wrap sections around the nylons tightly. Then top them with a stem. So clever and really I think beautiful!
8. Dollar Tree Pumpkin Candy Jar

My daughter loves this next creation and I hope you might too. It’s a candy jar pumpkin. I started with one of those plastic Dollar Tree containers and added mod podge to a napkin around the main section of the container. When the mod podge dries add words or embellishments on the sides of the pumpkin candy jar.
For the lid add jute twine all around with hot glue. Finish it off by adding a stem, leaves and pumpkin curls. This really is a cute container for fall. You can keep candy, coffee pods, craft supplies or other items inside. For a full tutorial the video above goes into more detail.
9. Dollar Tree Coasters
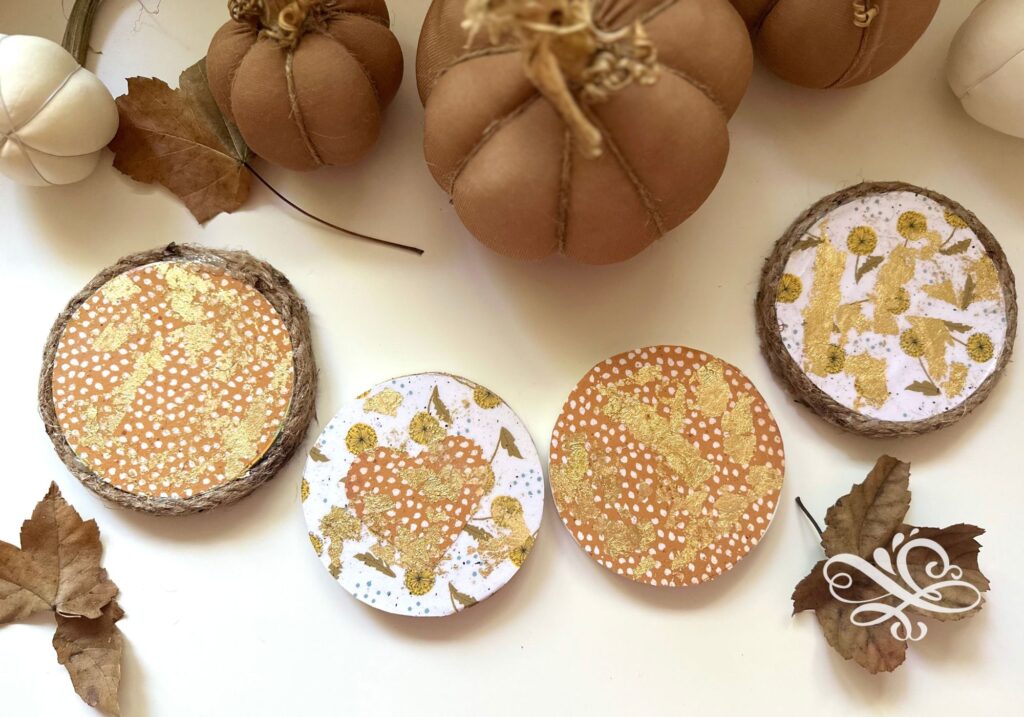
I don’t think you can ever had enough coasters. These fall coasters were made from a circular wreath add-on. But you could use really anything that is round to make these cute little coasters.
Use fall colored scrap paper and mod podge on the top. Add some gold foil for all the fall feels and then add a sealant to keep them safe from any liquids. You can add jute twine around the edges to give them a rustic feel as well.
10. Napkin Pumpkin
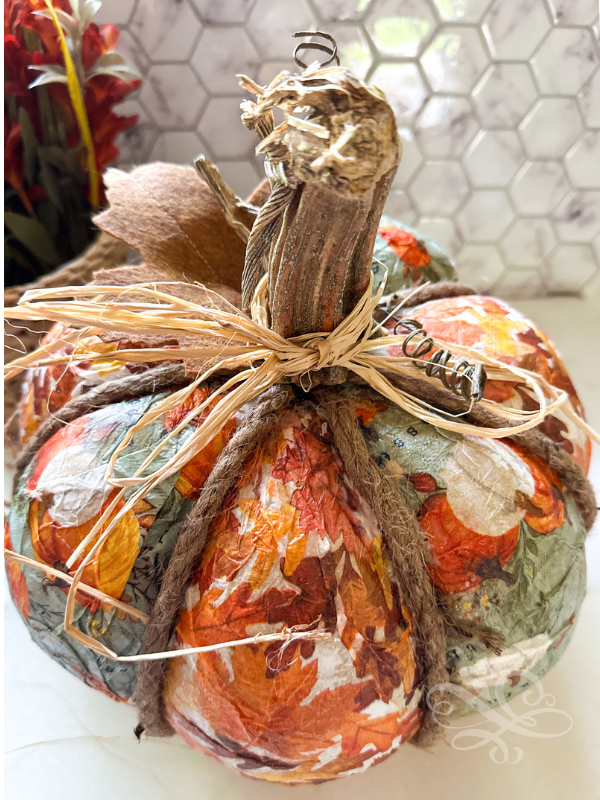
This was one of my favorite crafts this fall. I started with a giant mod podge pumpkin. Then I added two different napkins alternating between sections with mod podge. After the mod podge had dried I used jute twine and hot glued it in between the napkin sections to emphasize the different colors.
I finished the pumpkin off by hot gluing a stem, leaves, raffia and pumpkin curls around the top. So fun and super cute!
Watch a video on the next 10 Gorgeous Dollar Tree Crafts for Fall
11. Dollar Tree Velvet Mushrooms
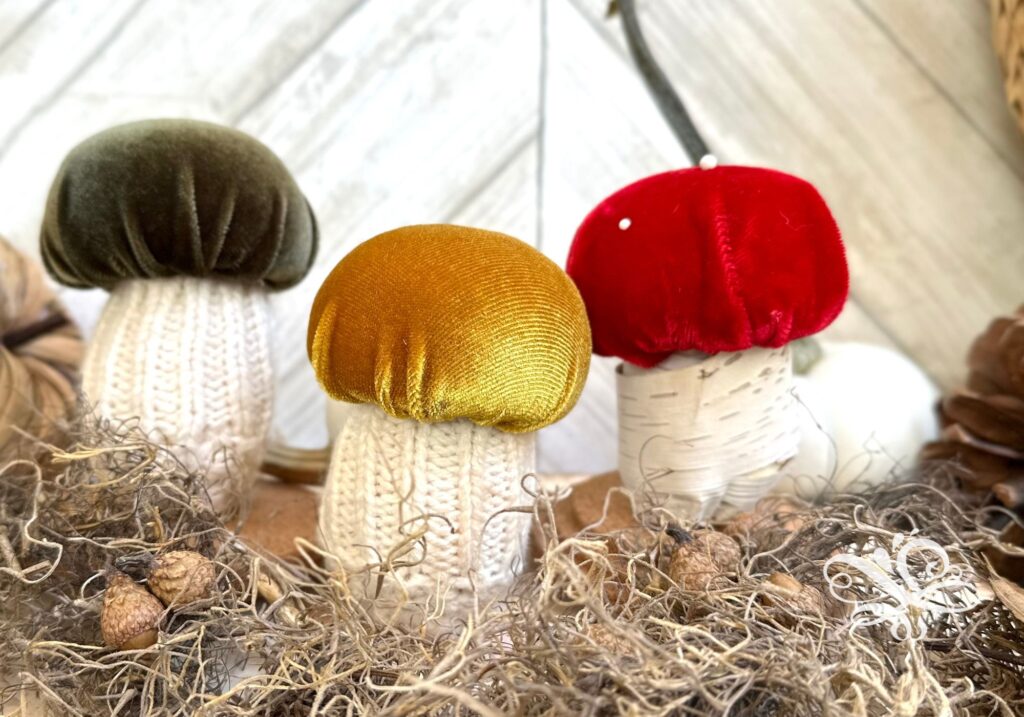
I love mushrooms! And these little Dollar Tree ones make it super cute to make a nice shaped mushroom in no time. Just start with a foam mushroom and cover the outside with velvet and sweaters.
You can also use birch bark or corn husks on the bottom of the mushroom. It doesn’t take long and these little mushrooms are looking a lot higher end.
12. Give Thanks Dollar Tree Sign

This was another one of my favorite crafts this fall. I started with a Dollar Tree round and painted it black. Then I added a wood round frame and jute twine on the outside of the round. I hot glued fall foliage on the top and bottom.
In the center of the round I hot glued some Scrabble letter holders and letters to the center spelling, “Give Thanks.” The last thing I did was add some wooden beads to hold the sign. It turned out really lovely and romantic for fall. I have it hanging on the hutch in our living room.
13. Rectangle Pumpkins
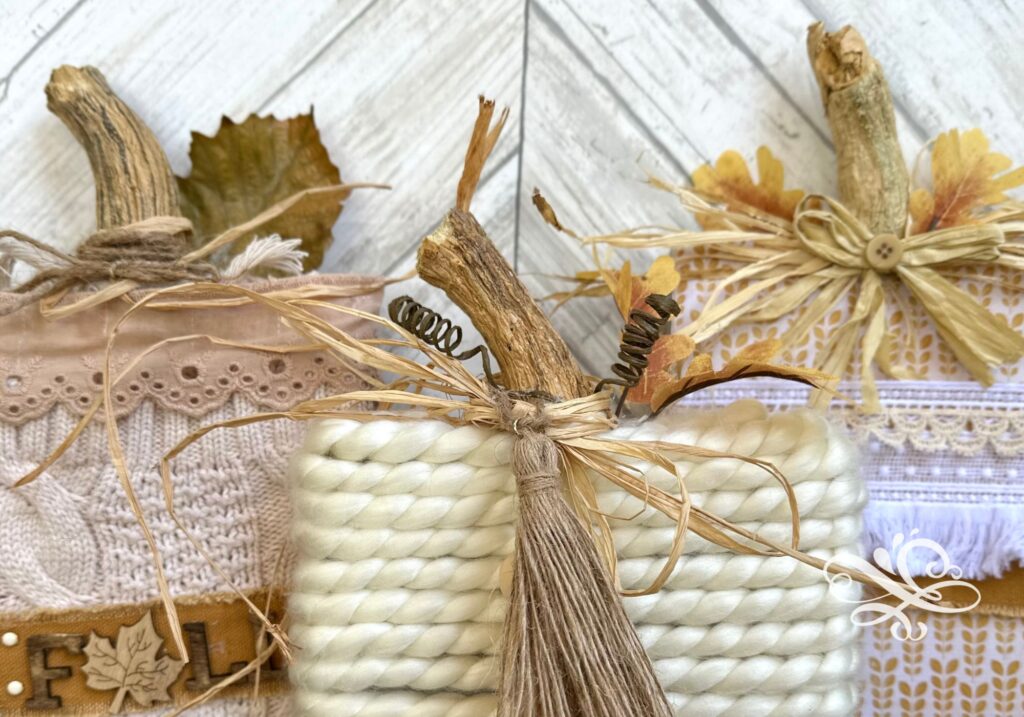
One of the most fun trends lately has been to make pumpkins out of wood squares. There have been so many variations of these circulating but I just used some of the ones the Dollar Tree had and transformed them into these gorgeous pumpkins.
These were really fun. I recommend checking out the full tutorial on how to make these!
14. Quilted Potholder Pumpkin
Another thing I really like these days are quilted fabrics. When I saw these quilted pumpkin potholders at the Dollar Tree I knew I wanted to re-do them and I had a project in mind. So I quickly purchased two of them.

When I got home I hot glued the potholders together, leaving the top slightly open. Then I stuffed them with poly fil. I used a small birch log as a stem and then I hot glued the rest of the potholder together. The last step was to take leaves, curls, twine and lace and embellish the pumpkin into a shabby chic beauty!
15. Fall Round Welcome Sign
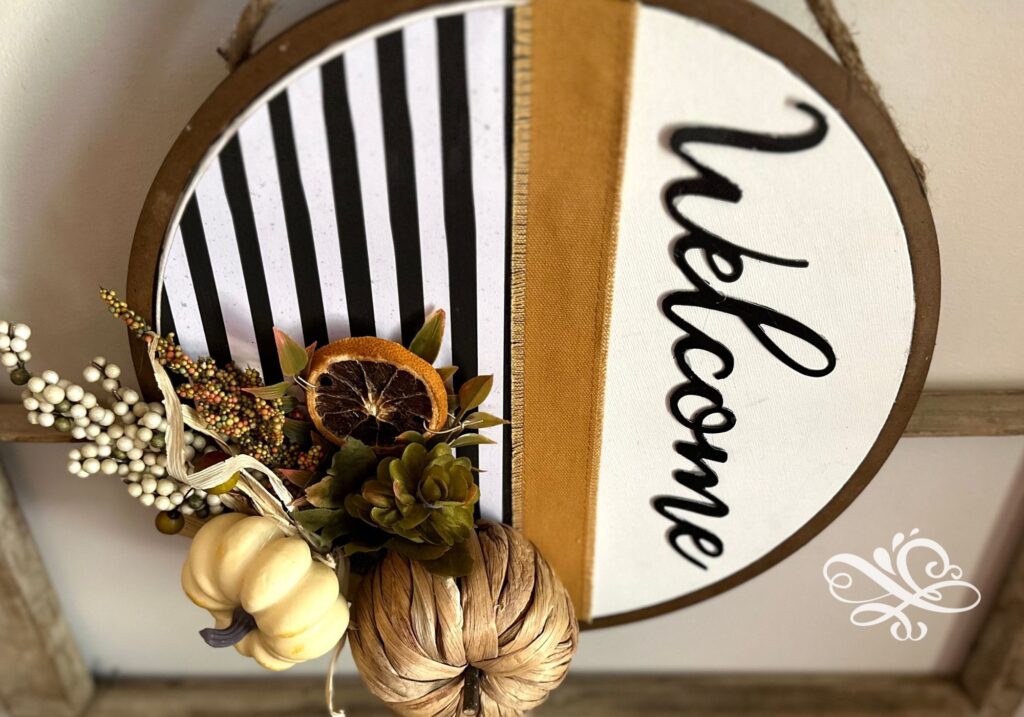
I go into detail on making this sign in the video above but it really is pretty simple. Start with a round white canvas and then add a wood round frame around the canvas. Add scrapbook paper that corresponds or contrasts a little on one side. Add a ribbon down the center of the frame.
Next add some fall foliage on the bottom of one side. Use a “Welcome” word or other word on the opposing side. Hot glue it into place. Use jute twine to hang the round.
16. Fall Book Stack

The Dollar Tree had some really Halloween-y book out this year, and although I didn’t like the covers of the books I liked the structure of the books. So I decided to turn then into a book stack that was more suited to my style.
I took coordinating paper and covered the books with mod podge. Then I joined the book stack together with lace and ribbon. I finished them off with a twine tassel and beads. This little book stack was so easy to make and a pretty decoration for fall. You could also add words to the side of the stack.
17. Embroidered Give Thanks Sign
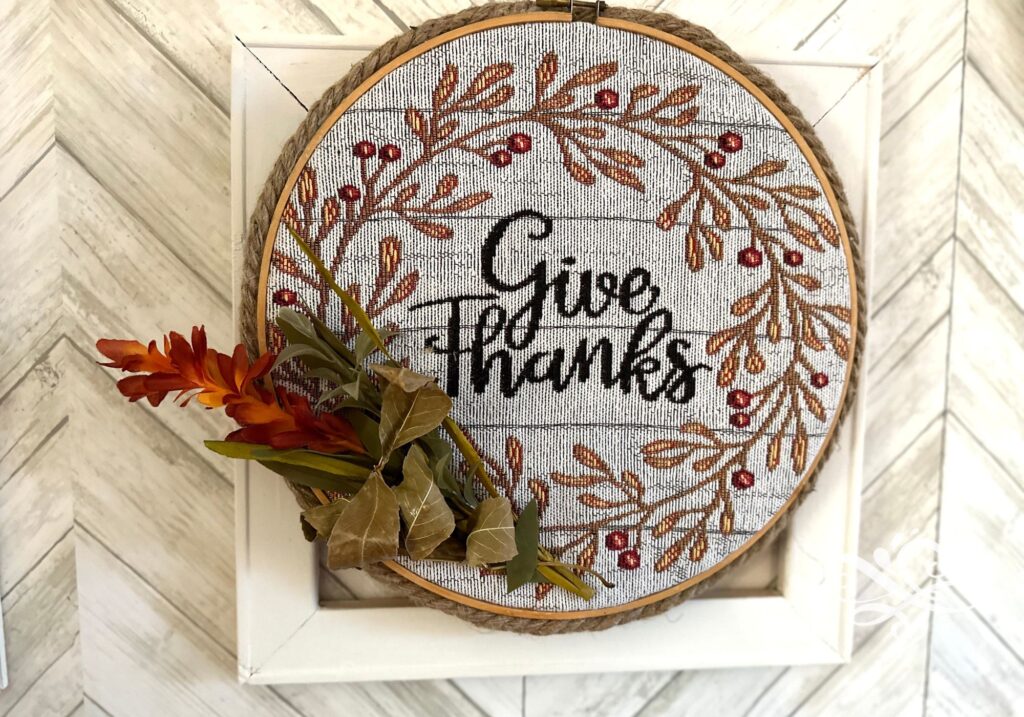
I love reminders all over my home that help me to center myself on what is true and lovely. And one of the things I need to be reminded of often is to give thanks. I found this embroidered table mat at the Dollar Tree. Right away I thought of making a pillow. But when I got home I started to think it would be nice hanging in an actual embroidery hoop.
So I ended up simply adding this place mat to an embroidery hoop. You can make something similar by placing it in a hoop and just cutting off the edges. Hot glue jute twine around the outside of the frame. Then add fall foliage on one side of the hoop. Simple and cute!
18. Dried Flower Wreath

Sometimes simple is best. The Dollar Tree had some of these wooden round frames out and I liked turning them into a fall wreath just by wrapping twine around the center of the frame.
Then add fall foliage in the center of the frame. Add wood beads on the top of the frame with wire so you can easily hang the wreath. So simple but really chic!
19. Thanksgiving Centerpiece

If you need an easy centerpiece for your Thanksgiving Day table then this craft is for you. The Dollar Tree sells these little trays in different colors. You can grab some candles from the Dollar Tree as well. Just set them in the center of the tray, hot. glue the into place if you don’t want them to move around.
Grab some fall floral picks and add some pine cones around the candles. Viola! A really gorgeous fall display!
20. Cement 3- D Pumpkin
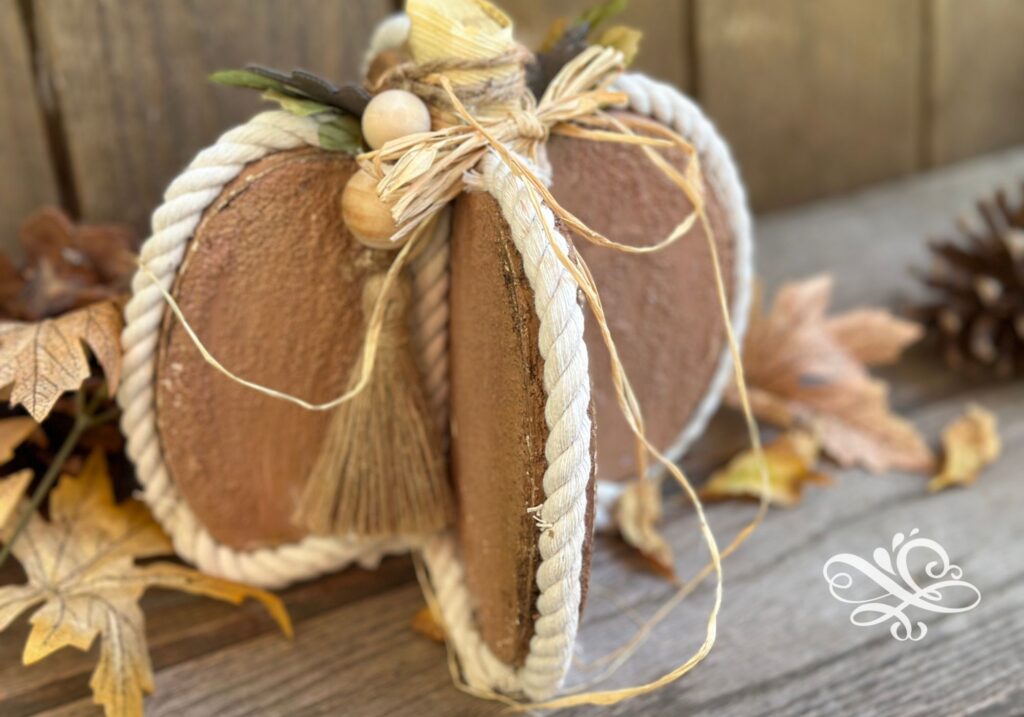
Make a 3- D pumkin by cutting two pumpkins in half and hot gluing them together. Paint over the pumpkin and add just twine or nautical twine on the edges. Embellish the pumpkin with a stem, leaves and curls.
Watch a video on making 10 Gorgeous and Easy Pumpkins from Dollar Tree Styrofoam pumpkins
21. Boho Faux Wood Pumpkin
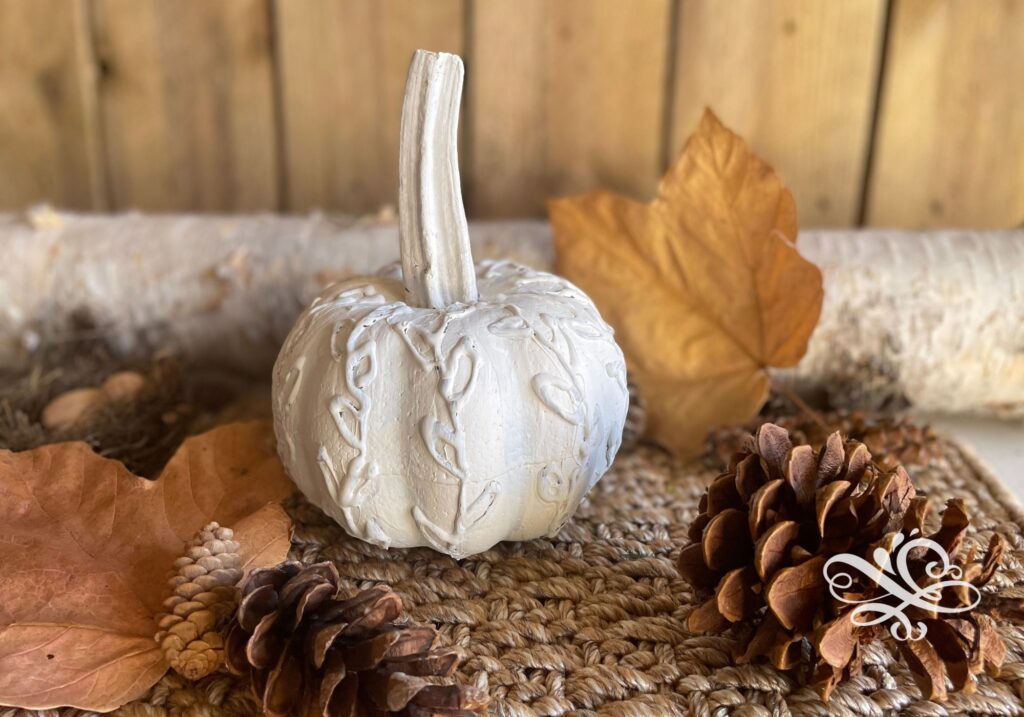
Have you ever thought of using hot glue on the outside of a pumpkin to add texture? Well this boho style faux wood pumpkin does just that. Start with a styrofoam pumpkin and add designs on the outside of the pumpkin with hot glue.
Once the glue hardens paint over the top of the pumpkin. Use sand paper to sand off certain areas and add texture. Complete the pumpkin by gluing a stem on the top of the pumpkin.
22. Sweater Pumpkins

If you have ever made sweater pumpkins before you may have sewn them. They turn out beautiful and are really well made. Well today I am going to show you an even easier way to make the and they are still a nice quality.
Simply start with the Styrofoam pumpkins again at the Dollar Tree. Cut out a hole in the center. Then add a sweater around the pumpkin, stuffing the extras in the center of the pumpkin. Then take a birch log or stem and tuck it into the center of the pumpkin. You can embellish it with leaves, curls or chunky yarn as well.
23. Chunky Yarn Styrofoam Pumpkins
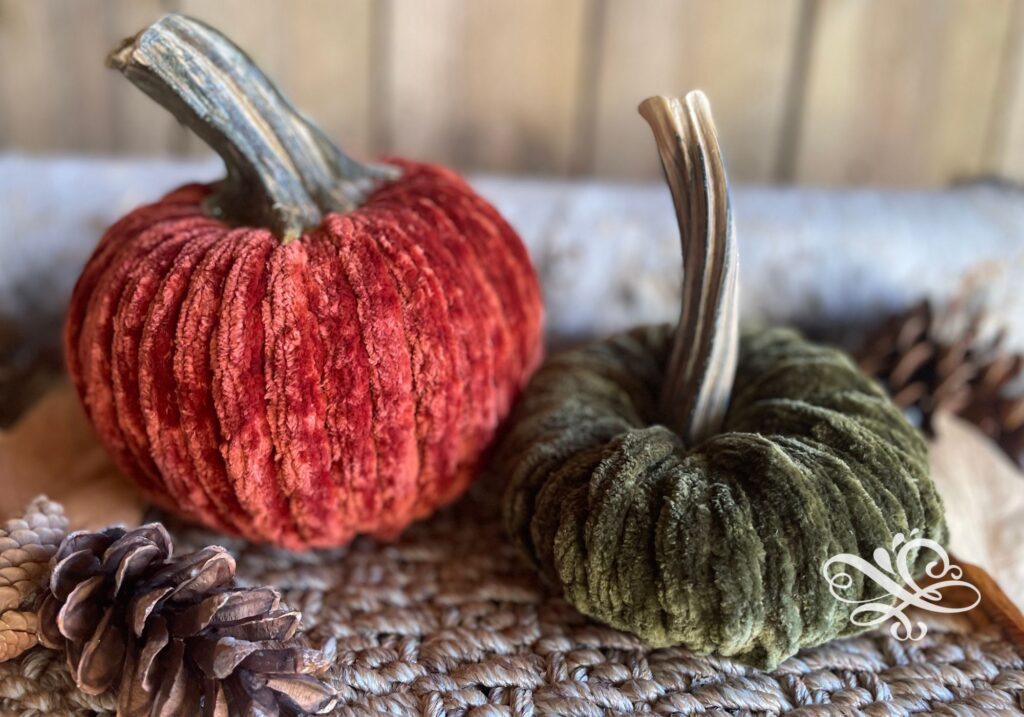
These pumpkins are truly so beautiful, but they are so simple to make! Just take a styrofoam pumpkin and carve out the center of the pumpkin. Then take this beautiful chunky velvet yarn and wrap it around the pumpkin, covering the entire pumpkin.
Simply finish the pumpkins off by adding a real stem in the center of the pumpkin. If you have never used real pumpkin stems you can see how to prepare pumpkin stems for crafts in this post. If you are wondering where to get pumpkin stems for crafts I also did a post on that.
24. Nautical Pumpkins
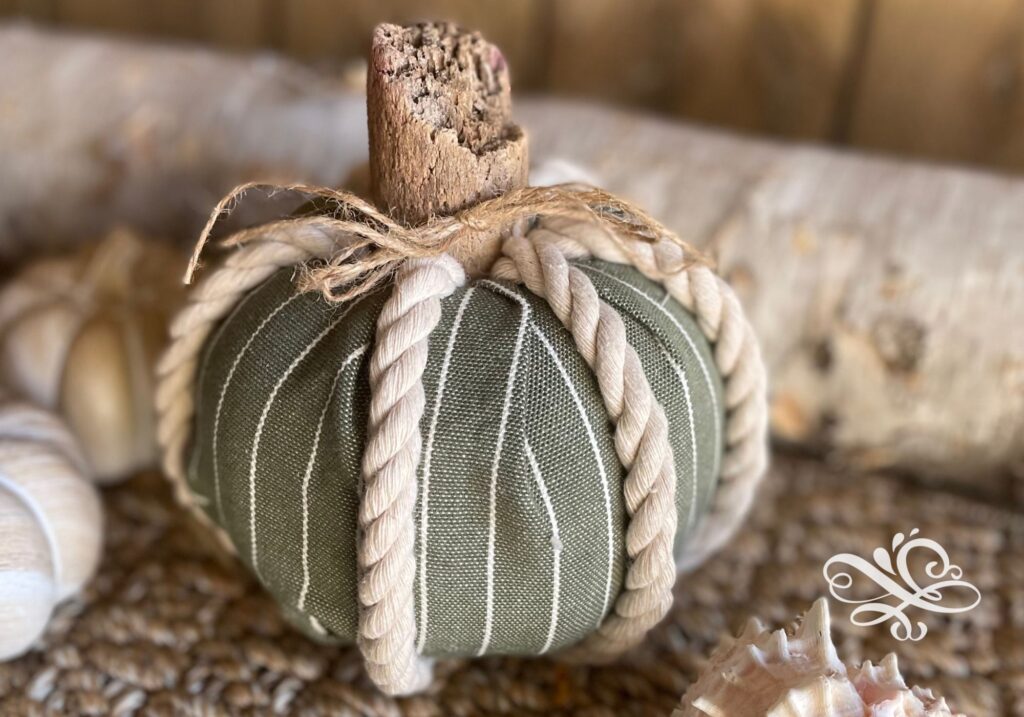
If you are a beach dweller then this pumpkin is for you! We are going to get all the fall vibes along with a coastal feel with this pumpkin. And the best part? It’s SOOO easy to make.
Start by carving out the center of the pumpkin. Then wrap neutral colored fabric around the pumpkin, stuffing it in the center as well. Hot glue the fabric into place. Next take some nautical rope and hot glue 6-8 sections around the pumpkin.
Finish the pumpkin off by adding drift wood in the center for a stem. Wrap twine or other embellishments on the top.
25. Scrap Yarn Pumpkin

Do you have a lot of scrap yarn or ribbon lying around? If so why not make this bohemian style pumpkin for fall. Carve out the center of the pumpkin then use your scrap yarn or ribbon and wrap it around your pumpkin.
Once the pumpkin is covered with yarn use a birch log or other stem in the center of the pumpkin. Embellish the pumpkin as you wish with ribbon, fabric strips or other greens.
26. Pumpkin Centerpiece

This is another idea to use these Dollar Tree carveable pumpkins. Carve out the center of the pumpkin. Then add golden ribbon or trim around the pumpkin, being careful to cover the entire pumpkin. After your pumpkin is covered with ribbon or trim you can add real or faux fall foliage.
27. Pumpkin Sign

Make a cute pumpkin sign this fall but slicing a carveable pumpkin in half. Hot glue the pumpkin onto a sign and you have a beautiful and unique sign for fall.
Use fall foliage and stick it into the pumpkin with a little sign that reminds guests to “Give Thanks.”
28. Ribbon Pumpkins
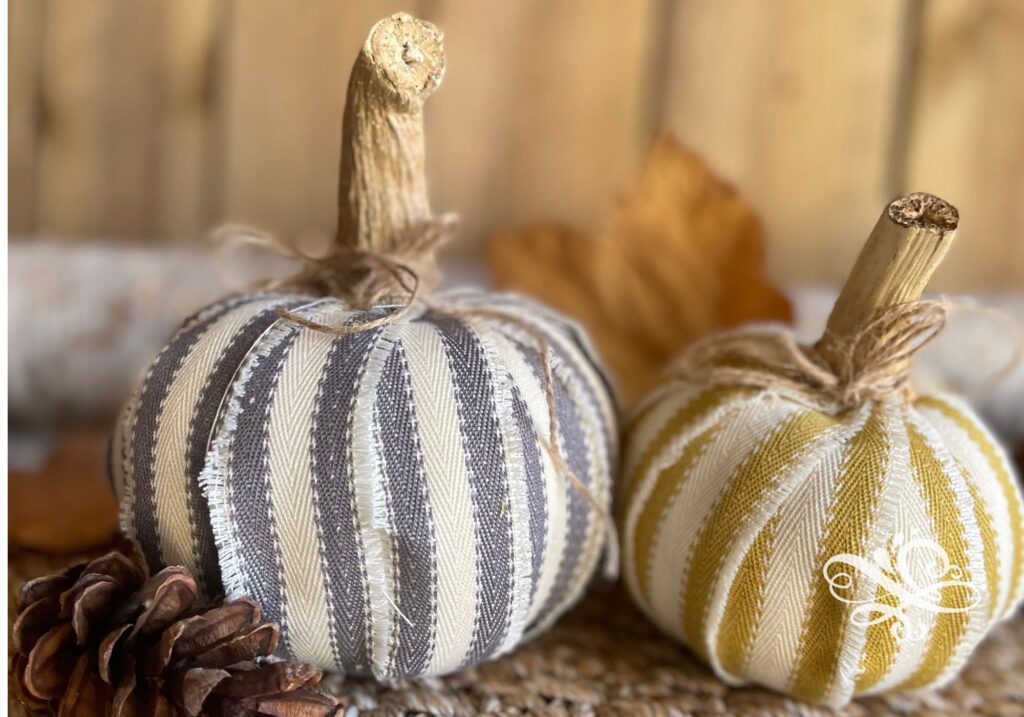
Do you ever see ribbon that you really love but you aren’t sure exactly how to use it? I saw some of this farmhouse style ribbon awhile back and grabbed it. I wasn’t exactly sure how I wanted to use it but I decided it could make some really cute pumpkins.
Just cut the ribbon or trim into small strips that span from the top of the pumpkin to the bottom. Use hot glue or a ribbon to secure them onto the pumpkin. Continue using the strips around the pumpkin until the entire pumpkin is covered. The video above has the full tutorial.
29. Easy No Sew Velvet Pumpkins

Did you know making beautiful romantic velvet pumpkins for fall can be super simple? You literally can make these in 5 minutes or less. So if you need a very quick but high end looking pumpkin this is a great craft for you!
Just start with carveable pumpkins. Cut off a small section of the center of the pumpkin. Then take a circle of fabric that is a few inches larger than the pumpkin and stuff it into the center hole. The video above has a full tutorial. Or you can watch this quick video.
30. Hair Donut Pumpkins
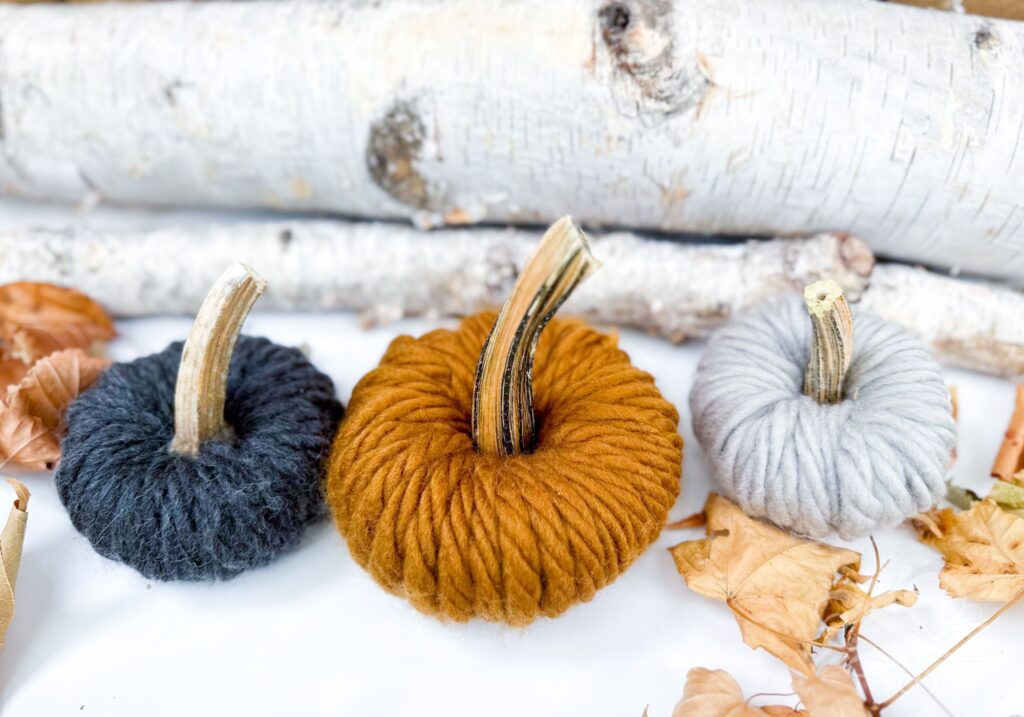
Hair donut pumpkins have long been a favorite of mine. I wanted to find a craft that was easy enough for my children to do but also created beautiful home decor. So I created these pumpkins from hair donuts. You can see the full tutorial here.
But simply get some beautiful yarn and wrap it around the donut. Finish the pumpkin off with a stem and other embellishments. And that’s it!
Leave a Reply