Check out this barrel cane back chair makeover. This vintage cane back chair was transformed with paint and beautiful fabric. Up-cycle a cane back chair with curtains or other fabric.
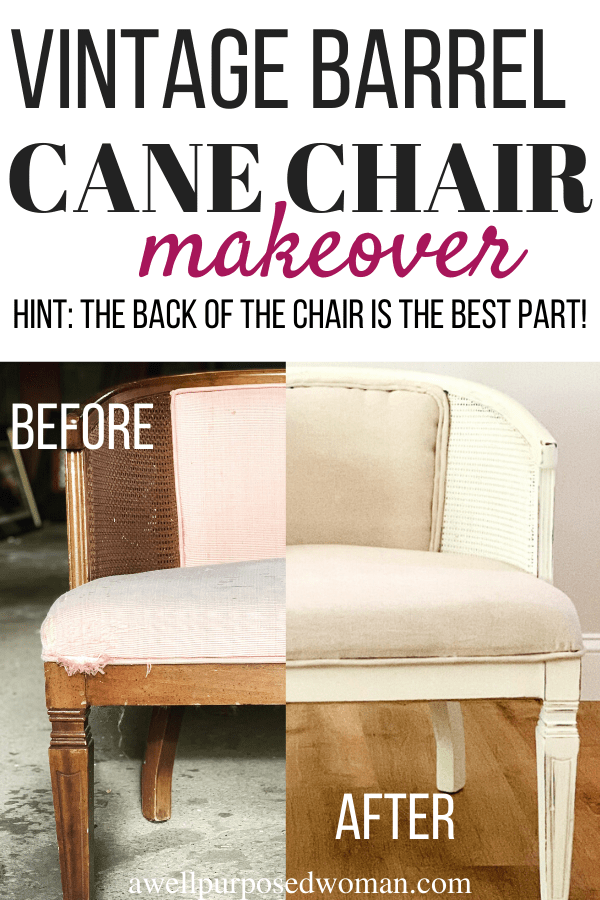
Happy Friday! I love Fridays. And it’s a great day to finish a project, today I finally finished reupholstering my barrel cane back chair!!. I haven’t done a Friday furniture freebie in awhile, like the hutch, coffee table, dresser or dining table. So today is the perfect day for one!
Removing the fabric on a barrel cane back chair
Earlier in the week I posted about how to remove the fabric from a barrel cane back chair. Since then I have been steadily working on finishing the cane back chair.
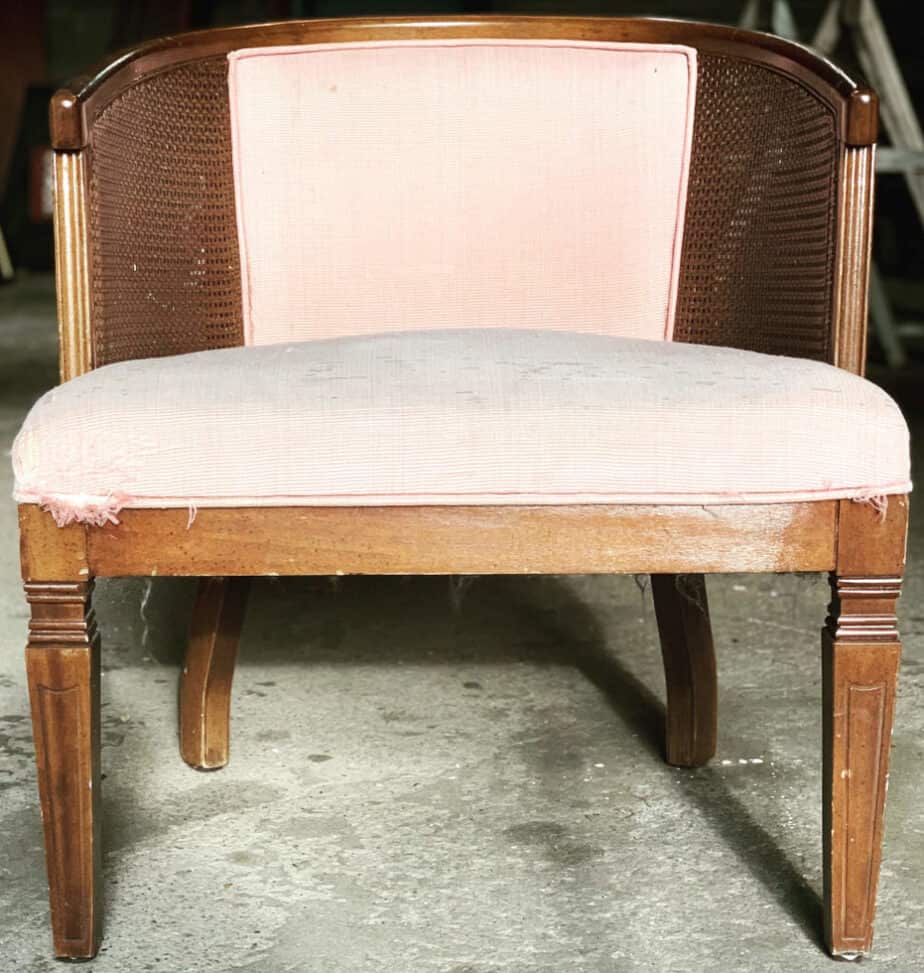
Before: Barrel Cane Back Chair
Here’s the before picture. As you can see the chair was in good condition overall. It was just dirty and the fabric was tearing in the front of the barrel chair. Plus the color and fabric was just dated and not my style. So it was a perfect candidate to be re-purposed.
I will try to post some new tutorials to go along with the chair. But if you are wanting to start on a project over the weekend this dining room chair tutorial would definitely get you started. I was so excited to show you my finished project that I decided to post it before I finished a tutorial!
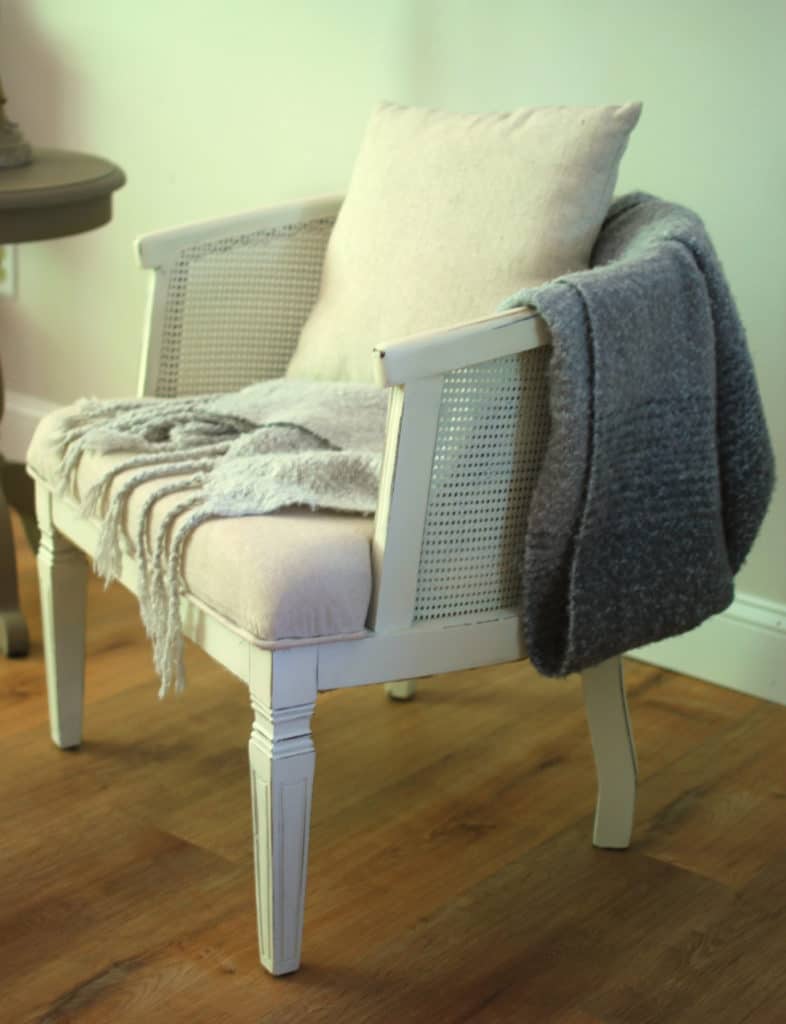
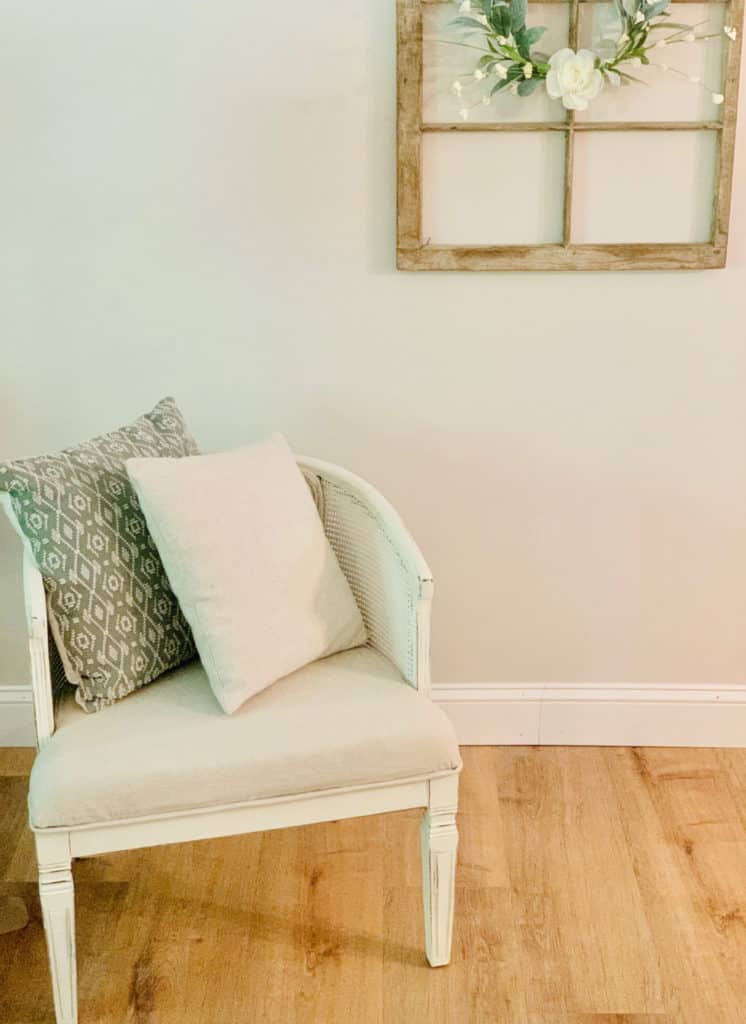
Anyways without further adieu here’s my newly upholstered barrel cane chair!
After: Barrel Cane Back Chair
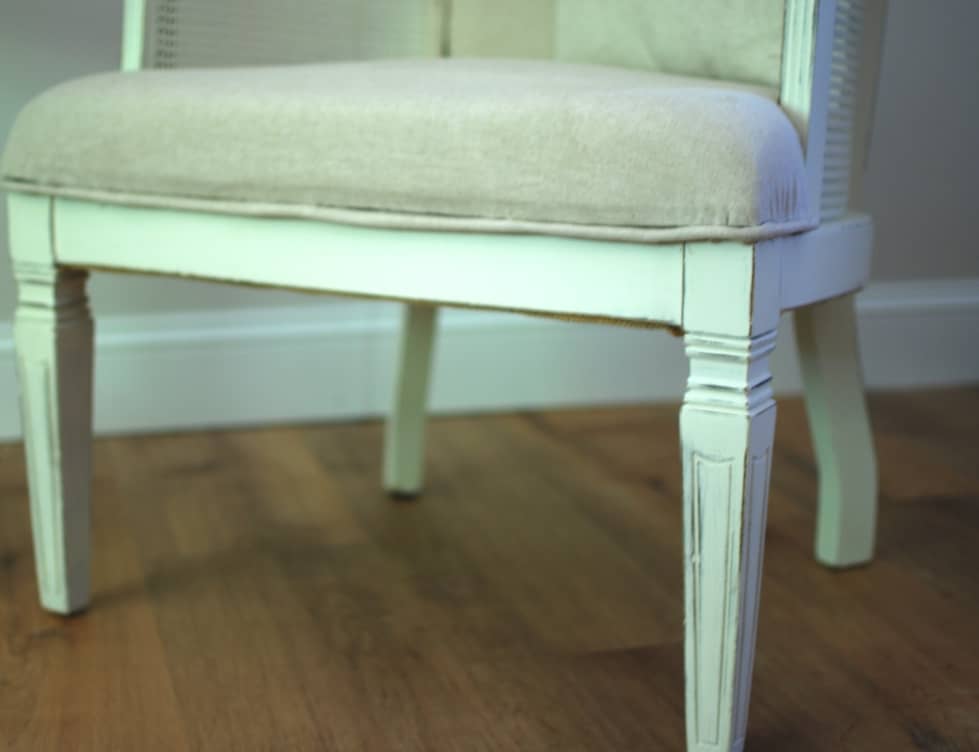
As you can see I decided to use white chalk paint on the frame of the chair. I distressed the arms, legs and other areas of the chair where there was some natural interest.
It is not perfect. And I definitely learned some stuff along the way. But this project reminded me of how continuing to learn and improve is always possible and important! There’s always room for improvement and we never arrive. But I am proud of myself for not giving up with this project..
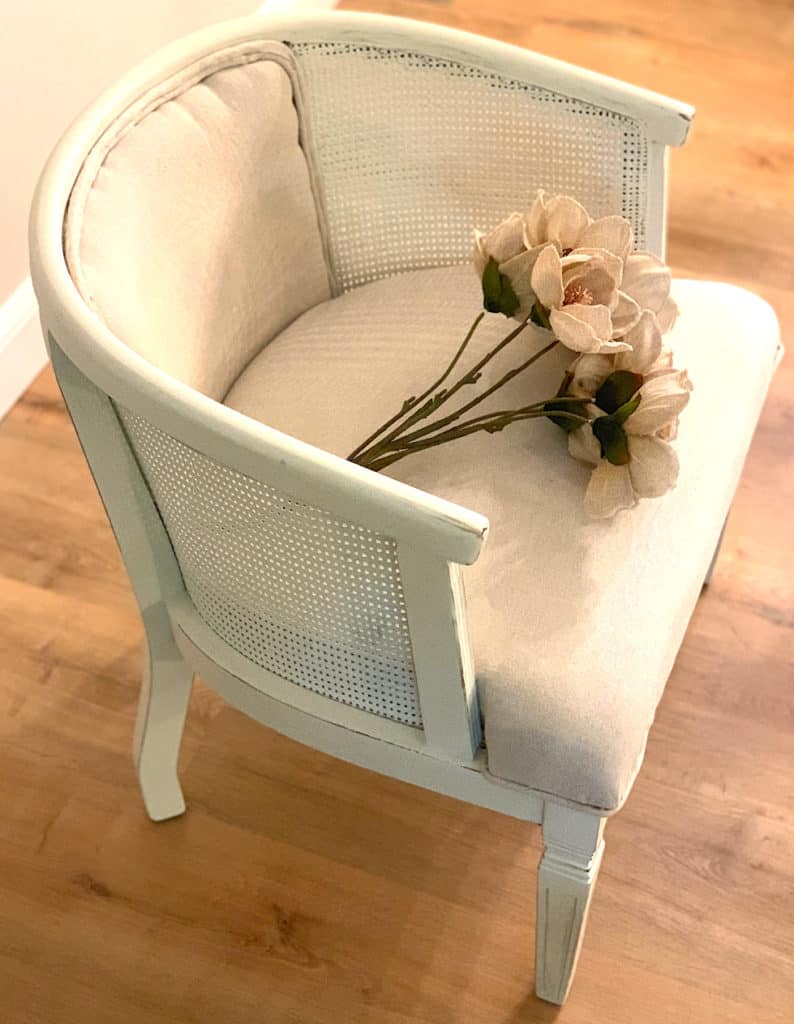
The fabric is a soft light cream/ tan color and feels similar to linen. It was from an old curtain I found at a local thrift store. When I saw the curtain I knew it would work for the chair and at just a little over $2, how could I resist? I made the piping with the curtain as well.
The back of the cane chair has a fun surprise that is different than the front. I love when I have seen others re-upholster the back of the chair differently than the front, so decided I would also do that for this chair. I chose a duck cotton fabric I found at Hobby Lobby.
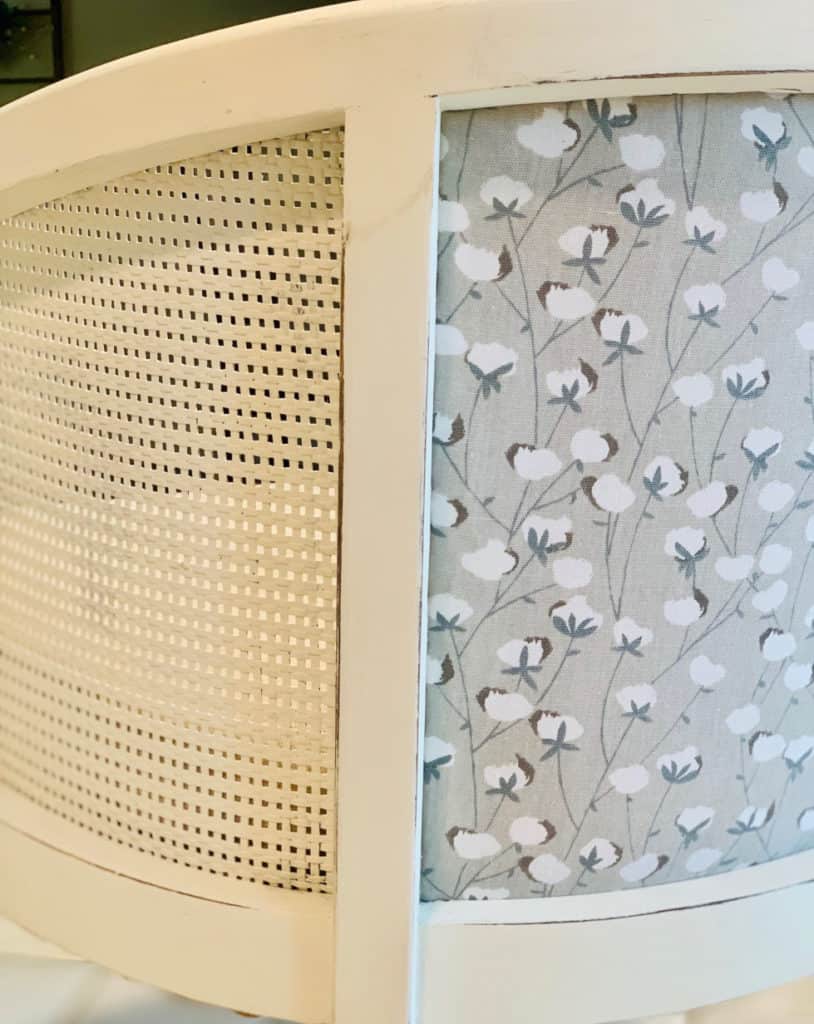
I really love how it turned out. I especially like how the distressed white looks with the fabric in the back and front. Here’s a wide view so you can see the front and the back together.
I have decided that pictures really don’t do the chair justice. It would be much better to just have you come over and check it out. Sit in it and visit awhile.
And pictures also can’t capture all the hard work that goes into re-doing a chair, but I guess for now they will have to do. 🙂
This project was fun, challenging, frustrating and in the end very satisfying. But I gotta say re-upholstering is not for the faint of heart! If you are newer to re-upholstering like me. Just remember that it doesn’t have to be perfect, and even if you run into small issues keep going. In the end I was proud of myself for finishing my chair!
Hope you enjoyed this barrel cane chair makeover! Let me know what you think in the comments below. Thanks for stopping by.
Have a great weekend!

Beautiful job Elizabeth! You certainly can be very proud of your project. I love the chair! Can’t wait to see your next project!
Thanks so much mom! Thanks for stopping by 🙂
It turned out great!!! Good work Lizzie! I think you should keep it too!
Thanks so much Alesha! Not sure yet if i will keep it. We will see 🙂
Lizzie great job. The chair turned out great, espically like the back I hope you are keeping it.
Thanks Connie! I am happy with the back too…I had other fabric picked out, but when I saw the cotton in my fabric pile I thought it looked way better!
Awesome job Lizzie!
Thanks Damon! Thanks for attaching the last four screws for me too!