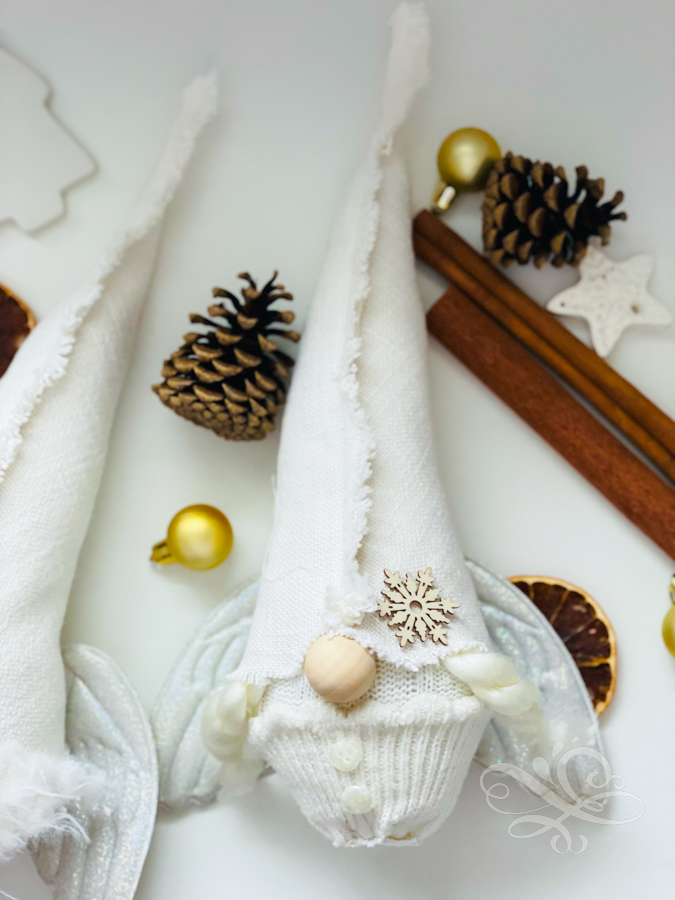
Learn how to make a boy and girl angel gnome with a free gnome hat pattern and free wing pattern. These cute little angel gnomes are made just from socks. Little boy and girl angel gnomes are fun to make for Christmas.

Welcome to day 17 of our Craft a Day Countdown to Christmas today we are going to make Angel Gnomes! Angels were the first to announce the birth of Christ and are a main character in the Christmas story, so today we are going to make some of these festive little angel gnomes!
Gnomes are fun to make for each season. If you missed our sock gnomes from a few seasons back you can see how to make sock gnomes. Also I did a post just about girl gnomes and gnomes with arms and legs. You can pretty much make gnomes out of anything.
Gnomes are pretty much everywhere these days and can be made out of almost anything. Like earlier this month we made gnomes of out scrap wood.
For today we are going to angel gnomes out of socks. So let’s get started on making our cute little boy and girl angel gnomes!
Here are the supplies needed to make girl and boy angel gnomes:
Boy Angel Gnomes
- Free Pattern
- White Sock
- Sewing machine
- White Fabric for hat
- White felt or other sturdy fabric for the wings
- Rice
- Poly Fil
- Rubber Band
- Scissors
- Faux fur
- hot glue gun and glue sticks
- wooden ball or felt ball
- embellishments
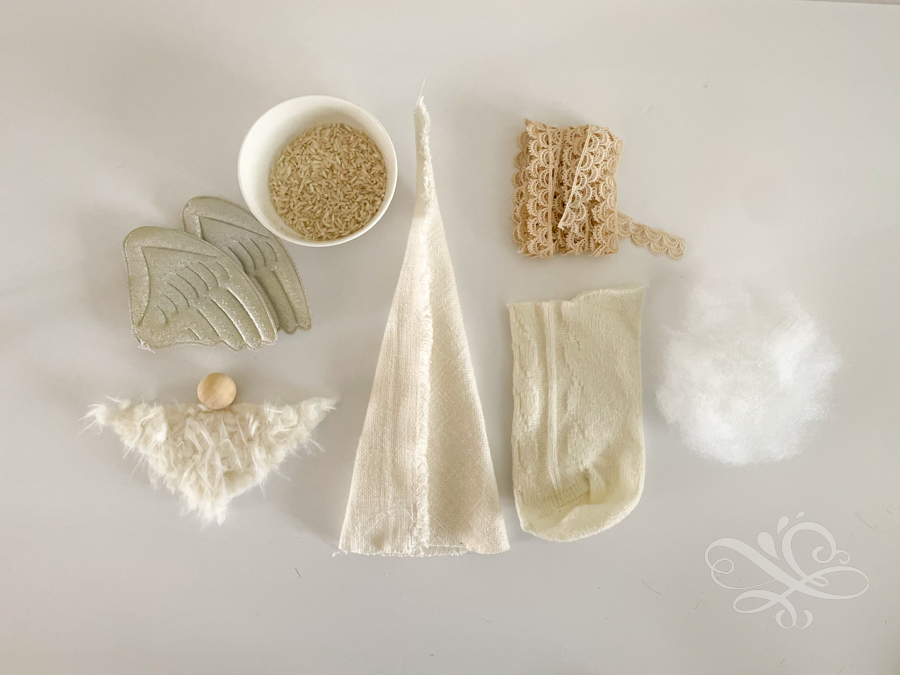
Girl Angel Gnome
- Free Pattern
- White sock
- Sewing Machine
- White fabric for the hat
- White felt or sturdy fabric for the wings
- rice
- poly fil
- rubber band
- scissors
- chunky braided yarn
- hot glue gun and glues-ticks
- small rubber bands
- wooden ball or felt ball
- embellishments for dress and hat
Watch how to make angel gnomes:
Here’s how to make angel gnomes:
Today we are going to make both boy and girl angel gnomes. The steps for making the boy and girl angel gnomes are very similar except for step four.
Step 1: Make your angel gnome’s hat
Start by downloading your free pattern and taping the gnome hat together. Then take your scissors and cut out your gnome hat.
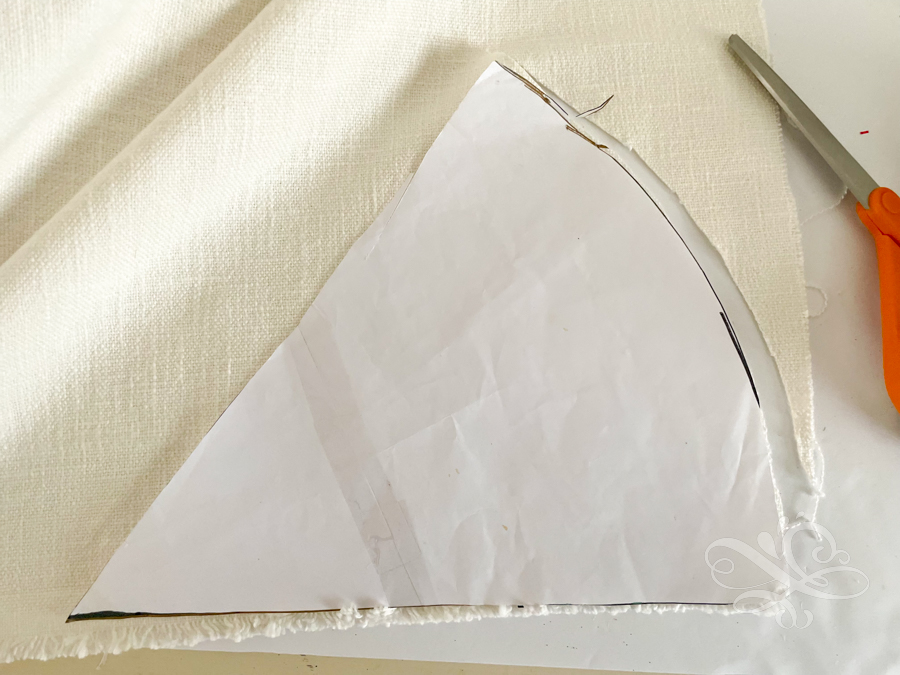
Using a sewing machine or a hot glue gun, run a seam along the hat make a cone shape.

Step 2: Preparing your angel gnome body
The next step is to fill your angel gnome’s body. Take a white sock and fill it with 1/4 cup of rice. Then fill the remainder of the sock with poly-fil. Use a rubber band to close up your angel gnome’s body. You want a nice full body for your angel gnome. Then cut off any excess material from the sock.
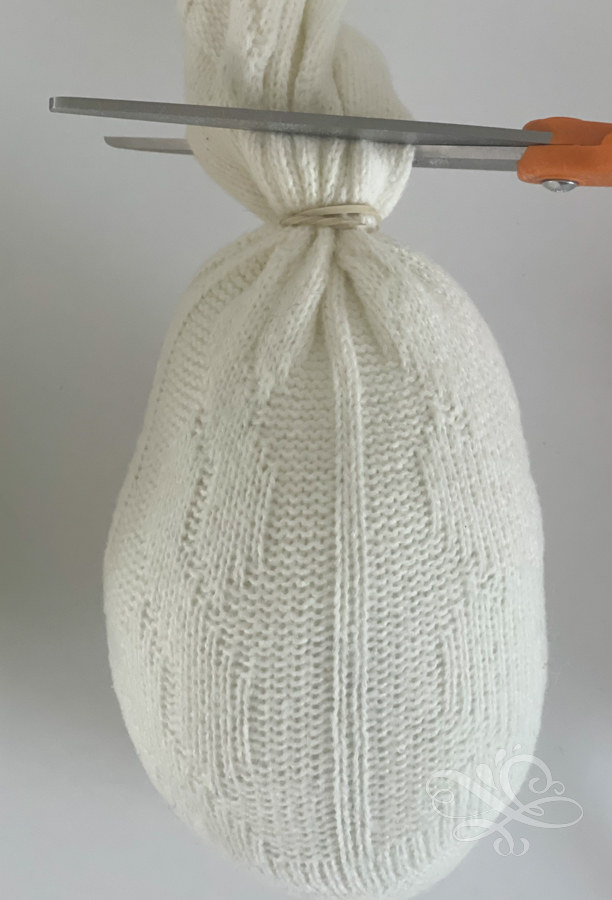
Step 3: Fill your hat and attach it to your angel gnome’s body
Now take your gnome’s hat and fill it 1/2 full with poly-fil. You can use wire or a wooden dowel to help the hat stay upright, but it isn’t necessary.
Place the gnome’s hat on your gnome’s body and arrange it how you like. Adjust the poly-fil if needed in either the body or the hat. Once you like the way it looks hot glue the hat onto the body.
Step 4: Add the hair and nose to your angel gnome
This is the only step that is different for the boy and girl gnome.
Boy gnome- hot glue the beard and nose in place.
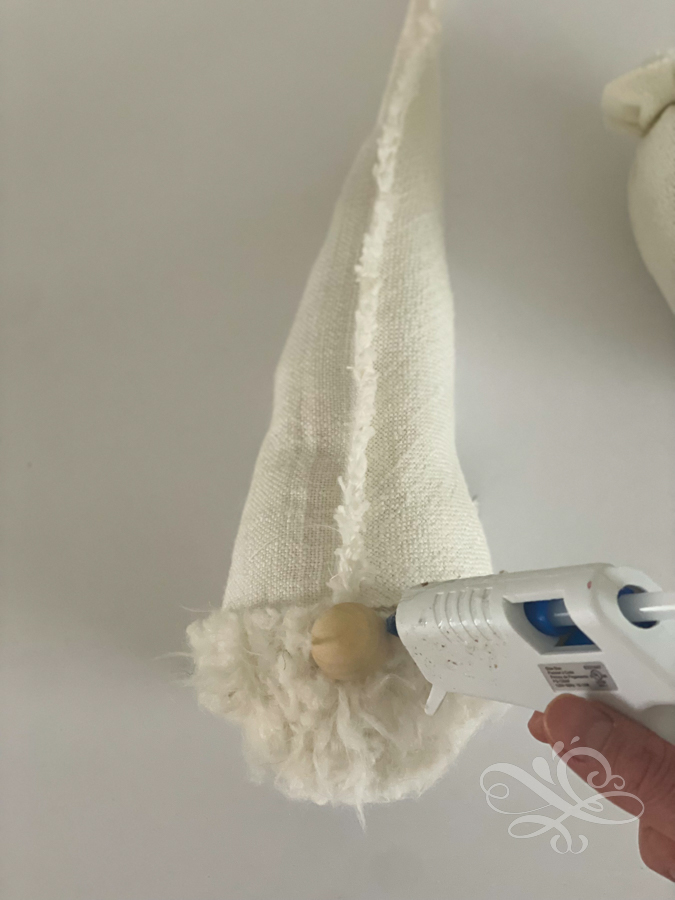
For the girl angel gnome- cut off a length of the chunky yarn that will fit on both sides of your girl gnome’s face. Then use rubber bands to tie up the ends of the braided yarn so it does not unravel. Hot glue the top of one end underneath the girl angel gnome’s hat.
Then hot glue the nose in place. I didn’t get a good picture of this while I was making these angel gnomes so I took one from my girl gnome post.
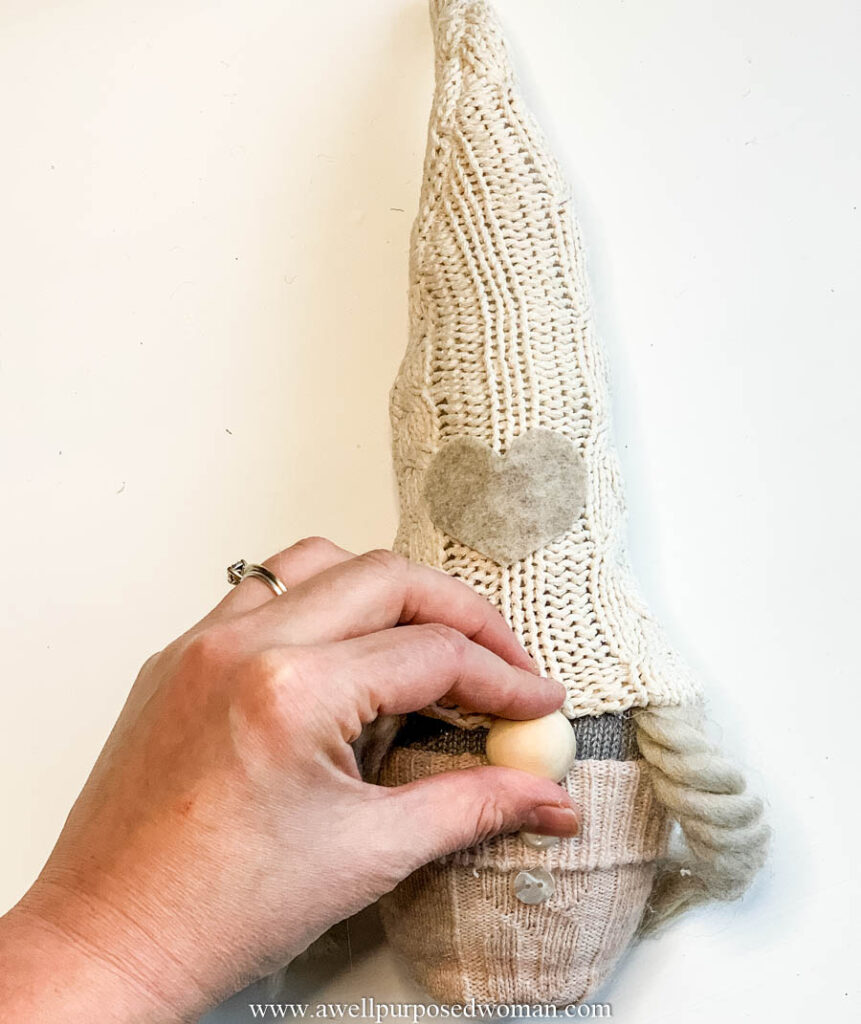
Tip: With the girl gnomes I like to add a little dress by using the top cuff of one of the socks I already used for my sock body. This gives the girl angel gnome something a little extra since her face might appear a little plain with just a nose and braids.
Step 5: Add your wings to your angel gnomes
Use your wing pattern and cut out two sets of each wing with felt. Hot glue or sew the two wings together that are facing the same direction. This will just give you a more sturdy wing.
If you are sewing you can stitch or embroider along the lines to give your wings some definition.
Then hot glue the wings onto the back of the body of the gnome. Arrange them so you like the way they look.
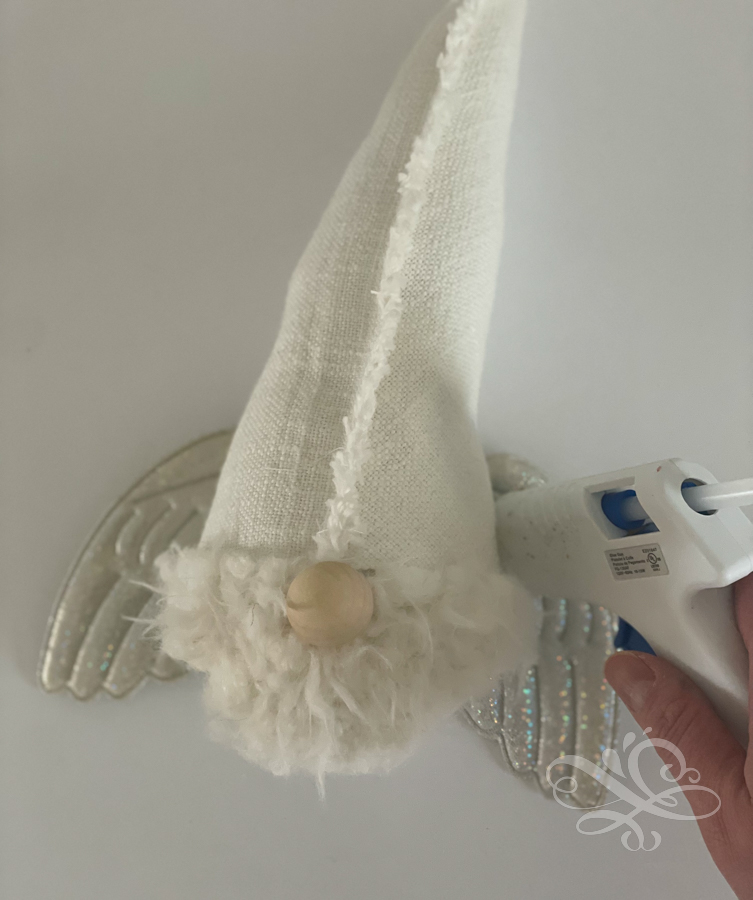
Step 6: (Optional) Add embellishments to your angel gnome
The last step is optional but add snowflakes, buttons, ribbon, trim or any other embellishments to your angel gnomes. I added a small snowflake at the bottom of each of the angel gnomes’ hats.

And that’s it! Here’s your angel gnomes!
They are a beautiful reminder of the birth of Christ and I couldn’t help but sing. Angels We have Heard on High as I was making these cute little angel gnomes.
Angels we have heard on highSweetly singing o’er the plains,And the mountains in replyEchoing their joyous strains.
[Chorus]Gloria in excelsis Deo.Gloria in excelsis Deo.
Shepherds, why this jubilee?Why your joyous strains prolong?What the gladsome tidings beWhich inspire your heav’nly song?
Come to Bethlehem and see Him whose birth the angels sing; Come, adore on bended kneeChrist the Lord, the newborn King.
Traditional French carol, 18th cent.

Now you have these adorable angel gnomes to add to your Christmas decor this year! Thanks so much for joining me and if you missed any of our other projects from our Craft a Day Countdown to Christmas you can check them out below!
Happy Christmas crafting!
Take care and God bless!

Craft a Day Countdown to Christmas Projects:
1: Dry Out Oranges for Garlands and Ornaments
4: How to Make a Star Wreath out of Chunky Yarn
5: How to Make Christmas Trees out of Yarn
6: How to Make an Ornament Wreath
7.How to Make a Star Ornament out of Beads & Strings
8: Free Gift for Email Subscribers
9: How to Make an Outdoor Planter
10: 10 Last Minute Mason Jar Lid Crafts
11. How to make a Christmas Mug on a Cricut Machine
12. How to Make Watercolor Christmas Cards Easily (4 Designs)
13. How to Make Christmas Yarn Ornaments on a Stick
15. How to Make a Star Shaped Christmas Wreath
16. How to Make an Easy Wood Christmas Trees
No time to craft now? No worries just pin it for later!

Leave a Reply