Learn how to make beautiful watercolor Christmas cards to send to friends and relatives. This step by step video will show you exactly how you can make your own Christmas cards. No experience in painting is required, this is for an absolute beginner.
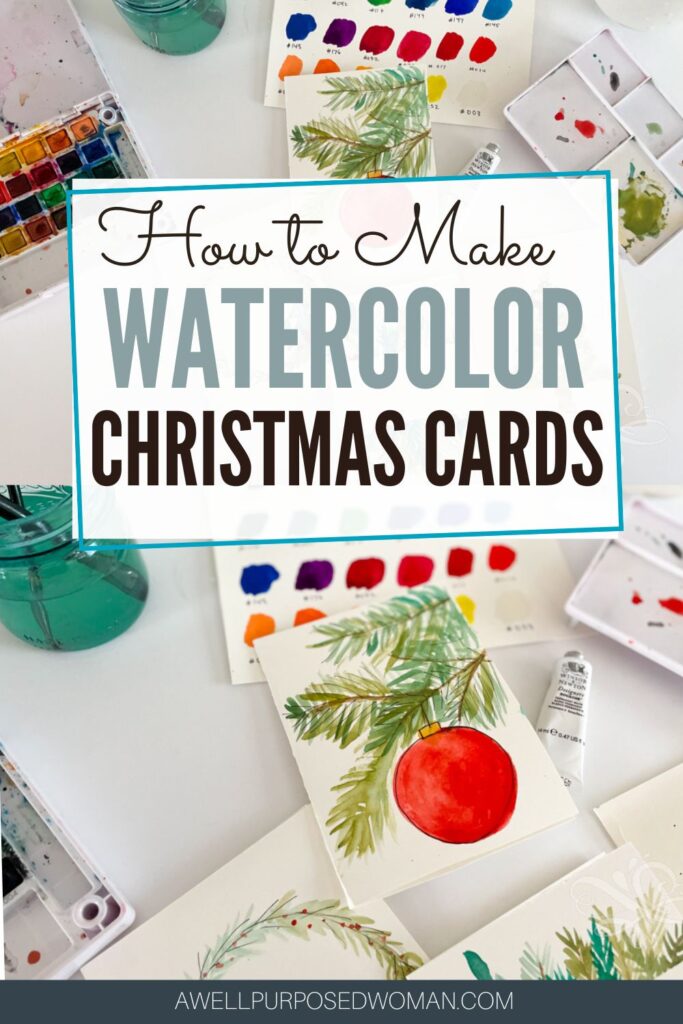
Today is day 12 of our Countdown to Christmas and we are going to make our own Watercolor Christmas Cards!
If you have ever wanted to try your hand at watercolor painting then today is a great day to be inspired! Watercolor painting is simple and fun and even an absolute beginner can make some really pretty designs. Making your own Christmas cards is a special way to send an extra bit of love this year!
And if you aren’t in to making your own. I am sharing my designs with you today so you can use these for your own Christmas cards this year!
So let’s get started on making watercolor Christmas cards!
This post contains amazon affiliate links products so you to know which products I reccommend. I do receive a small comission at no additional charge for products bought through a link.
Here are the supplies you need to make Watercolor Christmas Cards:
- Watercolor cards
- Size 2, 5, 11, and 6 brush
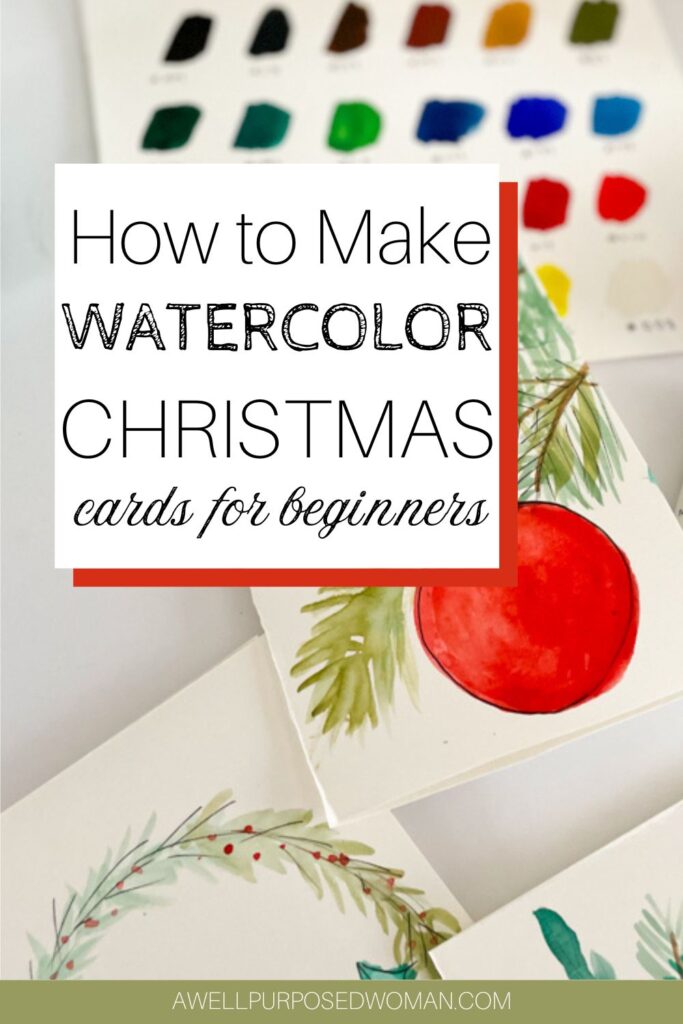
- Watercolor set of 12 colors (we will use primarily greens, brown, red, and gold colors)
- White gouache
- Fine tip black pens
- Pencil and eraser
Watch how to make watercolor Christmas cards:
Here’s how to make watercolor Christmas cards:
1. Winter Frame Watercolor Christmas Card
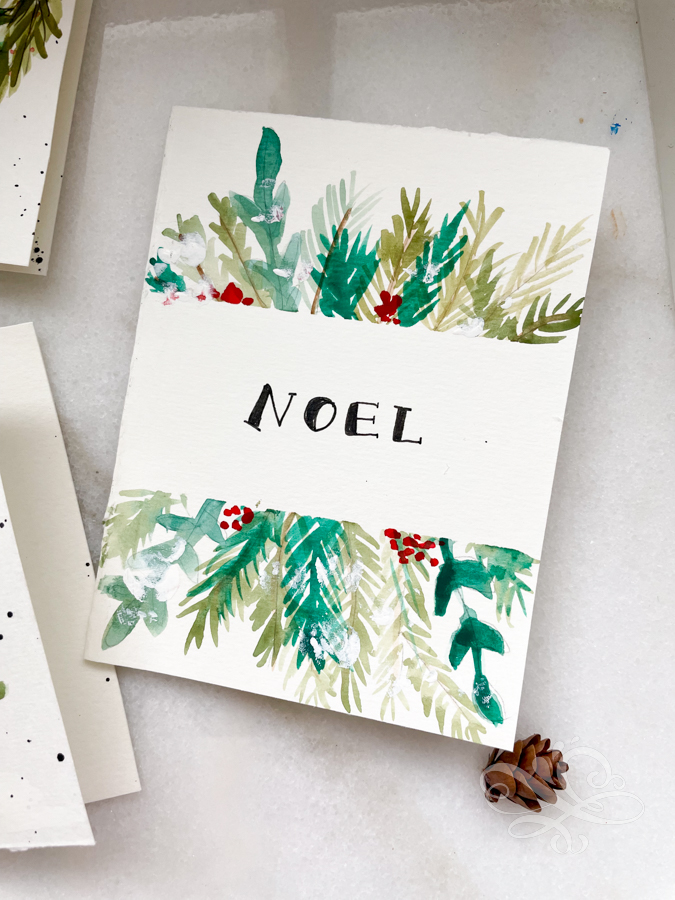
Step 1: Place painter’s tape across the center of your card
Start by putting a piece of painter’s tape across the center your greeting card. We will paint above and below the tape and the center will remain blank.
Step 2: Draw your evergreen branches
Now take a pencil and draw lines coming out from the center of your frame. These will be the branches of your evergreens. You can also add a few lines with leaves on them, for some winter florals.
Now take a brown watercolor and brush over the lines that you drew.
Step 3: Add your evergreens
Now mix up some dark greens, and lighter greens. Using a size 2 brush start in the center of the branch and make strokes going upward to the left and right with your brush. Fill in your branches with these upward brush strokes.
Fill in the top and bottom of the card with these evergreen branches and floral greens.
Step 4: Add in some berries
Once the green paint has dried. Now taking your size 2 brush again and add some red berries to your design. I choose 2 areas on the top and bottom to add berries.
Step 5: Pull off your painter’s tape and add writing
Once all your paint is dry. Remove the painters tape in the center of your card. Add words or lettering to the white space on the card.
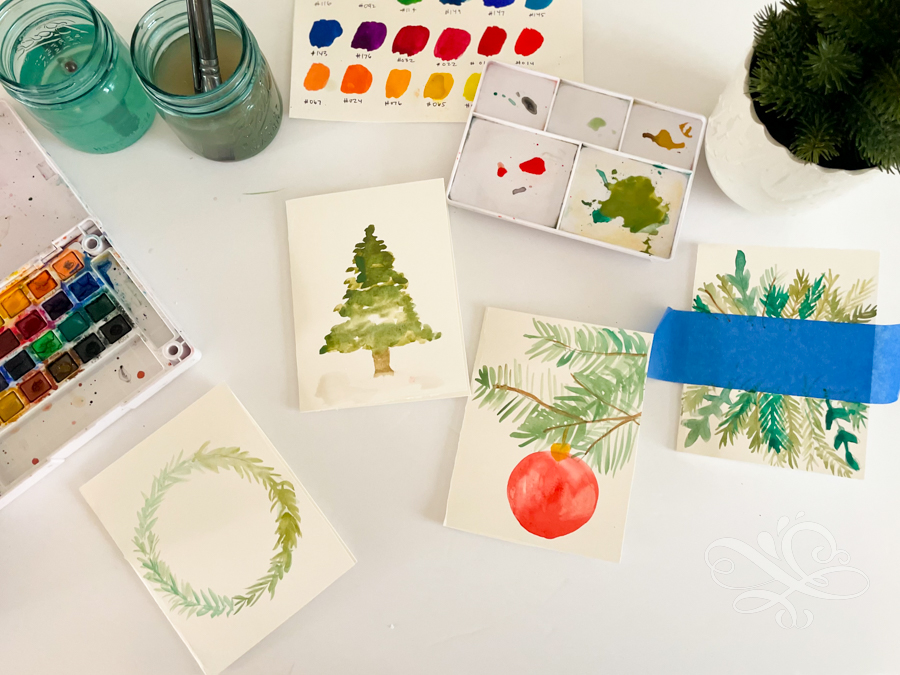
2. Watercolor Christmas Tree Card
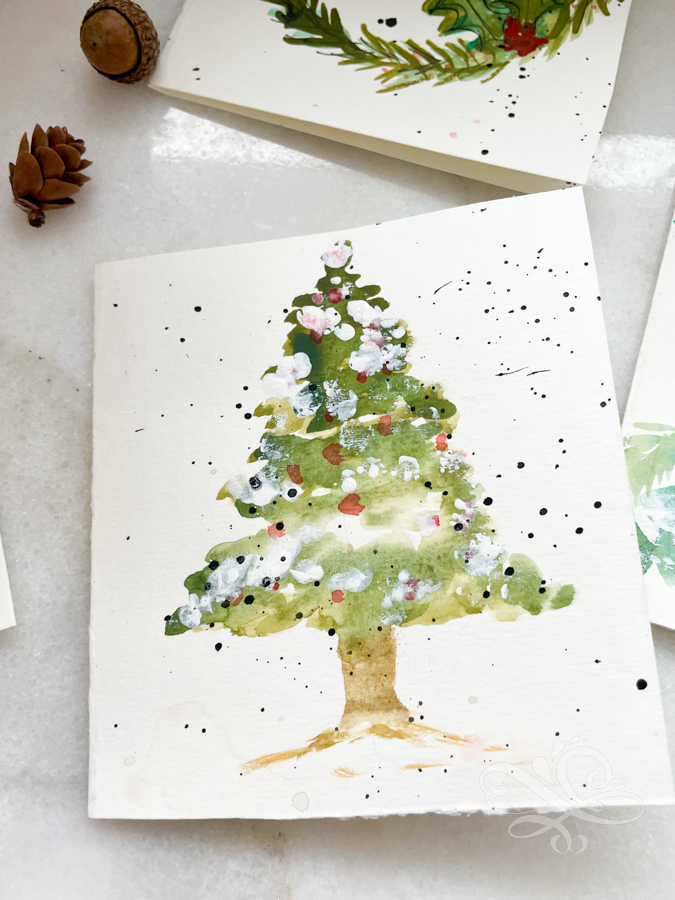
Step 1: Sketch a line down the middle of your card.
This will be the trunk on your tree. Then take the number 5 brush and dab paint in the shape of a Christmas Tree. I started at the top with one dab and added two underneath, then 3, then 4 and so on.
Add some areas of light and dark greens. Make the tree in the shape of a tree.
Step 2: Add a trunk on the bottom of the tree
Now take some brown paint and just add a trunk to the bottom of your tree. Drag the bottom of the tree out a bit as if its a base to your tree.
Step 3: Embellish your Christmas Tree
Although the tree to dry. Fill in any areas with more green. Then add embellishments to the tree. Little red dots for onrnaments or whatever you would like.
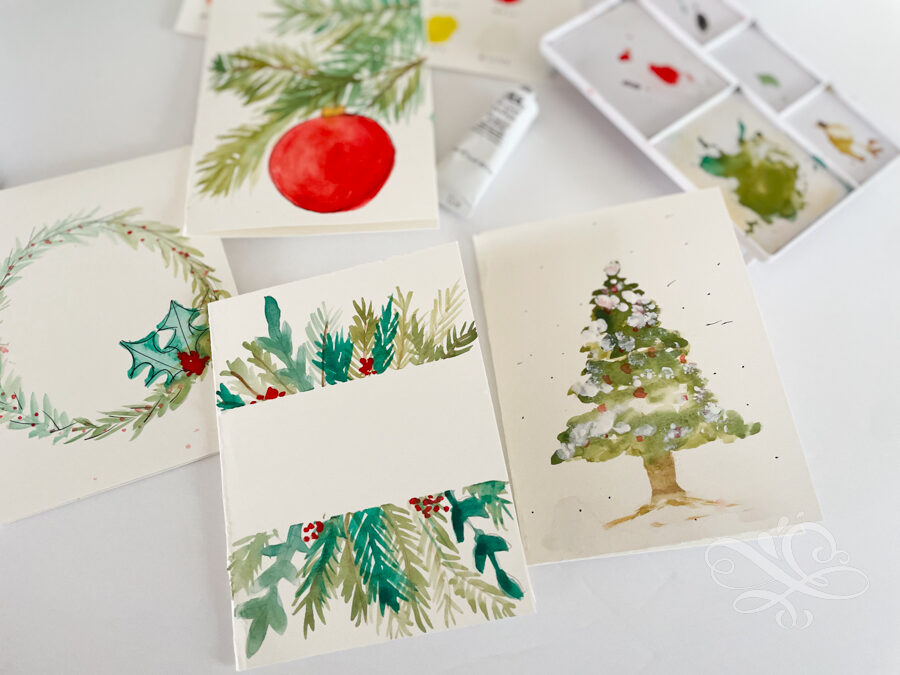
3. Watercolor Christmas Ornament Card

Step 1: Sketch your ornament and evergreen
Start by sketching a few evergreen branches in the top of your greeting card. Then trace around a circle underneath the branches. I used the outside line of some washi tape. This will be your ornament hanging from an evergreen branch.
Step 2: Paint your ornament
Taking a size 11 brush, fill in the circle with your paint. You can make a perfect circle with the brush if you turn the card as you paint, But don’t worry about it being perfect just fill it in as best you can!
Use gold paint to put a small ornament cap on the top of your ornament. You can use black pen or brown paint to make a string from the ornament to the evergreen branch.
Tip: You can create highlights in your ornament by brushing water onto the ornament and dabbing it out with a paper towel.
Step 3: Paint your evergreen branches
Next use your brown paint to paint the branches of your evergreen. Use green paint and go off the center branches to the left and right in an upward brush stroke. Fill in the branches as full or as sparse as you would like.
Step 4: Use a fine point pen to create lines (optional)
Now take a fine point pen and outline the ornament or branches. This adds an interesting flair to your painting.
4. Watercolor Christmas Wreath Card
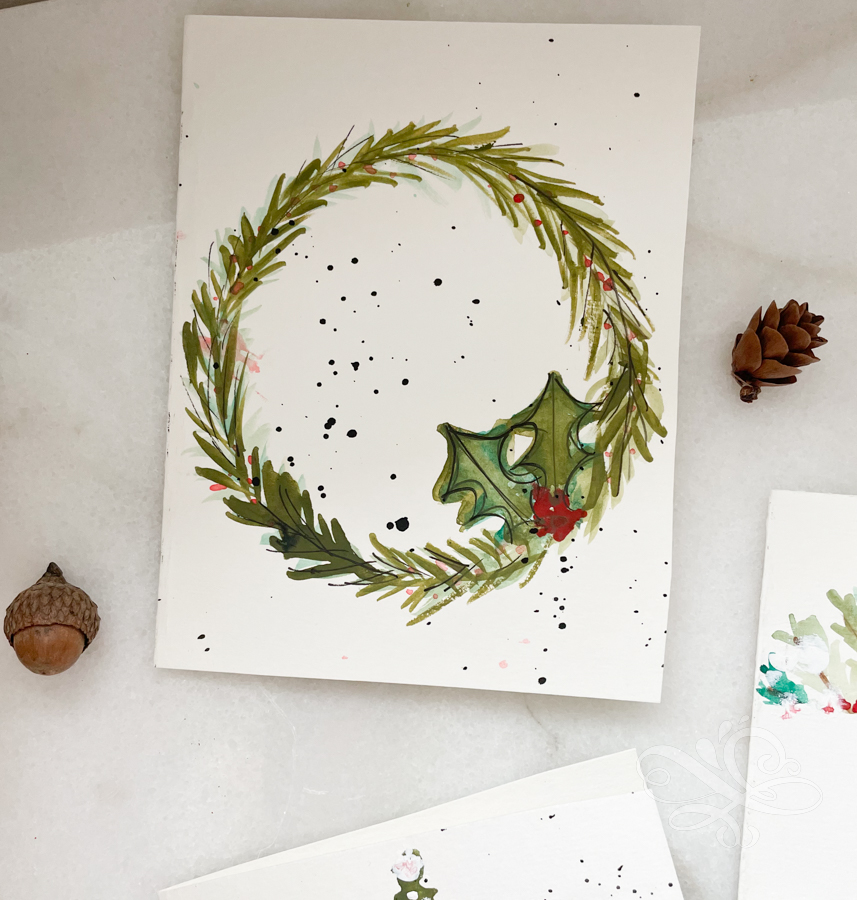
Step 1: Trace a circle in the center of your card
The first step in making a Christmas wreath card is to trace a circle in the center of your card. I used my painter’s tape and just traced around it.
Step 2: Paint around the circle
Now take your size 2 brush and green paint and outline the circle with brush strokes going upward to the left and right of the circle.
You can use brushstrokes on the entire circle forming a complete wreath or just do a small section of the circle with the greens and use gold or black paint to make a hoop on the other part of the wreath.
Step 3: Add berries to your wreath
Allow your wreath to dry. Then come back with your size 2 brush and add some red paint or other color paint for berries around your wreath. Just use the tip of your brush and make small red dots on your wreath. I put berries all around the wreath.
Step 4: (Optional) Use a fine point pen to add
The last step is optional but you can take your fine point pen and trace around your wreath or make some pen lines where the berries are as well.

I hope you had fun making these watercolor Christmas cards! These cards are simple, easy to make and add your personal touch. Please let me know if you have any questions below. Otherwise thanks for being here and if you missed any of the other days of our Christmas Countdown you can see them below!
Take care and God bless!

Here are the other days of our Countdown to Christmas!
1: Dry Out Oranges for Garlands and Ornaments
4: How to Make a Star Wreath out of Chunky Yarn
5: How to Make Christmas Trees out of Yarn
6: How to Make an Ornament Wreath
7.How to Make a Star Ornament out of Beads & Strings
8: Free Gift for Email Subscribers
9: How to Make an Outdoor Planter
10: 10 Last Minute Mason Jar Lid Crafts
11. How to make a Christmas Mug on a Cricut Machine
No time to paint now? No worries just pint it for later and learn a new skill in the new year!
These cards are so pretty! I am going to try my hand at it if I have any time left for this Christmas…otherwise, will make a bunch for next year. Thanks for sharing this wonderful idea and tutorial!
Of course! What a great idea! Enjoy! Elizabeth