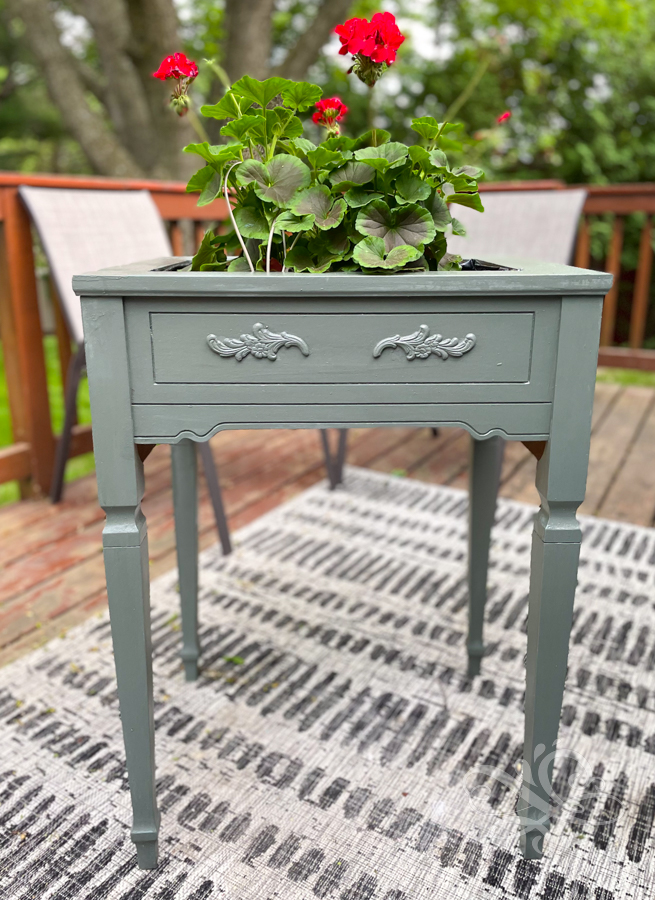
Learn how to update an old sewing table into a planter for summer. If you have an old sewing table than this is the perfect tutorial for you! Re-purposing an old sewing table into a new planter is a practical way to update it. Old sewing tables are set up with a wide opening that is perfect for turning into a planter.
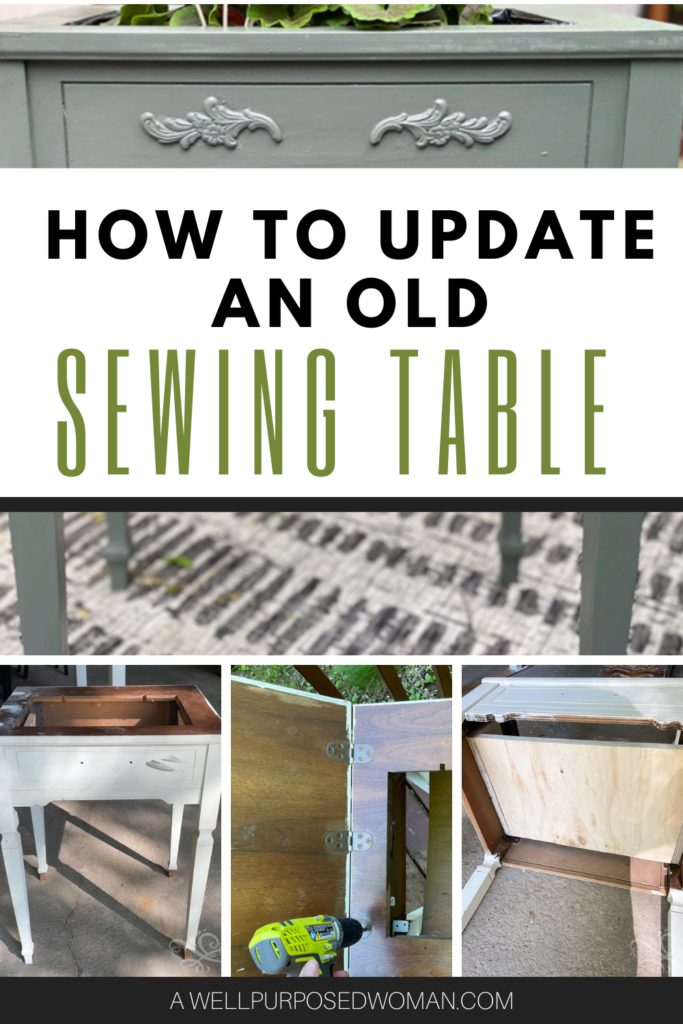
Today I am going to share how I updated an old sewing machine table into an unique planter. Whenever the weather turns nicer my husband and I start cleaning out our garage. This year I updated and moved out almost all the furniture I had been gathering. I updated the hope chest, in sage green just a few weeks ago, and moved a beautiful white table into my craft room.
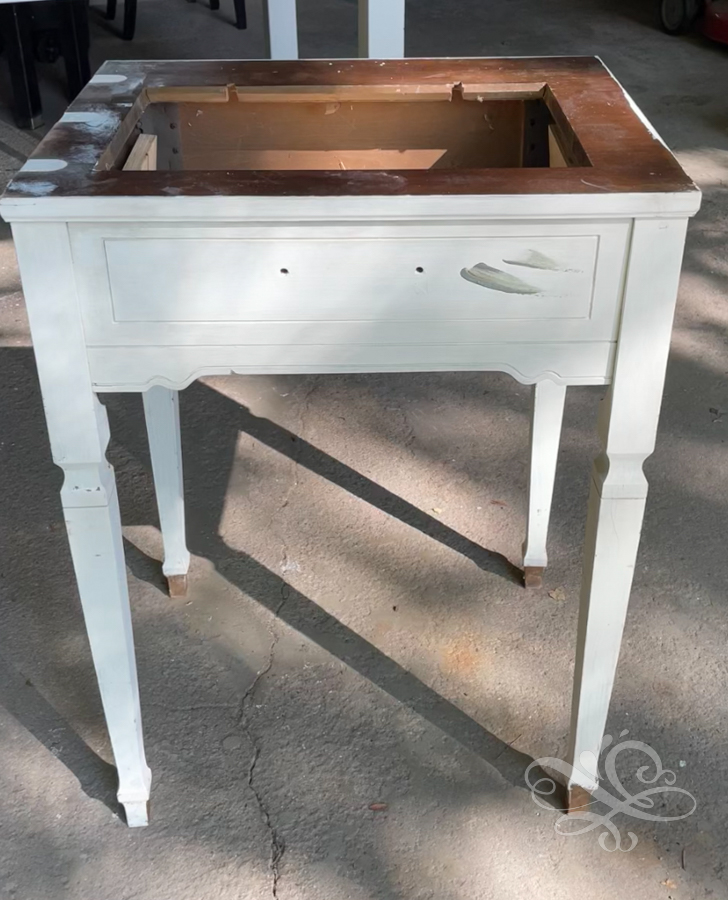
Before I decided to update the old sewing machine table this week I had painted it white. I never did find a good purpose for it so it was hanging out in my laundry room most recently.
But this year when I started planting flowers, I couldn’t help but realize how the sewing table was perfectly designed to be a planter box. So my gears started churning. And all of a sudden I had a new purposed in mind for the old sewing table.
What a joy to give things that once shown with pride and beauty a grand new purpose! Of course that reminds me of a spiritual principal as well. It is easy to feel like we have maybe reached our prime and the future looks bleak. But the beautiful thing about the Lord is that each day and in each season He gives us new purposes! So let’s get to updating this old beauty!
This post contains affiliate links, which means I receive a small comission at no extra cost to you for reccommending products.
Here’s the supplies you need to update an old sewing table:
- Old Sewing Table
- Chalk Paint
- Wood Appliques
- Polyurethane
- Wood Glue
- Wood Scraps
- Staple Gun
- Landscape weed control sheeting or breathable fabric
- Screws
- Screwdriver
Here’s how you update an old sewing table into a planter;
Step 1: Remove the table top of your sewing table
The first thing I did to the sewing table was remove the lid of the table top of the sewing table. I have seen some people leave this part on and create a potting station but I don’t usually like how the open table top makes the table look unbalanced. So I voted for removing the table top completely for my planter.

Step 2: Remove the hadware of the sewing table
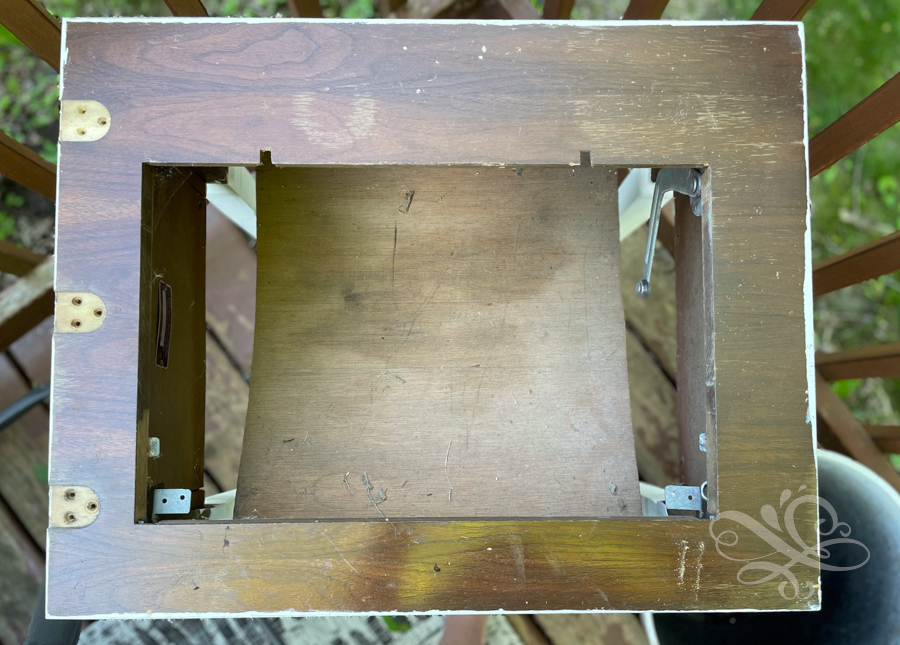
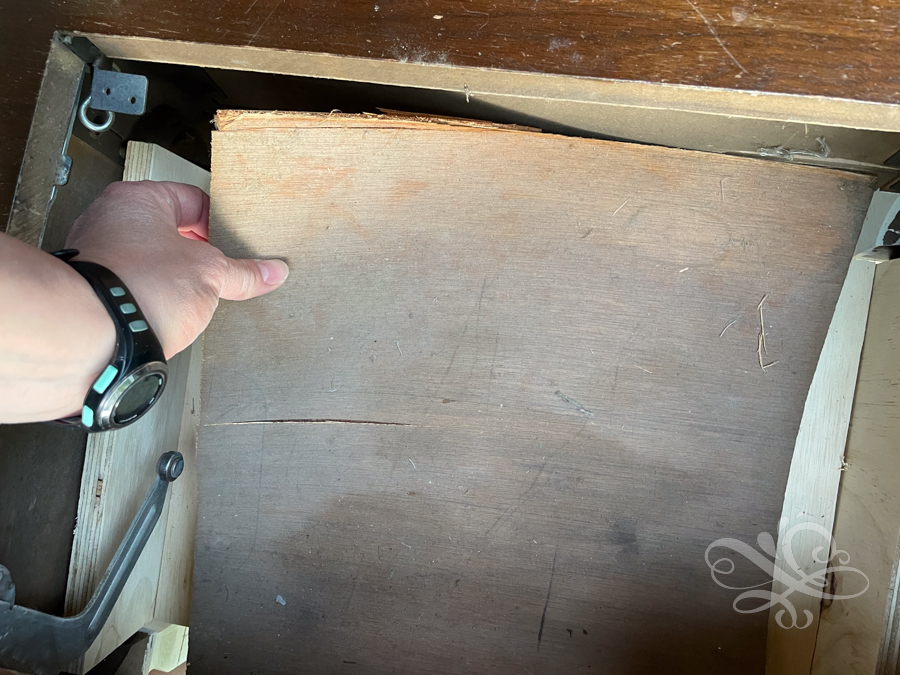
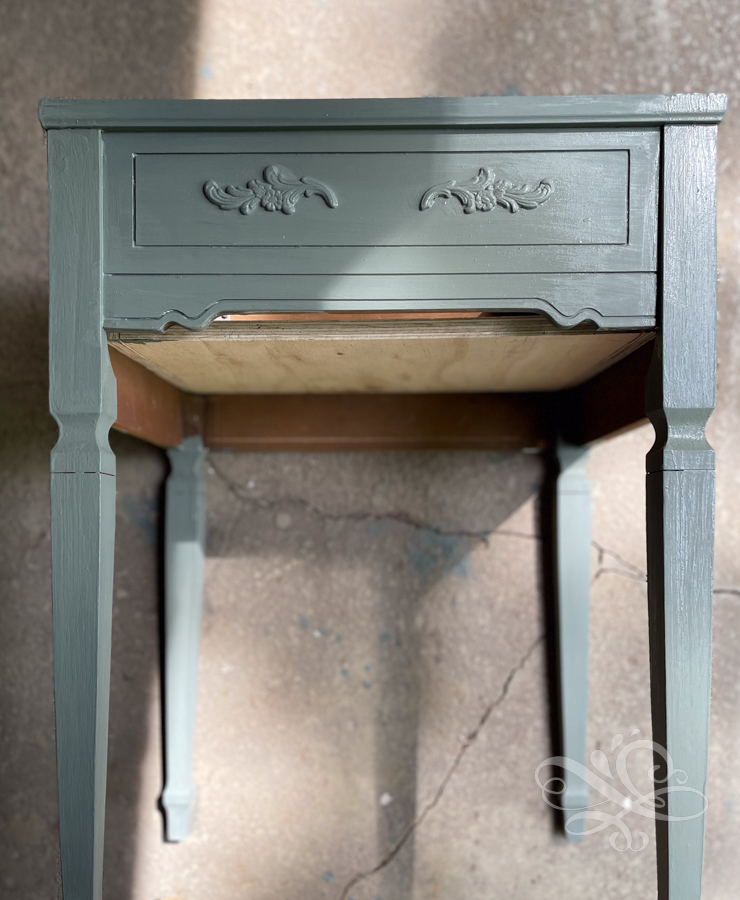
The next step in transforming your sewing table into a planter is to disassemble the sewing table. Take a screwdriver and remove all the parts that are no longer needed. For me I removed everything that was was not a part of the wooden structure of the table.
I also removed a thin piece of plywood that was underneath the hardware portion of the table. You could consider keeping this piece if you think it might be sturdy enough to hold a planter. The plywood in my table was already quite damaged and flimsy so I pushed hard on it and it came apart.
Step 3: Wood fill any holes of the sewing table
After I finished removing all the parts I wanted off of the sewing table, I filled in any holes with joint compound. You can also use wood filler for this step. Fill in the holes and then wait for the filler to dry.
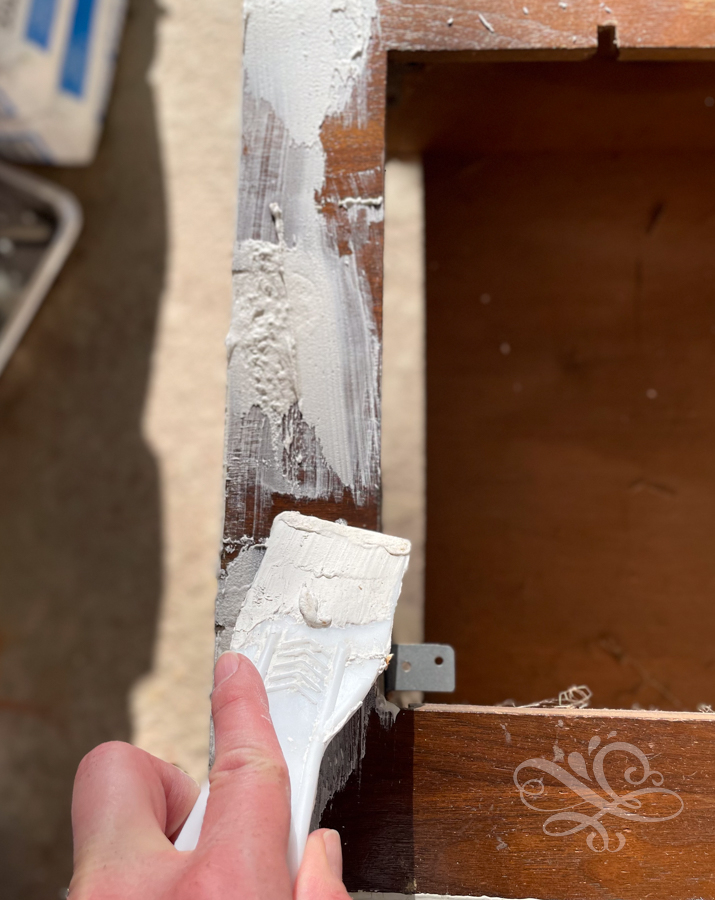
Once the filler or the joint compound has dried. Sand off any excess to make a smooth finish on the top of your planter.
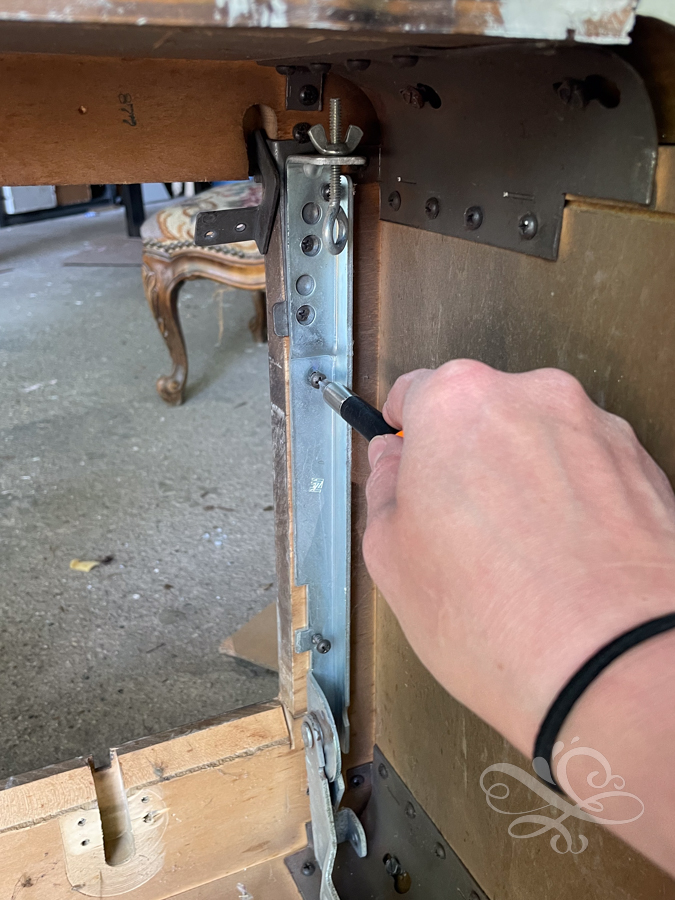
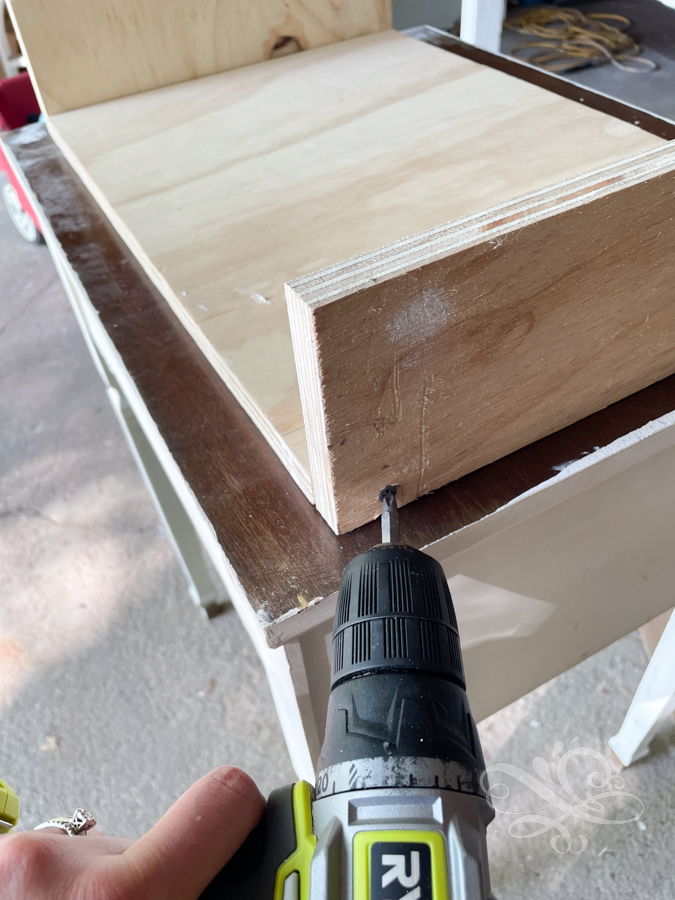
Step 4: Add some scrap wood to use as the bottom of the planter
The last step I did before painting the sewing table was to add some scrap wood on the bottom of the table. I just added two pieces of plywood with a drill and screws on the sides of another piece of wood. The wood pieces fit just inside the sewing table.
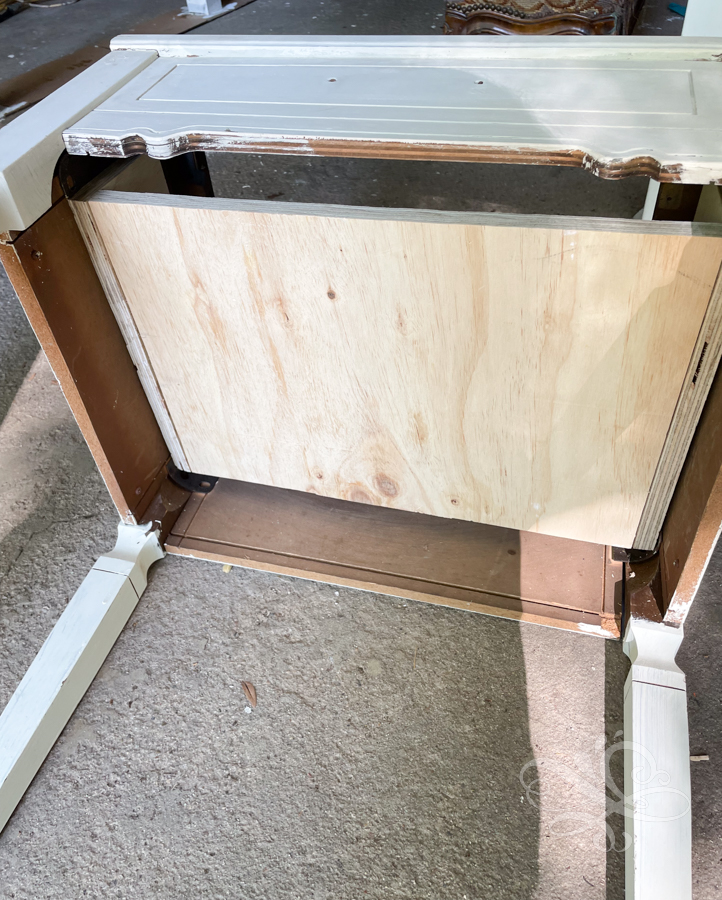
Step 5: Paint the old sewing table
Once the bottom of my sewing table was in place, I took some sage paint and painted the table. I used the leftover paint from the sage hope chest.
Step 6: (Optional) Add embellishments to your planter
I wanted to add some character to our planter. So I decided to glue on some wood appliques on with wood glue. This is an inexpensive and quick way to take furniture up a notch.
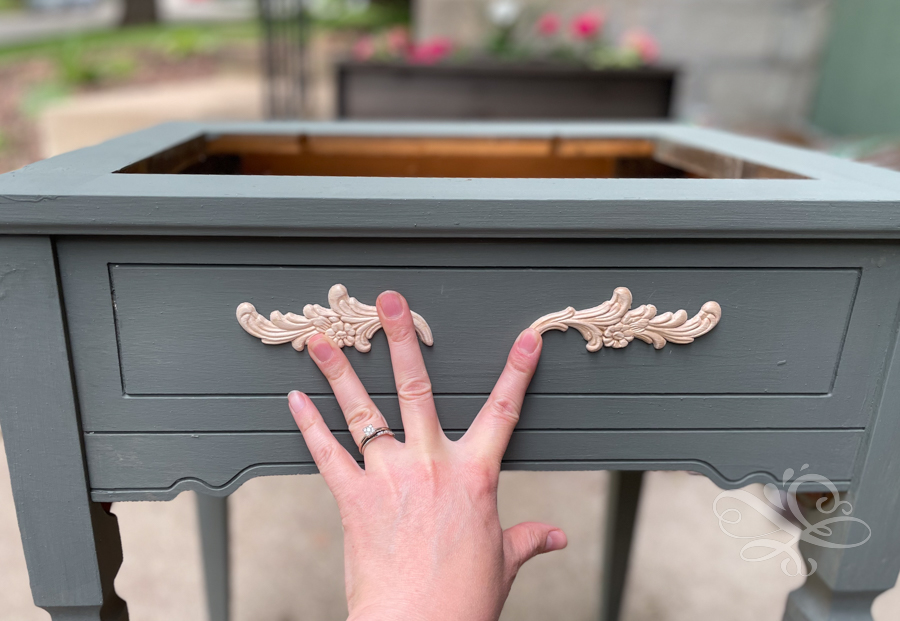
Use wood glue on the underside of the applique. Then hold the appliques in place with a clamp or other weighted object. Then let the glue dry.
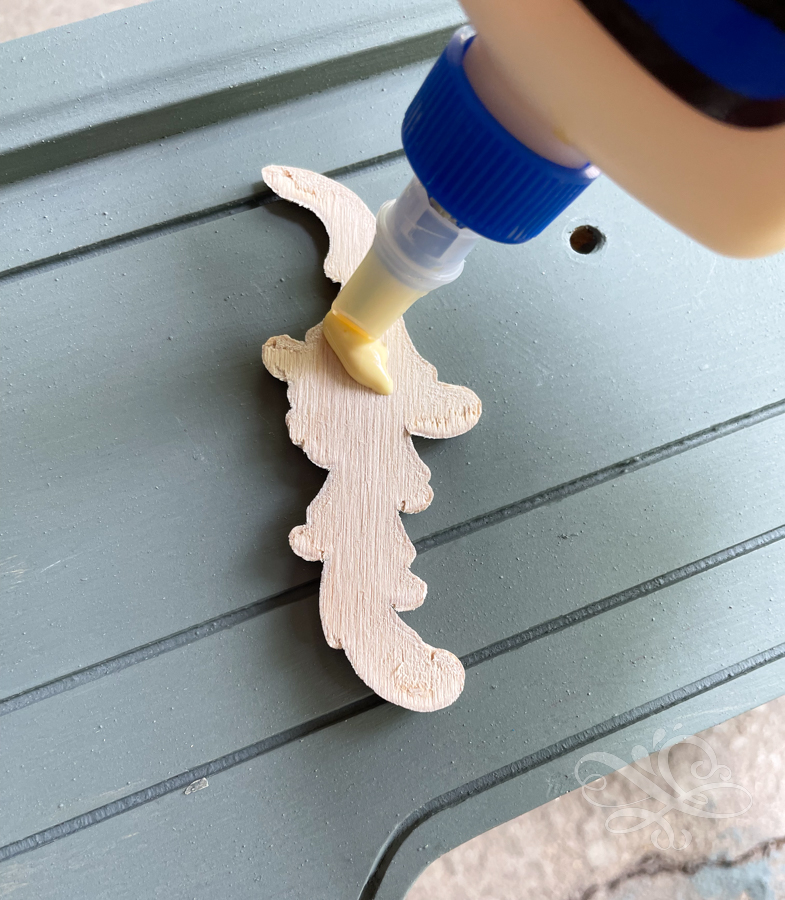
Once the glue has dried. Paint over the appliques.
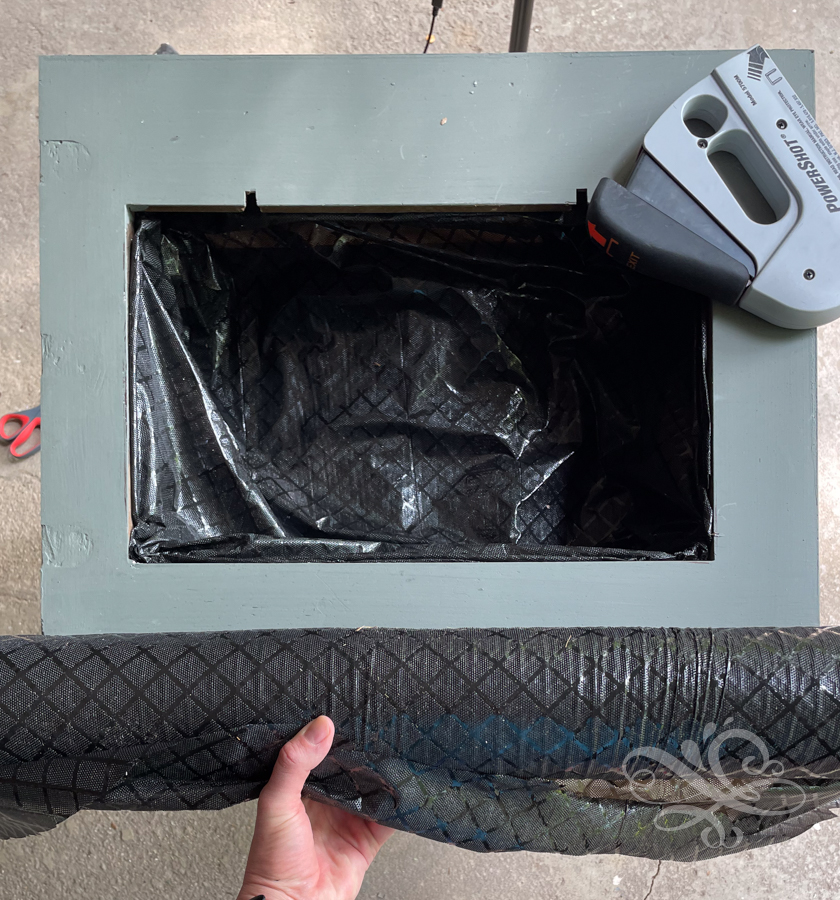
Step 7: Add your landscape sheeting and your plants
The last step I took was to staple plastic sheeting on the inside of the planter. I used a staple gun and stapled in all the way around the planter box.
And that’s it! Now you have a new purpose for this old beauty!
And it’s like Louis Nizer once said, “..a beautiful lady is a work of art!” Just like this beautiful old sewing machine which is now a new planter to use in my garden!
I hope you enjoyed today’s makeover. Let me know if you have an old sewing machine that you might consider re-purposing into a planter!
Take care and God bless!

This is beautiful. What a great recycle idea.🥰
Thank you so much Dee! Elizabeth
Lovely idea! Did you plant directly into planter or place potted plants in it? If planted directly, does the landscape plastic prevent leakage?
Hi Heidi, You can do either. This year I just used a potted plant but the idea is to use it as a planter. Yes the landscape plastic on top of the scrap wood will hold dirt and plants in place, but still allows excess water to drain. Elizabeth
it came out beautiful 🤩
are you going to use it inside or out? wondering how it would hold up outside……
Hi Lorraine, I will plan to use this outside on our patio, but it will sit underneath an awning. I think it will hold up as well as old re-purposed furniture used in gardens. Elizabeth
Love it!!! What a great idea!