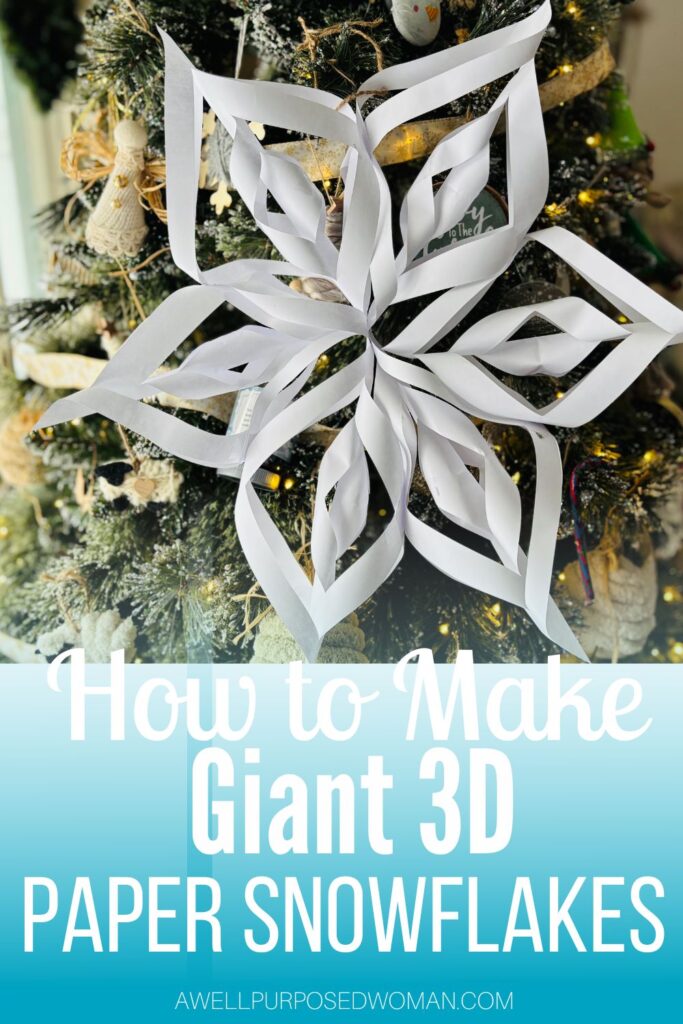
Learn how to make these giant 3D snowflakes this Christmas. These giant 3D snowflakes are quite the show stopping decoration! This step by step tutorial will show you exactly how to make these beautiful 3D paper snowflakes.
Today is day 13 of our Jesse Tree craft along to Christmas and we are going to make giant 3D paper snowflakes! Today we are talking about Namaan and how his leprosy was white like the snow, but the Lord miraculously healed him. So we are going to make giant 3D paper snowflakes.
This craft was my oldest daughter’s idea. She taught us how to make them and decorated our hallway with them. She is very excited to share them with you as well today! I have to say these snowflakes are REALLY fun and they make quite a statement. They would be perfect for a photo backdrop or holiday party.
So let’s get started!
Here’s the supplies need to make a giant 3D Paper Snowflake:
- 6 Pieces of Paper
- Scissors
- Twine
- Stapler
- Tape
Here’s how to make a giant 3D Paper Snowflake:
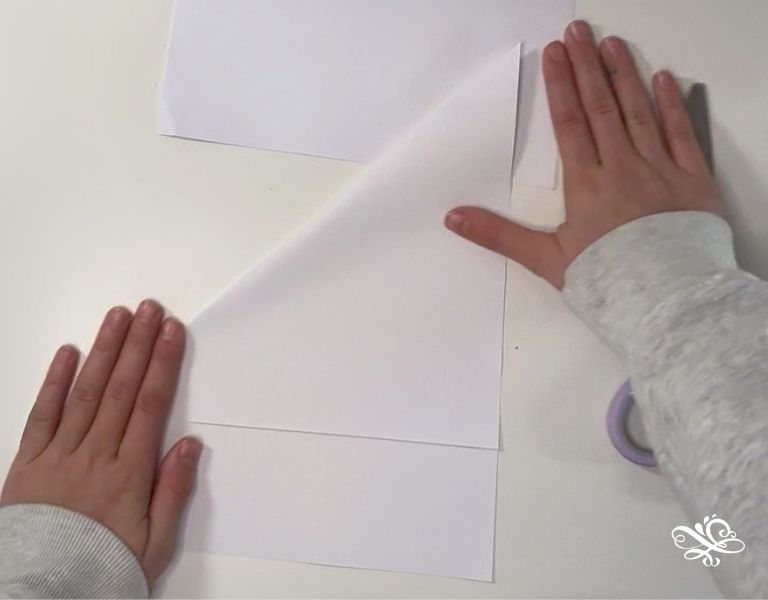
Step 1: Fold your paper making a triangle
Start with your regular paper, you are going to make a 8.5″ square by folding your paper into a triangle at 8.5″. Then cut off the extra few inches on the bottom of your paper.
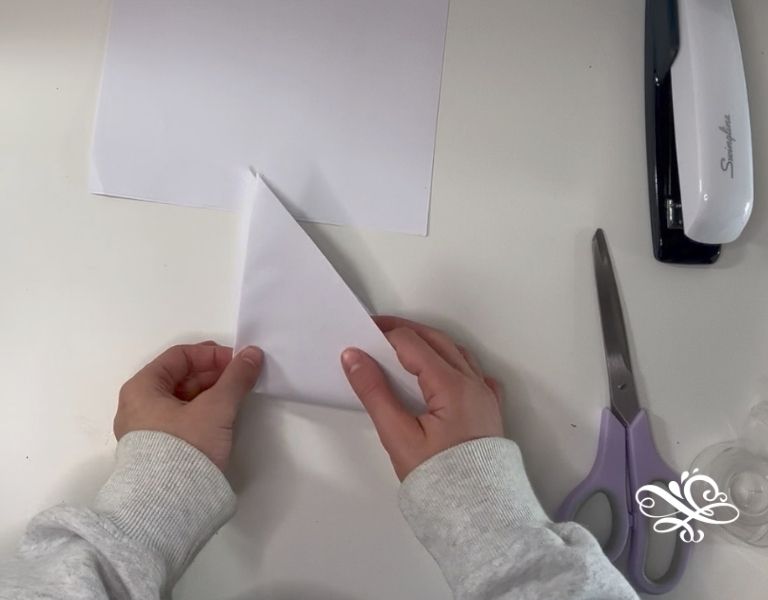
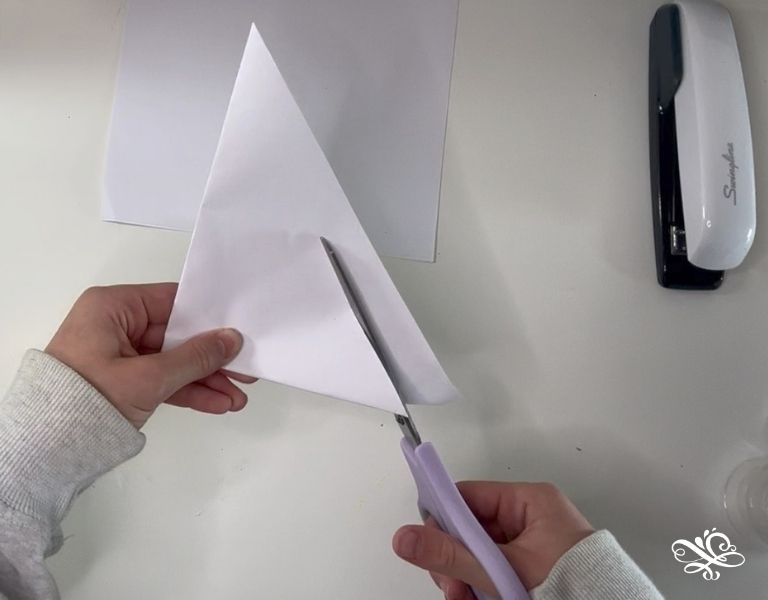
Step 2: Fold the paper again into a smaller triangle and make 3 slits
The next step is to fold your triangle, again and make a smaller triangle. Then on the folded edge make three slits on the triangle.
Step 3: Open your square and tape each section together
Open up your paper and you will have a square with four sections. You are going to start at the innermost section and tape the corner of the right and left section together. Then flip your paper over and tape the next section together. Continue to do this until all of the sections are taped together.
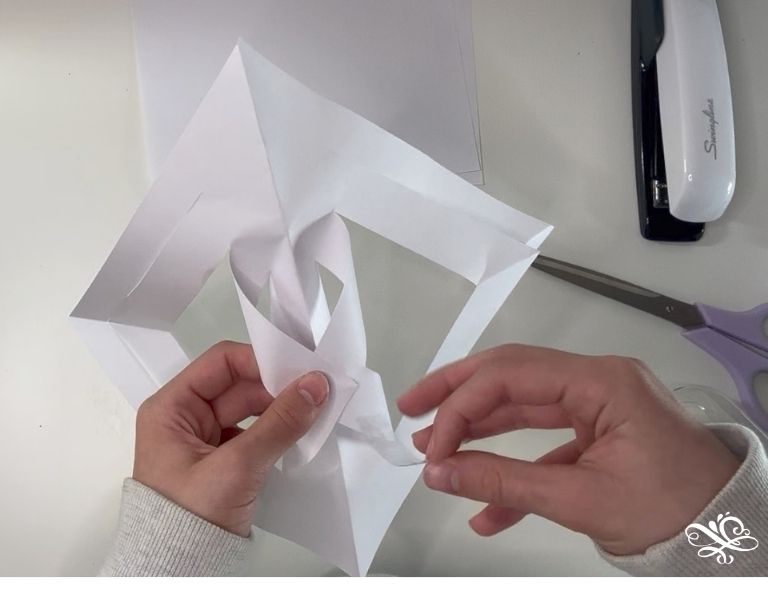
This is your first section of your giant 3D paper snowflake! Now you just have to repeat these steps 5 more times to make 6 sections for your paper snowflake.
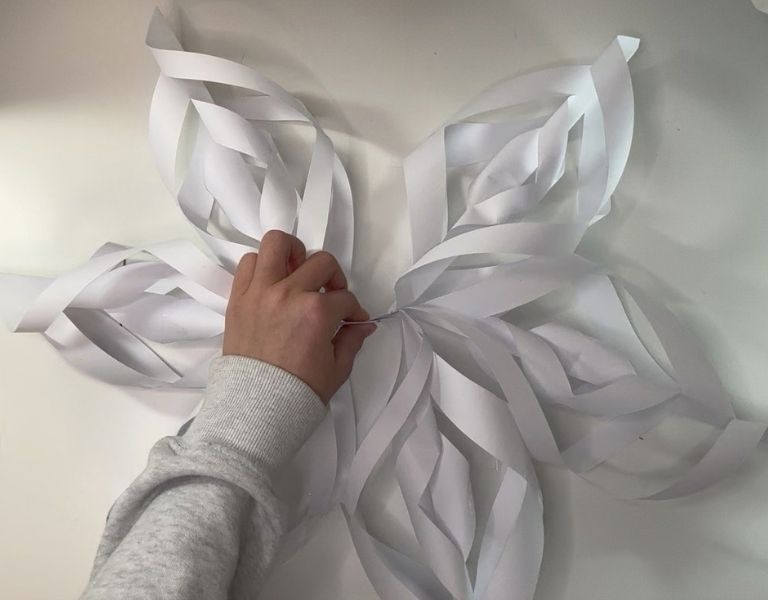
Step 4: Staple the sections of your 3D paper snowflake together
Now you will want to attach all of your snowflake sections together. Use a stapler and staple three sections together at a time. Then staple in the center of the snowflake and staple all the sections together.
After the sections are stapled together, go around the paper snowflake and staple each section together as well.
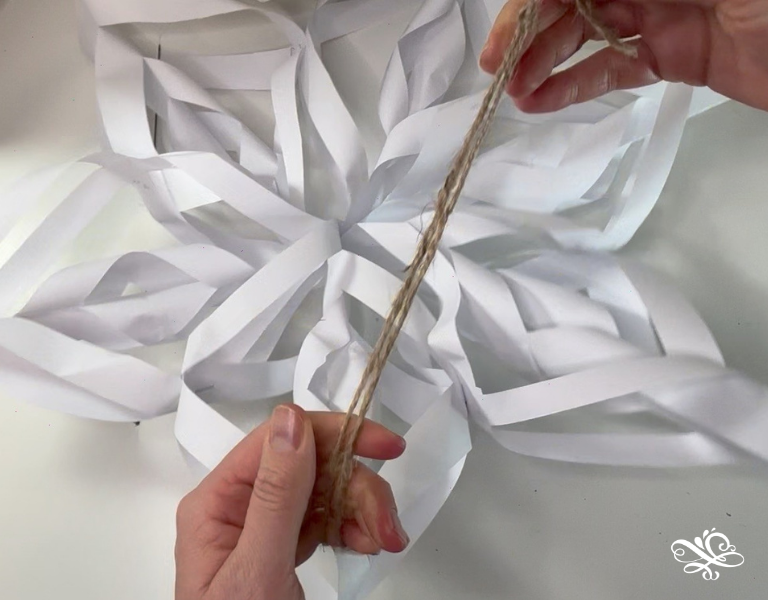
Step 5: Hang your giant paper snowflake
The last step is to hang up your paper snowfalke. Attach twine to one of the sections and tie it together.
And that’s it!
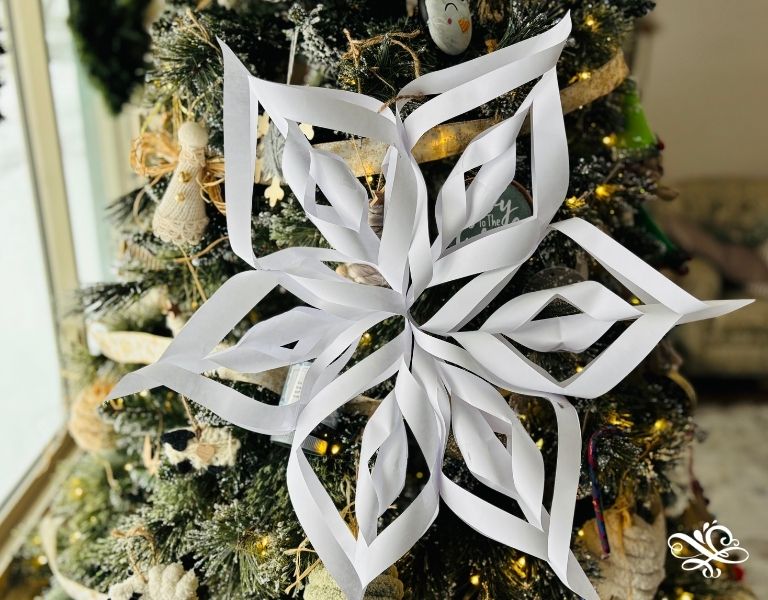
Isn’t this gorgeous? And who would have thought you could make it from regular pieces of paper. I was so impressed with my daughter’s craftmanship and how she came home and just whipped these up for Christmas!
I hope you enjoyed this craft as well. If you missed any of the other days you can catch them down below:
- Day 1: World Pour Paint Ornaments
- Day 2: Drying Out Apples for Ornaments
- Day 3: Yarn Rainbow
- Day 4: Wooden Star with Beads
- Day 5: Yarn Sheep Ornament
- Day 6: Rainbow Tree Ornament
- Day 7: Paper Bag Luminairies
- Day 8 Natural Christmas Ornaments
- Day 9: Names of God Ornaments
- Day 10: Music Sheet Angels
- Day 11: Peg Doll Nativity
- Day 12: Salt Dough Ornaments
Take care and God bless!

Leave a Reply