Learn how to make a nativity scene with planters and wooden beads. Making a little nativity scene is perfect for small hands this Christmas. This tutorial will show you step by step how to make a nativity scene for kids.

Today we are on day 21 of our Jesse Tree tradition and we are going to learn how to make a small nativity scene with planters and beads. This nativity scene is easy enough for kids to make but could also be a fun craft for adults. My daughter worked on creating this nativity scene for us today.
The simple and natural look of the supplies we used today remind us of Christ’s lowly entry into the world. Christ didn’t enter the world into a palace or even a conventional birth at the time, which would probably have been a home, but he entered into the lowliest place we can imagine- a stable for animals.
“And she gave birth to her firstborn son and wrapped him in swaddling cloths and laid him in a manger, because there was no place for them in the inn.” Luke 2:7
Today we are going to make a little nativity that reminds us of his humble birth, and of his mother, who considered herself the maidservant of the Lord and his father Joseph.
So let’s get started on making this cute little nativity scene!
Supplies needed to make a cute nativity scene:
- 2 Planters- we used paper ones you could also use the terracotta kind
- 2 Large Wooden Beads, 1 Small Bead
- Felt
- Mason Jar Lid
- Raffia
- Hot Glue Gun and Gluesticks
- Scissors
- Black Sharpie
Here’s a video on how to make this cute little nativity scene:
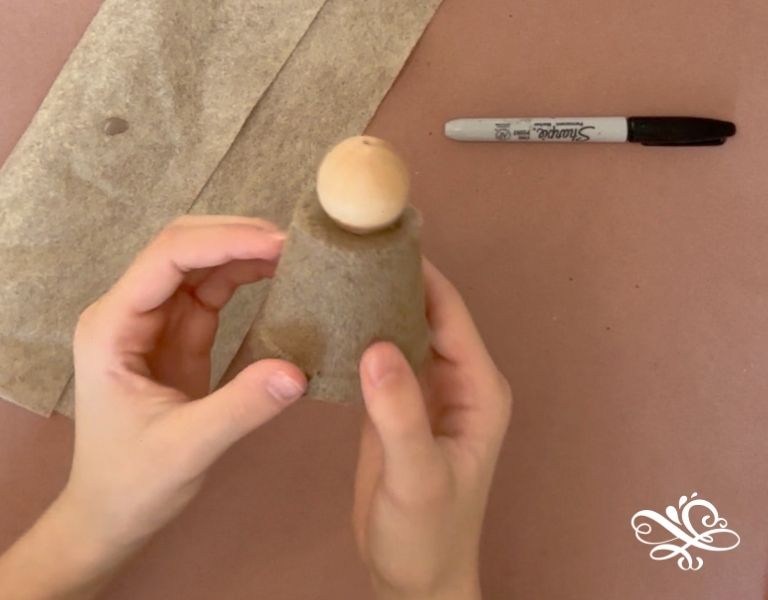
Step 1: Make Joseph & Mary
The first step in our craft today is to make Mary & Joseph. We are going to start by taking our larger beads and hot gluing them on the top of our planters. You can also paint your planter to match the color of Mary and Joseph’s head coverings.
So now you will have a planter with a large bead glue on top. Do this for both Mary & Joseph.
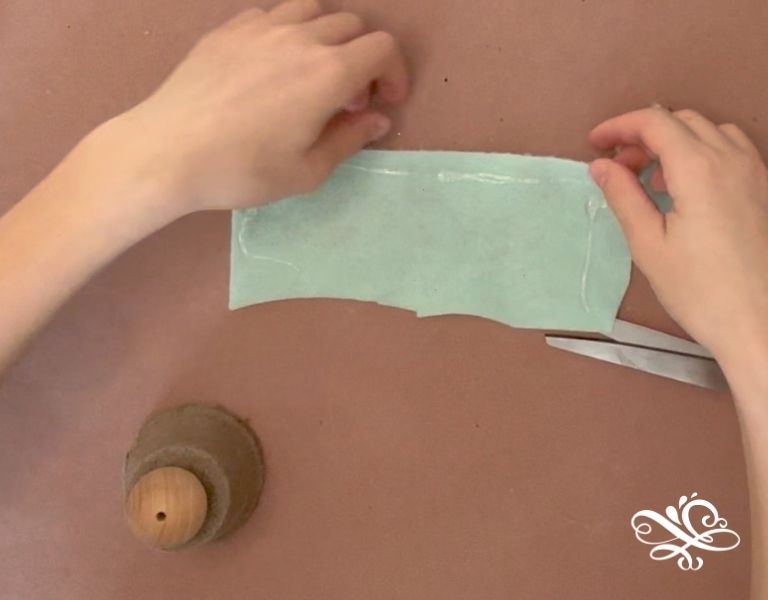
Next take your felt, with the color of your choice for Mary and Joseph. Cut out a rectangle 6-8″ in length and hot glue it over the bead. Do this for Mary and Joseph both.
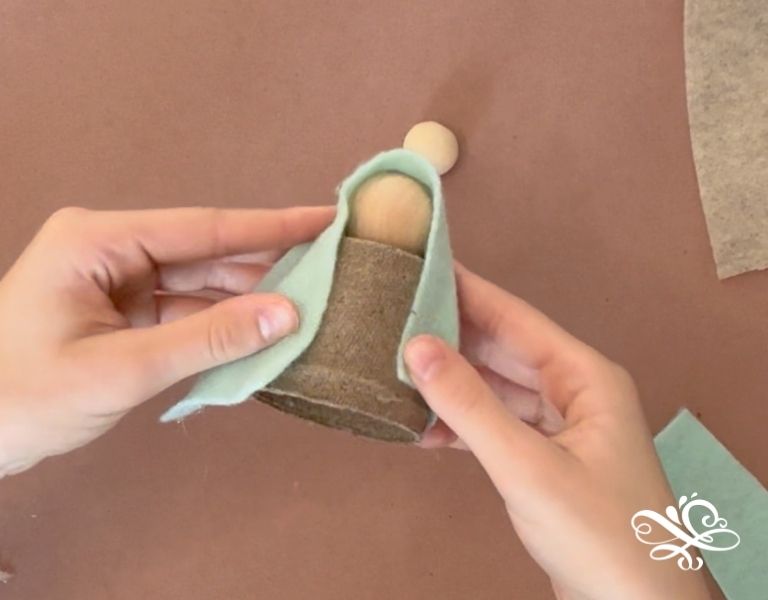
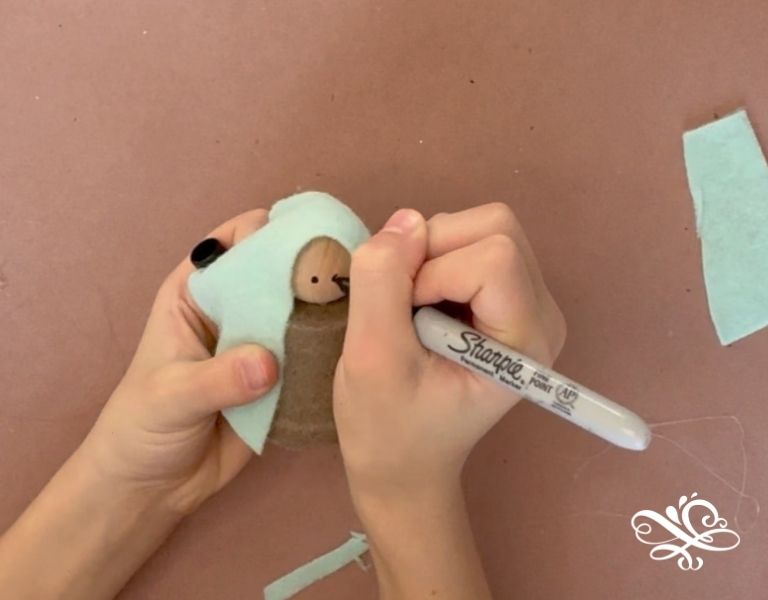
Now take your black sharpie and draw on a simple set of eyes and a smile. Repeat this for Mary and Joseph.
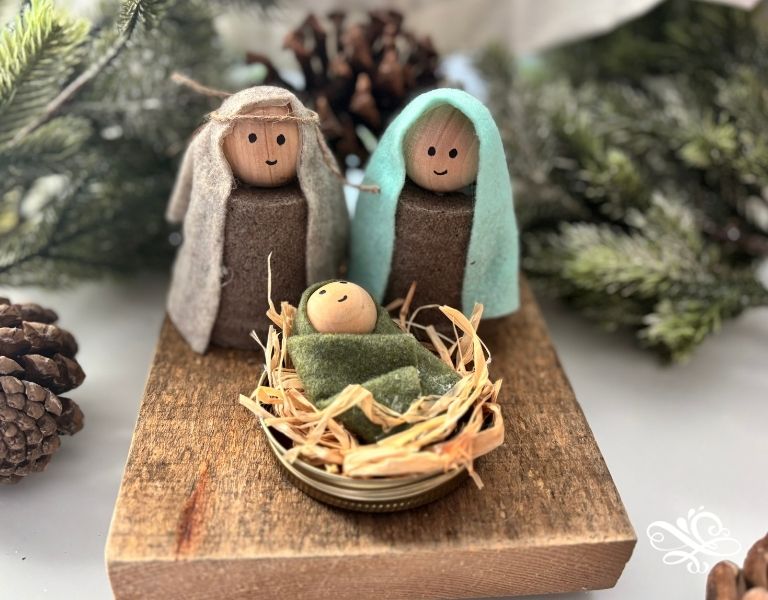
Step 2: Make your manger
We are going to make a simple manger for the baby Jesus out of a mason jar. Take hot glue and put it in your mason jar. Then add raffia cut in little pieces on top of the glue. You could also use a wood slice or something else to make the manger.
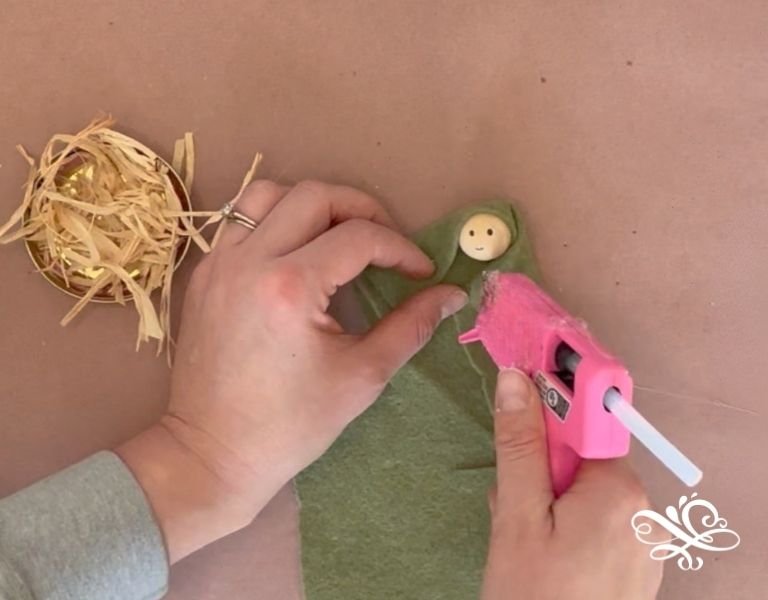
Step 3: Make the baby Jesus
The last step is to make the baby Jesus. Start by drawing a little face on the baby Jesus with a black sharpie. Take hot glue and glue your bead to a piece of felt. Wrap the felt around the bead and you will have a little body for the baby Jesus. Cut off any extra felt. Hot glue Jesus on top of yoru manger.
And that’s it! Now you a cute little nativity scene for kids to make this Christmas! This makes a great present for grandparents or parents and it is a great reminder of the true meaning of Christmas. You can see our finished nativity set down below.
It would also be easy to add wise men, sheperds and an angel to the scene!
If you missed out on any of our other Jesse Tree Crafts you can see them down below!
- Day 1: World Pour Paint Ornaments
- Day 2: Drying Out Apples for Ornaments
- Day 3: Yarn Rainbow
- Day 4: Wooden Star with Beads
- Day 5: Yarn Sheep Ornament
- Day 6: Rainbow Tree Ornament
- Day 7: Paper Bag Luminairies
- Day 8 Natural Christmas Ornaments
- Day 9: Names of God Ornaments
- Day 10: Music Sheet Angels
- Day 11: Peg Doll Nativity
- Day 12: Salt Dough Ornaments
- Day 13: Giant 3D Paper Snowflakes
- Day 14: 12 Christ Centered Crafts
- Day 15: How to Make a Lion out of a Paper Bag
- Day 16: Beaded Jesus Fish
- Day 17: Heart Angels Ornaments
- Day 18: How to Make A Paper Mache Angel
Take care and God bless!

Leave a Reply