Learn how to make these beautiful music sheet angels. This step by step tutorial will walk you through making these beautiful music sheet angels. This craft is designed for older children or adults.

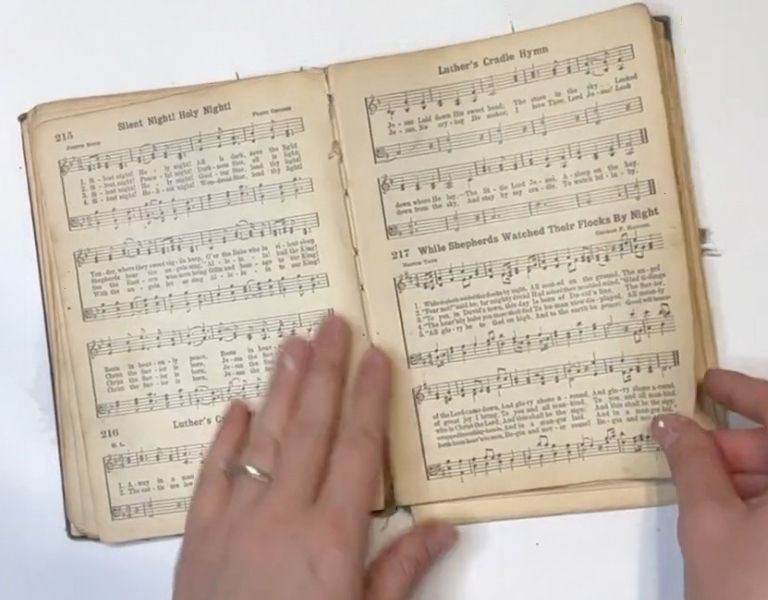
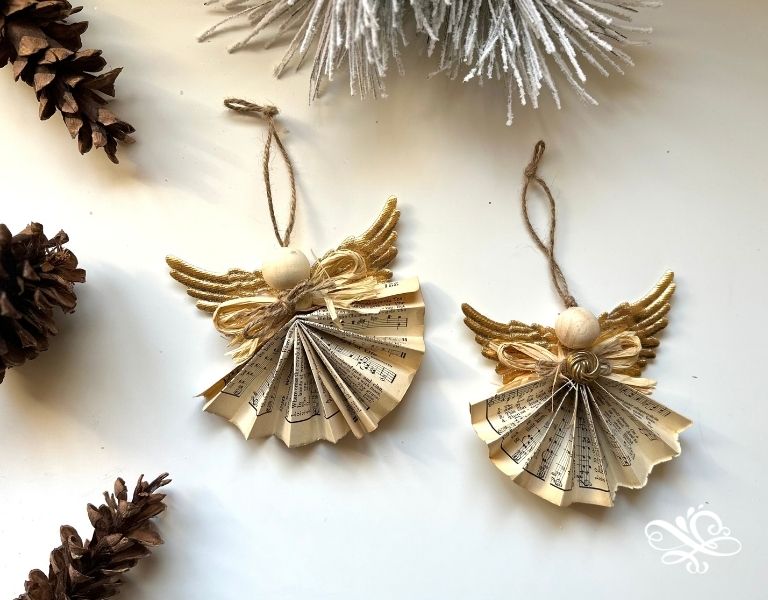
Today is day 10 of our Jesse Tree craft along to Christmas and we will be making these gorgeous music sheet angels. If you like angels, you will love this craft. It uses vintage music sheets for the body of the angel and then adds beautiful golden wings to the back.
God used angels through the Christmas story and I love how these music sheet angles remind us of this. I also like when the music sheets actually display Christmas songs on their pages. What a great way to incorporate more of the joy of the seaon into this craft.
I hope you love this craft, so let’ get started!
Here’s the supplies need to make natural Christmas ornaments:
- Music Sheets
- Wooden Bead (at least 25 mm)
- Raffia
- Twine
- Hot Glue Gun and Gluesticks
- Button
Here’s how to make music sheet angels:
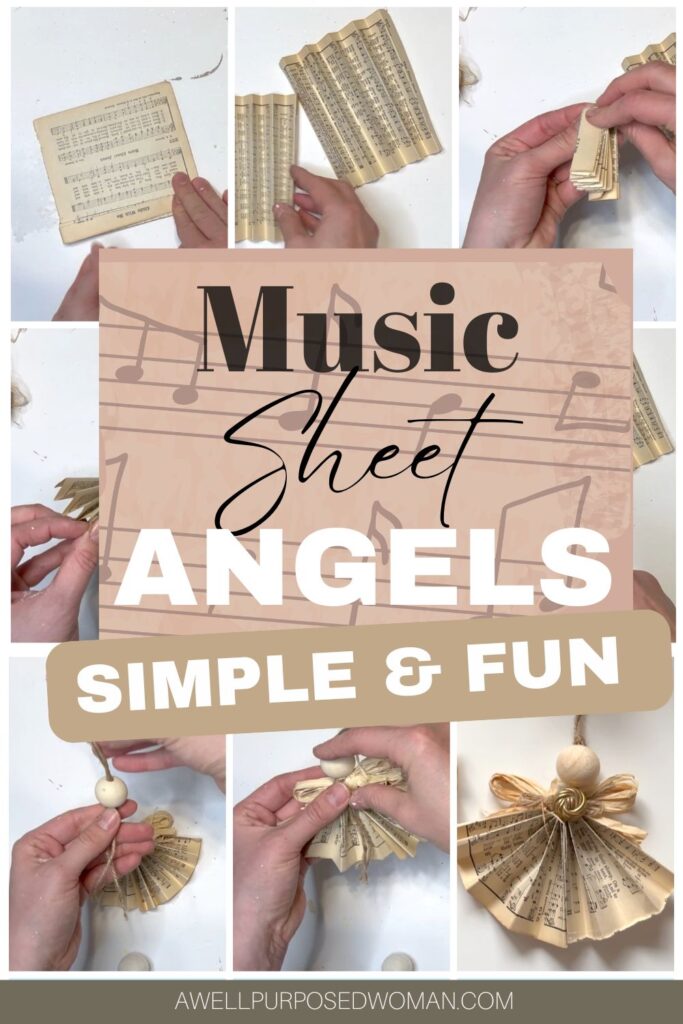
Step 1: Attach a bead on your twine for the angels’s head
Cut a piece of 12″ twine. Fold your twine equally. Feed both ends of your twine through the bead. Pull the loop end of the twine 3″-4″ from the bead. This will be what you use to hange your ornament.
Tie a knot on the underside of the bead. You will have some twine hanging down. Tie these ends into a bow.

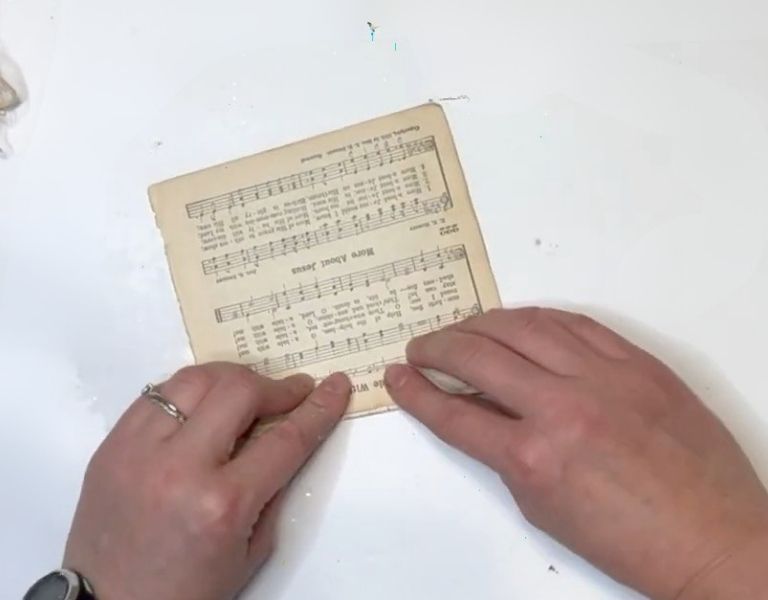
Step 2: Start at the bottom of a music sheet. Fold the sheet by 1/2 inch folds (using an accordian style fold) across the entire music sheet.
The next step is to make your angel’s dress. Fold the entire sheet of music in an accordion style fold. Until the entire sheet is folded into a 1/2″ fold.

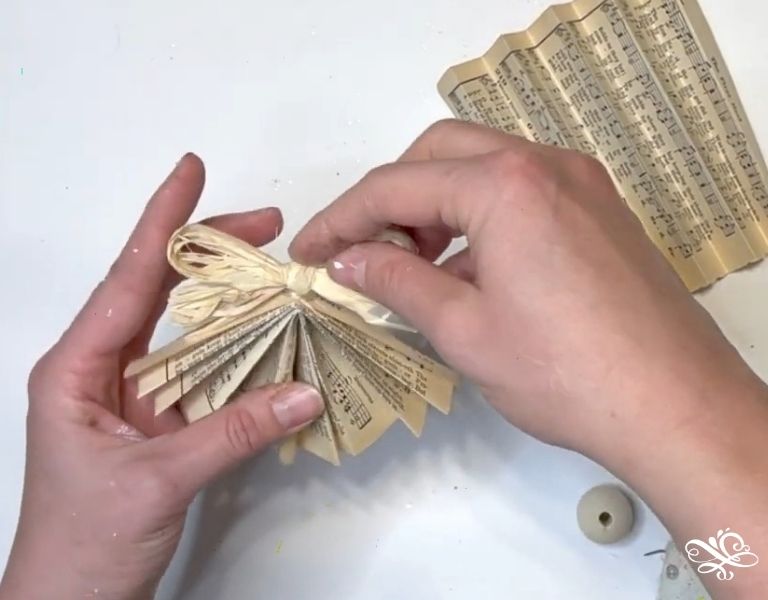
Step 3: Now that you have folds on the entire sheet, fold the sheet in half.
Punch a hole in the center of the folded sheet to feed your twine through. I didn’t do this in the video but since making more of these I realized this is a very important step and makes it a lot easier to make in the end. Once you have fed the twine through the folded music sheet.

Hot glue along the fold line of the dress.

Step 3: Hot Glue along the fold line
Now that you have folded your dress, and fed your twine through the hole and with your angels’s head (bead) on the top of the dress, hot glue along the fold line to form your angel’s dress.
Step 4: Hot glue a raffia bow and wings
Take a small piece of raffia and make a bow. Hot glue this on the top of the dress. Then add your angels’s wings on the back of your ornament and hot glue them onto your angel.
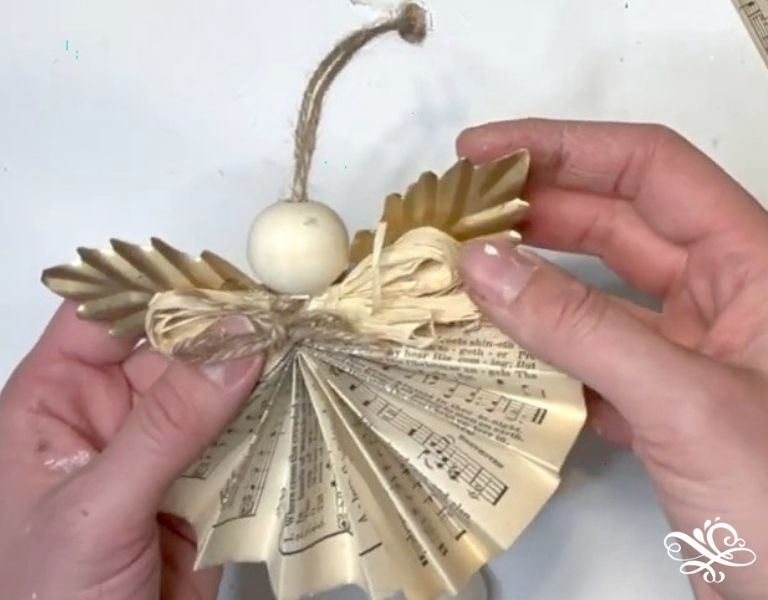
Step 5: Add embellishemnts to your angels
You may want to touch up your angel in different ways then I did. Now is the time to add embellishments- gold glitter, gold flakes, buttons, a halo, any additional items you would like.
And that’s really all there is to it. I love angels and I love how simple these music sheet angels are! I hope you enjoyed making these too!
If you missed any of the other days you can catch them down below:
- Day 1: World Pour Paint Ornaments
- Day 2: Drying Out Apples for Ornaments
- Day 3: Yarn Rainbow
- Day 4: Wooden Star with Beads
- Day 5: Yarn Sheep Ornament
- Day 6: Rainbow Tree Ornament
- Day 7: Paper Bag Luminairies
- Day 8 Natural Christmas Ornaments
- Day 9: Names of God Ornaments
Take care and God bless!

No time to craft now, no worries just pin it for later!
Leave a Reply